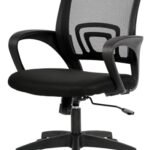
You lean back in your office chair, and instead of the smooth, supportive recline you expect, you’re met with a jarring clunk and a sudden, uncontrolled tilt. The culprit? A small, often overlooked piece of hardware called a retaining clip, which has either broken or popped off its track. This tiny component is the linchpin of your chair's tilt mechanism, and without it, your chair is rendered frustratingly unstable. Learning to replace it yourself is not just a repair; it's a reclaiming of your comfort and productivity.
This topic matters because a malfunctioning office chair can lead to poor posture, distraction, and unnecessary expense. Professional repair services can be costly, and replacing an entire chair over a five-dollar part is wasteful. In this guide, you will learn to confidently identify the retaining clip on your chair, source the correct replacement, and execute the repair with precision. We'll demystify the process, provide step-by-step instructions, and offer tips to ensure a lasting fix, empowering you to solve this common problem quickly and effectively.
Understanding the Retaining Clip and Its Role
A retaining clip, sometimes called a tilt lock clip, chair clip, or mechanism clip, is a small, typically C-shaped or horseshoe-shaped piece of hardened steel or plastic. It is designed to snap securely onto a metal rod or shaft within the chair's tilt mechanism. Its primary function is to act as a physical stop or lock. When you engage your chair's tilt lock lever, it pushes this clip into a position that prevents the chair's central mechanism from moving, thereby locking the chair in an upright position. When the clip is missing or broken, the locking mechanism has nothing to catch on, allowing the chair to recline freely regardless of the lever's position.
These clips are not universal; they vary in size, shape, and thickness depending on the chair manufacturer and model. For instance, a clip for a Herman Miller Aeron chair will be different from one used in a generic Staples task chair. The clip usually sits within a housing on the side of the chair's central cylinder (the part that connects the seat to the base). Over time, due to repeated locking and unlocking, or from excessive force when leaning back, the metal can fatigue and snap, or the clip can simply work itself loose and fall out, often disappearing into the chair's base.
Recognizing the signs of a failed retaining clip is the first step. The most obvious symptom is a tilt lock lever that moves but does not engage, leaving the chair in a perpetual state of recline. You might also hear a distinct rattling or grinding sound from the mechanism, indicating a loose part. Before ordering any parts, you must identify your chair model, usually found on a label underneath the seat. This information is crucial for sourcing the correct replacement clip.
Gathering the Right Tools and Replacement Parts
Before you begin the repair, assembling the correct tools and parts is essential for a smooth process. The good news is that this repair requires minimal tools. You will likely need a set of hex keys (Allen wrenches), typically metric sizes like 4mm, 5mm, or 6mm, which are often provided with the chair. A Phillips-head screwdriver is also common. For some chairs, you may need a rubber mallet to gently tap parts back into place without causing damage. Have a flashlight handy to illuminate the dark recesses of the chair mechanism, and a small container to keep screws organized.
Sourcing the correct retaining clip is the most critical part of preparation. The easiest method is to search online using your chair's exact make and model number followed by "retaining clip" or "tilt lock clip." Numerous office chair parts suppliers operate online and can ship specific components directly to you. If the model number is unavailable, you may need to disassemble the chair partially to remove the broken clip and visually match it to images online. Some suppliers offer clip assortments, but for a guaranteed fit, the model-specific part is best.
When your new clip arrives, inspect it carefully. Compare it to any broken pieces you have. Ensure the metal is sturdy and the shape matches exactly. It's also a prudent time to consider other wear items. While you have the chair disassembled, check the condition of the tilt tension knob, the gas cylinder, and the chair's wheels. Addressing multiple potential points of failure in one repair session can extend the overall life of your chair and prevent future disruptions.
Step-by-Step Disassembly and Access
With tools and part in hand, you can begin the repair. First, turn the chair upside down on a soft, non-scratch surface like a carpet or a blanket. This provides stable access to the underside. Locate the screws or bolts that secure the chair's arms to the seat. In most office chairs, removing the arms is necessary to access the side plates of the mechanism. Use the appropriate hex key or screwdriver to remove these fasteners, placing them in your container. Gently set the arms aside.
Next, you need to separate the seat from the chair's central mechanism housing. Look for four large bolts (often carriage bolts) that attach the seat plate to the mechanism. These are usually accessible from the top of the seat, pointing downward. Remove these bolts carefully. Once they are out, the seat assembly (seat and backrest) should lift away from the metal mechanism housing and the gas cylinder. You may need to wiggle it slightly if it's stuck. This step exposes the inner workings of the tilt mechanism.
Now, examine the exposed mechanism. You should see the tilt lock lever connected to a metal bar or actuator. Follow this bar to where it interacts with the mechanism housing. On the side of this housing, you will likely see a slot or groove. This is where the retaining clip is meant to sit on a shaft. If the clip is broken, you may see remnants inside. If it simply fell off, the shaft will be visible. Use your flashlight to get a clear view. This is the target area for your new clip.
Installing the New Retaining Clip
Installation is often the quickest part. Take your new retaining clip and orient it correctly. The open side of the "C" must face the direction that allows it to slide onto the metal shaft. There is usually a specific groove or flat spot on the shaft where the clip is designed to sit. Align the clip with this groove. Using your fingers, press the clip firmly onto the shaft until you hear or feel a definitive "click" or snap. It should sit flush and secure, with no wobble. Do not force it with pliers, as this can deform the clip; use firm, even pressure.
Once the clip is seated, manually operate the tilt lock lever by moving the connected metal bar. Observe how the bar now pushes against the newly installed clip. As you engage the lever, you should see the clip prevent the mechanism from rotating, which is the lock function. Disengage the lever, and the mechanism should move freely again. This manual test confirms the clip is installed correctly and functioning before you reassemble the entire chair. If the lever doesn't move the bar onto the clip, double-check the clip's orientation and the lever's linkage.
After confirming the clip works, perform a general inspection of the mechanism. Look for any other loose parts, accumulated dust, or signs of wear. Use this opportunity to clean out any debris with a dry cloth or compressed air. Ensuring the area is clean will help the new clip and the mechanism operate smoothly for years to come. You are now ready to reverse the disassembly process and put your chair back together.
Reassembly, Testing, and Preventative Maintenance
Reassembly is essentially the disassembly steps in reverse. Carefully lower the seat assembly back onto the mechanism housing, aligning the bolt holes. Re-insert and hand-tighten the four main carriage bolts before fully tightening them with your tool in a crisscross pattern to ensure even pressure. Next, reattach the chair arms, making sure they are aligned correctly and all screws are snug. Avoid over-tightening, which can strip plastic threads. Once fully assembled, turn the chair right-side up.
Conduct a comprehensive functionality test. Sit in the chair and use the tilt lock lever. It should now engage with a positive feel, holding the chair firmly upright. Test the tilt tension knob to adjust the recline resistance. Roll around to ensure the wheels are intact. Put the chair through its full range of motion. Listen for any new or unusual sounds. A successful repair will restore the chair to its original, stable functionality, with no play or slippage in the locked position.
To prevent future issues, adopt simple maintenance habits. Avoid slamming or throwing your weight back into the chair when the tilt lock is engaged, as this is a primary cause of clip failure. Periodically check the tightness of the chair's bolts and screws, as vibrations can loosen them over time. Keep the mechanism area free from dust and debris by vacuuming around the base occasionally. By treating your chair with care, you can significantly extend the life of the retaining clip and all other components.
Key Takeaways
- ✓ The retaining clip is a small but critical component that enables your chair's tilt lock function; failure leads to an unstable, always-reclining chair.
- ✓ Always identify your chair's exact make and model to source the correct replacement clip, as sizes and shapes are not universal.
- ✓ The repair requires basic tools like hex keys and involves disassembling the chair to access the mechanism housing beneath the seat.
- ✓ Installing the new clip involves snapping it firmly onto a specific shaft or groove until it clicks into place, then manually testing the lock function before reassembly.
- ✓ Regular maintenance, including avoiding abrupt force on the locked mechanism, can prevent premature failure of the clip and other chair parts.
Frequently Asked Questions
How do I know for sure if my retaining clip is broken and not another part?
The most definitive sign is a tilt lock lever that moves but doesn't lock the chair upright. If the chair reclines freely regardless of the lever's position, the clip is the prime suspect. You can confirm by disassembling the chair to visually inspect the clip's location on the mechanism shaft. A missing or visibly fractured clip confirms the diagnosis.
Can I use a generic retaining clip from a hardware store?
It is not recommended. Office chair clips are engineered for specific load-bearing and dimensional requirements. A hardware store clip may be the wrong size, thickness, or metal hardness, leading to immediate failure, improper locking, or even damage to the mechanism. For a reliable and safe repair, always use a part designed for your specific chair model.
Is this a repair a beginner can handle, or should I call a professional?
This is an excellent beginner-level repair. It requires no soldering, welding, or advanced technical skill—just careful disassembly, part replacement, and reassembly. If you can use basic hand tools and follow sequential instructions, you can successfully complete this repair. It typically takes 30-60 minutes and saves significant money compared to a service call.
My chair still wobbles after replacing the clip. What could be wrong?
A persistent wobble after a clip replacement usually points to a different issue. The retaining clip specifically affects the tilt lock function. General wobbliness often originates from a worn gas cylinder, loose five-point base, or damaged wheel casters. Check that all bolts connecting the seat to the mechanism are tight. If the wobble is between the cylinder and the base, the cylinder itself may need replacement.
How often do these retaining clips typically need to be replaced?
There's no set lifespan, as it depends entirely on usage. In a home office with moderate use, a clip could last a decade or more. In a heavy-use commercial environment, it might fail in a few years. The clip generally only needs replacement when it breaks or goes missing. Proper use—not forcing the lock—is the best way to maximize its lifespan.
Conclusion
Replacing a retaining clip on an office chair is a clear demonstration of how a minor, inexpensive component can have a major impact on functionality. By understanding the clip's role, meticulously gathering the correct part and tools, and methodically working through disassembly, installation, and reassembly, you can restore your chair's stability and comfort. This repair empowers you to bypass the hassle and cost of professional services, turning a source of daily frustration into a satisfying DIY accomplishment.
Take a moment to appreciate your newly repaired chair. You've not only fixed a mechanical issue but also gained valuable insight into how your office furniture works. Carry this confidence forward. The next time a piece of equipment fails, consider whether a targeted repair is within reach. With the right approach, many common problems have simple, cost-effective solutions that put you back in control of your workspace and your productivity.