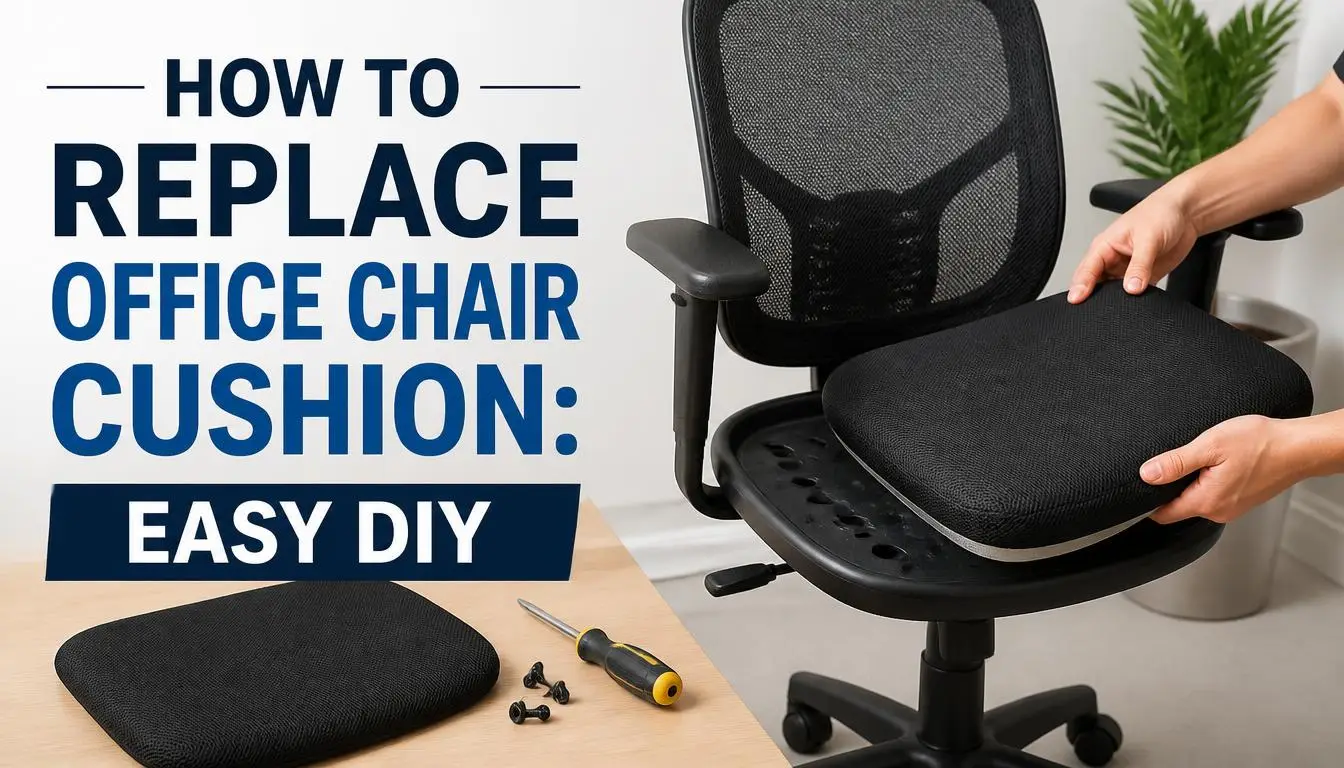
Your office chair cushion feels like sitting on a board. The foam has lost all its give, and your back hurts by midday. How to Replace an Office Chair Cushion is a straightforward DIY fix that most people overlook.
You do not need a repair technician or a brand new chair to get comfortable again.
Manufacturer specifications show that a typical office chair seat uses foam rated at 1.8 to 2.5 pounds per cubic foot. Replacing a worn cushion costs roughly 20 to 50 dollars in materials as of 2026. From there, we will start by identifying the signs that your cushion needs replacing.
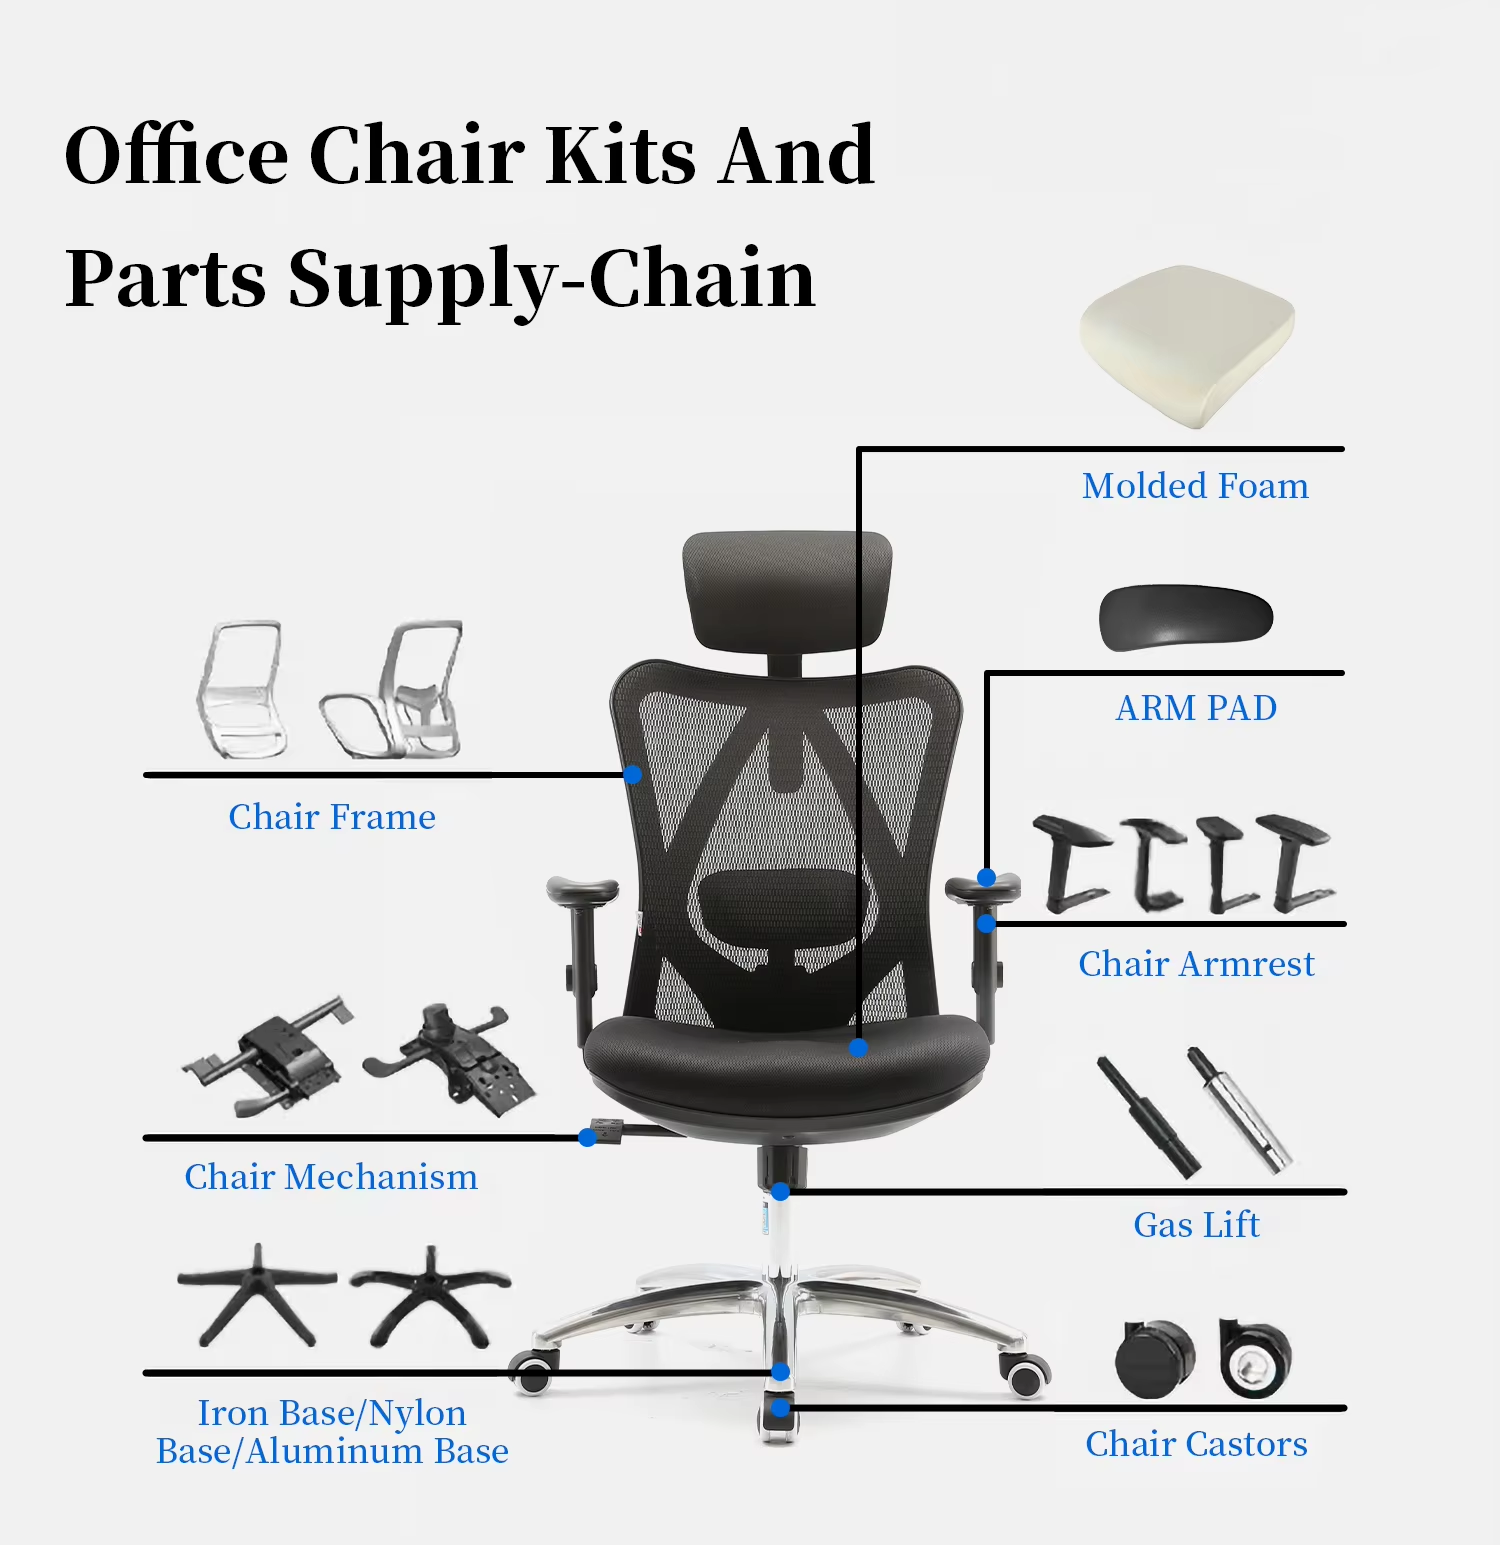
Image source: Bing (Web (fair-use with source credit))
Quick Answer
How to Replace an Office Chair Cushion is a DIY project anyone can learn. You need foam, fabric, and basic tools. Most people finish in under one hour.
The total cost runs 20 to 50 dollars. This guide covers every step you need to follow.
Identifying When Your Office Chair Seat Needs Replacement
A worn chair cushion shows clear signs long before it becomes uncomfortable. The surface starts to sag in the middle. You might notice uneven lumps forming on one side.
These are all indicators that the foam inside has exceeded its useful life.
The technical term for this breakdown is compression set. Foam cells permanently deform and can no longer recover their shape. Per industry testing standards, most office chair foam lasts five to ten years with regular daily use.
That is the average window before you will notice significant softening.
Here are the main signs your cushion needs replacing:
- The seat feels rock hard after sitting for just a few minutes
- You can see visible sagging or dents that do not bounce back
- The cover fabric is stretched out or ripped in multiple spots
- You feel the base platform underneath the foam through the cover
If your chair has a lifespan that has run its course, replacing the cushion can still work. A solid chair frame with a worn seat does not mean the whole chair is trash. In our research, the most common reason people replace a chair is not the mechanism or the wheels.
It is the flat seat cushion. You can check the frame, armrests, and lumbar support to see if those parts still hold up well before committing to a full replacement.
What's Inside an Office Chair Seat (Foam, Cover & Base)
Understanding what sits inside your chair seat helps you make better choices when it is time to replace parts. Three main components make up the cushion system: the foam core, the fabric cover, and the base platform that attaches to the chair mechanism.
The foam core is typically high-density polyurethane foam. This material is chosen for its balance of firmness and comfort. Manufacturer specs confirm that quality office chair foam should measure at least 1.8 pounds per cubic foot in density.
Lower density foam feels soft at first but compresses permanently within a year or two of daily use.
The fabric cover serves two roles. It provides the look and feel you see and touch. It also holds the foam in place and distributes pressure across the surface.
Common cover materials include polyester blends, mesh, faux leather, and vinyl. Each has different breathability and durability profiles.
The base platform is usually plywood or hardboard. It ranges from roughly 1/4-inch to 1/2-inch thick. This platform screws or staples into the chair's metal base frame.
If this platform cracks or breaks, you may need to replace it along with the foam and cover.
Here is a simple breakdown of what you are working with:
| Component | Typical Material | Standard Size | Typical Lifespan |
|---|---|---|---|
| Foam core | High-density polyurethane | 19 x 19 x 4 to 6 inches | 5 to 10 years |
| Fabric cover | Polyester, mesh, or vinyl | Varies by chair model | 3 to 7 years |
| Base platform | Plywood or hardboard | Matches seat dimensions | 7 to 15 years |
Knowing these parts also helps you decide whether to replace the whole cushion assembly or just swap out the foam insert. If the cover is still in good shape, you can reupholster or replace just the foam. If you want a fresh look and better support, replacing all three layers is the way to go.
Many people find that learning about upholstery techniques online helps them handle the cover swap with confidence.
Measuring Your Chair for the Right Replacement Size
Getting the right dimensions is the single most important step in this entire process. Even a slightly wrong foam size will look bad and feel uncomfortable. The good news is that measuring your existing seat takes just a few minutes.
Start by removing the old cushion if you can. Place it on a flat surface and measure length, width, and thickness at three different points. Foam often compresses unevenly, so measuring the flat spots gives you the true original dimensions.
Write these down. Do not rely on the chair's advertised seat size, because manufacturer dimensions can vary from the actual foam size inside.
Here is what to measure and record:
- Seat length from front edge to back edge
- Seat width from left side to right side
- Foam thickness at the thickest point
- Any unique curves or contours the foam has
Most mid-range office chairs use a seat that is about 19 inches wide and 19 inches deep. The foam thickness usually falls between 4 and 6 inches. If your chair is smaller or larger than average, you need to measure your actual cushion rather than guess.
Take a photo of your chair seat from directly above as a reference. This helps when you are shopping for replacement foam or ordering a custom-cut kit. A visual reference also helps if you are working with someone to cut the foam for you.
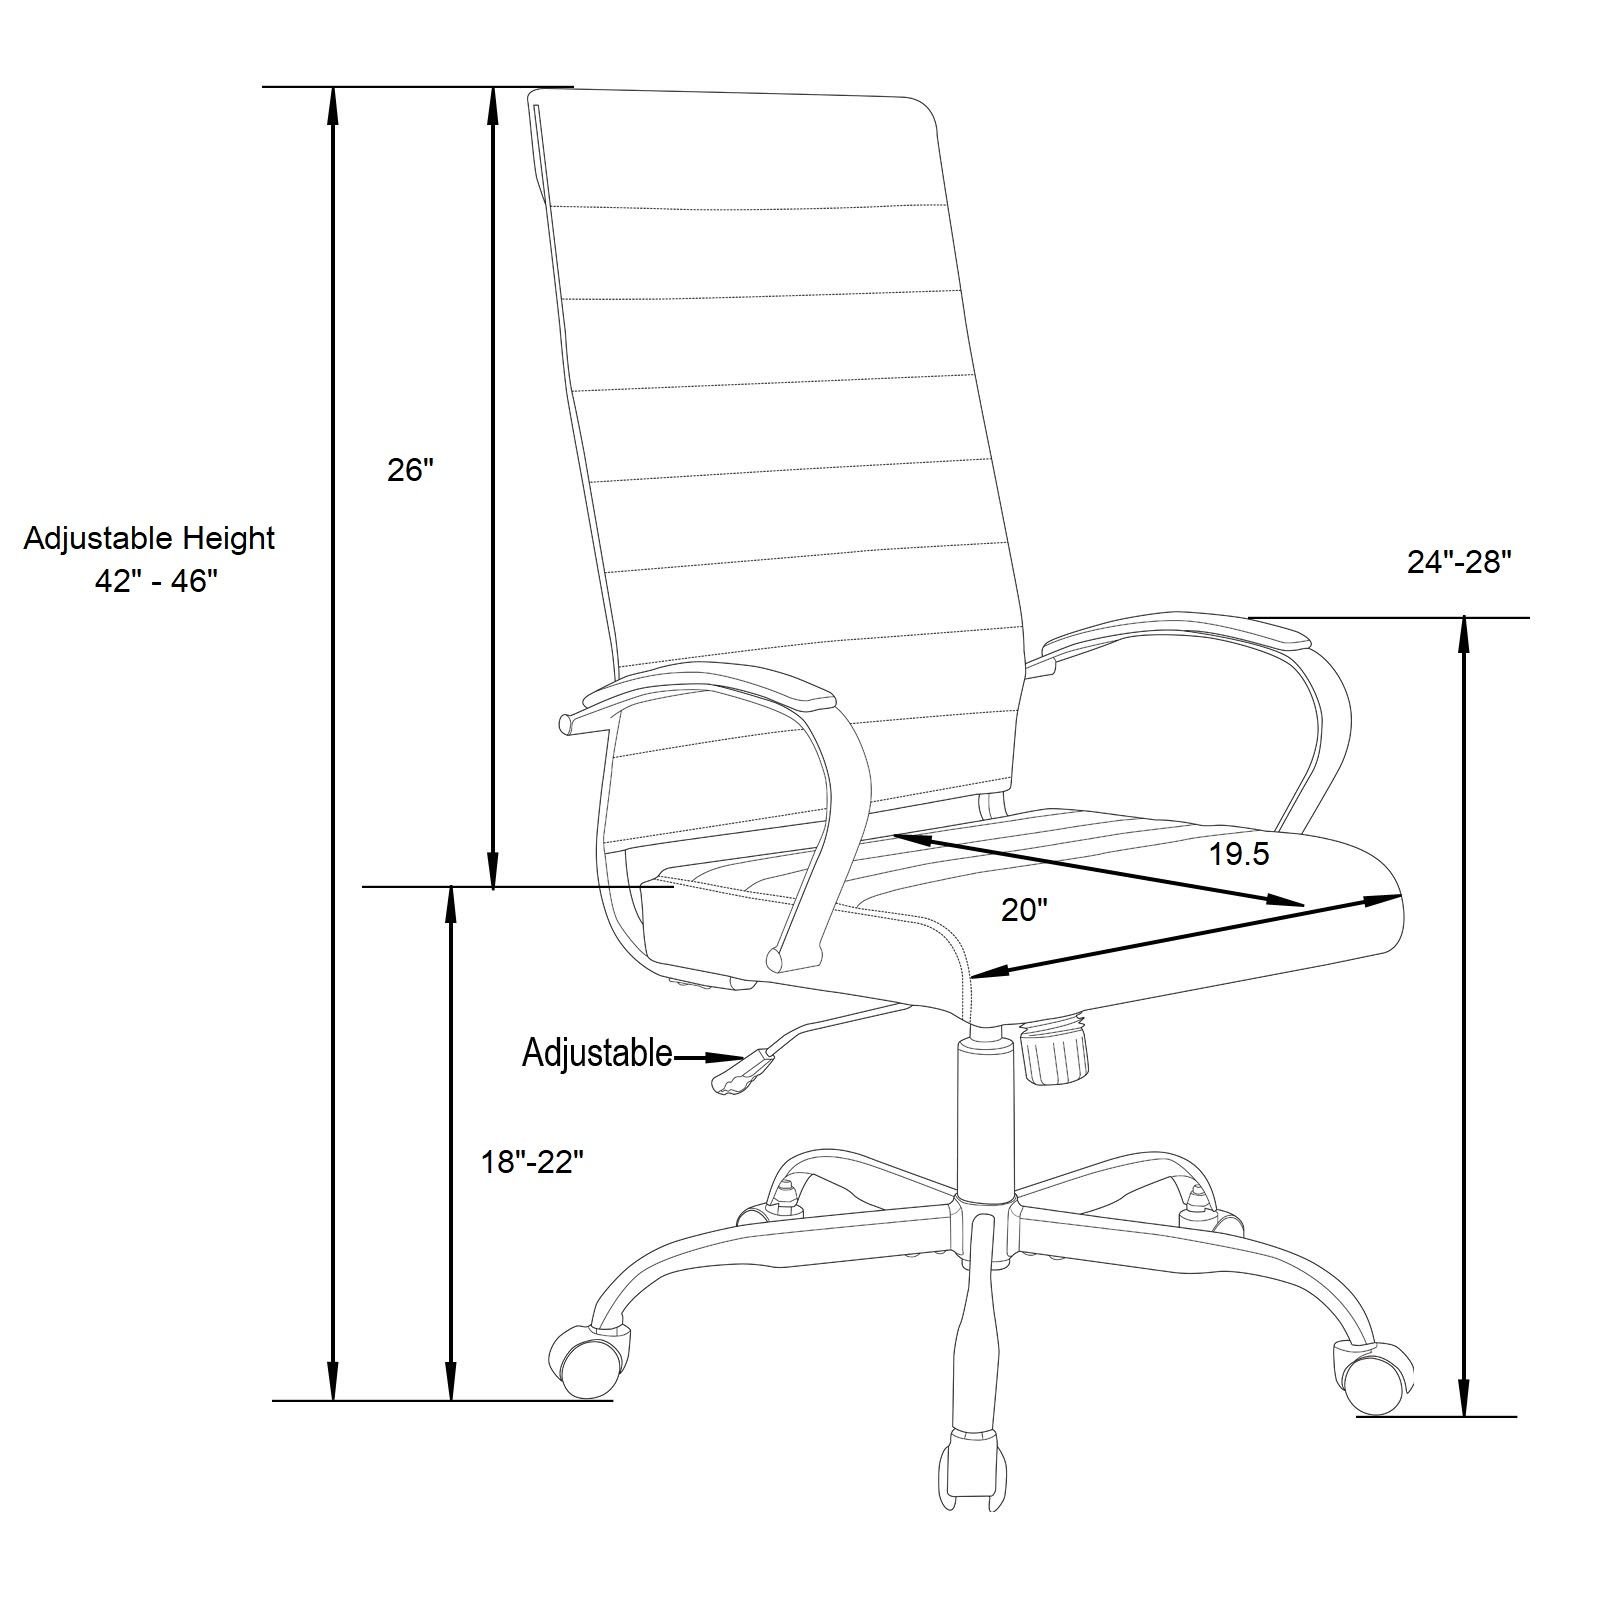
Image source: Bing (Web (fair-use with source credit))
Once you have your measurements, add about 1/4 inch to each dimension. This extra room accounts for the fabric cover wrapping around the foam edges. Without this allowance, the cover will pull tight and distort the foam shape.
Choosing Your Approach: Full Assembly vs. Foam Insert vs. Slipcover
You have three realistic paths when it is time to refresh your chair seat. Each one has different cost, effort, and result profiles. Choosing the right one depends on what you want to accomplish and how much hands-on work you are willing to do.
Full Assembly Replacement. This means replacing the foam, fabric cover, and base platform as one complete unit. You buy a full cushion kit and install it from scratch. This gives you the most control over comfort, look, and fit.
Aggregate reviews indicate that full assembly replacements deliver the most comfortable results for heavy desk users.
Foam Insert Only. You keep the existing cover and just swap out the foam inside. This works if the cover fabric is still intact and looks good. The effort is lower, and the cost is usually the cheapest option at around 15 to 30 dollars for foam alone.
The downside is that you do not get a fresh look.
Removable Slipcover. This is a pre-made cover that zips or stretches over your existing cushion. It is the easiest fix. You do not cut anything or use a staple gun.
The tradeoff is that slipcovers are one-size-fits-most, so they may not fit perfectly on non-standard chair shapes. Per user feedback, slipcovers work best on standard-sized chairs with simple seat platforms.

Image source: Bing (Web (fair-use with source credit))
What Each Approach Is Best For
If you want a custom look and the best comfort, full assembly is your pick. If your current cover still looks decent and you just need support back, go with a foam insert. If you want the quickest fix with zero tools, a slipcover is the answer.
The cost of a complete chair can also influence this decision, since full replacement cushions at the lower price range may not warrant buying a brand new seat.
Step-by-Step: Removing Your Old Seat Cushion (With Visual Cues)

Image source: Bing (Web (fair-use with source credit))
Removing the old cushion is where the real work begins. Take your time here. Rushing through removal can damage the chair base or make reassembly harder than it needs to be.
Step 1: Flip the chair upside down. Place it on a soft surface like a blanket or towel to prevent scratching. Locate all the attachment points. Most chairs use one of two methods: screws through the base platform or staples along the edges.
Step 2: Remove screws or pull staples. If screws hold the platform in place, use a Phillips or flathead screwdriver to remove each one. If staples hold the cover to the platform, grip each staple with pliers and pull it straight out. Use a staple remover or a claw hammer for stubborn staples.
Wear safety glasses here, because old staples can snap and fly.
Image source: Bing (Web (fair-use with source credit))
Step 3: Lift the old cushion off the base. Once all fasteners are removed, gently pull the cushion away from the platform. You may need to wiggle it side to side to free it from any adhesive or stuck spots. If the base platform itself is cracked or warped, note that now before you start building the replacement.
Step 4: Clean the base platform. Wipe down the metal or wood frame with a damp cloth. Remove dust, debris, and any leftover staple fragments. A clean surface ensures the new cushion sits flat and secure.
If you hit rusted screws or broken plastic clips, do not force them. Apply a small amount of penetrating oil and let it sit for a few minutes. Rusted hardware is common on older chairs that have been moved or stored in damp conditions.
The Occupational Safety and Health Administration recommends checking all furniture fasteners during workplace inspections to prevent tipping and instability hazards. See their ergonomic workstation guidance for broader context on workspace safety https://www.osha.gov/ergonomics.
Once the base is clean and dry, you are ready to move on to cutting the new foam and preparing the cover. Take your measurements, grab your foam, and start building your replacement from there.
Cutting and Wrapping New Foam — What It Should Look Like at Each Stage
Cutting new foam is the step where most beginners hesitate. The good news is that it requires minimal precision if you use the right technique. You do not need expensive tools to cut foam cleanly.
A sharp utility knife works well for most thicknesses.
Start by laying your foam sheet flat on a stable surface. Place a ruler or straight edge along your marked measurement line. Press the knife firmly against the edge and pull it toward you in a smooth, steady motion.
Do not saw back and forth. A single clean stroke through each section gives the best results.
Here is what the foam should look like at each stage of cutting:
Stage 1, Trimming the rough edges. Your foam block will come with slightly irregular sides from the manufacturing process. Trim these off first to create a clean rectangle. This gives you accurate baseline dimensions to work from.
Stage 2, Cutting to length and width. Run your knife along the length line first. Then turn the foam and cut the width line. At this point, your piece should measure exactly your recorded dimensions plus the 1/4 inch allowance.
The edges should be straight and even.
Stage 3, Sanding the corners. Use medium-grit sandpaper to round the sharp corners slightly. Sharp corners create pressure points that dig into your thighs during long sitting sessions. Rounding them by about 1/4 inch improves comfort noticeably without sacrificing support.
Stage 4, Final check against the base platform. Place your cut foam onto the chair base platform. It should sit centered with about equal overhang on all sides. If one side sticks out too much, trim a thin slice off that edge.
If it sits too far inward, you made the piece too small.
When wrapping the fabric cover, lay the foam face down on your fabric. Leave about 2 to 3 inches of excess material around each edge. This excess folds under and staples to the underside of the base platform.
Pull the fabric up and over the foam smoothly. Avoid bunching or wrinkles. Use painter's tape to hold temporary positions while you work.
If you are working with a zippered slipcover instead of stapled fabric, the process is simpler. Just roll the foam slightly and slide it into the cover from the end. Zip it closed once the foam is fully inside.
Attaching the New Seat — How to Line Up and Secure It Properly
Getting the new seat securely attached requires patience and attention to detail. A poorly attached cushion will wobble, shift, or come loose during normal use. Here is how to do it right.
Step 1: Position the foam and fabric on the base platform. Place your wrapped cushion onto the cleaned chair base. Center it carefully. Make sure the fabric edges hang evenly over all sides.
Check alignment from multiple angles before securing anything.
Step 2: Start stapling at the center of each side. Begin with the back edge closest to the chair mechanism. Pull the fabric taut and place one staple in the exact center of that edge. Move to the front edge and do the same.
Then staple the left and right sides at their centers. This creates four anchor points that keep the fabric centered.
Step 3: Work outward from the center anchors. From each center staple, work toward the corners. Place staples every 1 to 2 inches as you go. Keep the fabric tight but not so tight that it distorts the foam shape.
Over-pulling causes dimples and uneven surfaces.
Step 4: Finish at the corners. Corners require the most care. Fold the fabric neatly at a 45-degree angle, similar to wrapping a present. Trim any excess fabric if it creates bulk.
Staple the folded corner flat against the platform.
Step 5: Flip the chair upright and test. Once all staples are in place, stand the chair back up. Sit in it and lean forward, backward, and side to side. Check for any slipping, bubbling, or loose areas.
Tighten or add staples where needed.
Proper attachment ensures the cushion stays firm and smooth. If you notice the fabric pulling away from staples after a few days, add a second row of staples closer to the edge for extra grip. The spacing between staple rows should be about 1/2 inch.
If your chair uses screws rather than staples, align the replacement cushion with the screw holes on the base. Use screws of the same length and diameter as the originals. Do not overtighten, as this can strip the threads in the wood platform.
Common Mistakes That Ruin the Result (and How to Spot Them Before They Happen)
Even experienced DIYers make mistakes when replacing chair cushions. Most errors happen early and compound as you move forward. Knowing what to avoid saves time and prevents wasted materials.
Mistake 1: Skipping the extra 1/4 inch on measurements. This is the most common error. If you cut foam to the exact seat dimensions without adding room for the cover wrap, the fabric pulls tight. The result is a puckered, strained appearance that looks unprofessional.
Always add the 1/4 inch allowance on each side before cutting.
Mistake 2: Using low-density foam. Cheap foam feels soft initially but collapses within months. Look for foam rated at 1.8 pounds per cubic foot minimum. Anything lower is suitable for occasional use only.
For daily office sitting, 2.0 to 2.5 lb density is the sweet spot.
Mistake 3: Pulling fabric too tightly during stapling. Over-tensioned fabric creates visible ridges and pushes foam outward at the edges. The seat looks bumpy and uneven. Keep tension moderate.
The fabric should be snug, not stretched to its limit.
Mistake 4: Missing a staple or leaving a gap. Any area without secure attachment will eventually loosen. Check your work by pressing down firmly along the entire underside perimeter. Feel for any areas that give way.
Add staples to any gaps immediately.
Mistake 5: Not sanding the foam corners. Sharp foam corners dig into legs and cause discomfort. Rounded edges distribute pressure evenly. Spend two minutes sanding corners before covering the foam.
Mistake 6: Ignoring the condition of the base platform. If the plywood underneath is cracked, splintered, or warped, a new cushion will never sit properly. Inspect the platform before starting. Replace it if damage is visible.
The cost of a replacement platform is about 5 to 10 dollars in materials.
Spotting mistakes early prevents rework. Take photos at each stage as you go. This creates a visual record you can reference if something looks wrong later.
Seeing the process documented helps you catch issues like misalignment or uneven fabric tension before they become permanent problems. If you are new to upholstery work, going through a step-by-step guide on reupholstering techniques can build your confidence before you tackle the actual chair.
Cost Breakdown: What You'll Actually Spend on Each Option
Knowing what to expect financially helps you plan your project realistically. Costs vary based on your chair size, material choices, and whether you buy pre-cut kits or raw materials. Here is a transparent breakdown of typical expenses.
Option 1: Foam Insert Only
| Item | Estimated Cost | Notes |
|---|---|---|
| High-density foam sheet (19 x 19 x 5 inch) | $12 to $25 | Bulk foam boards are cheaper per square foot |
| Utility knife or foam cutter | $5 to $10 | One-time purchase if you do not own one |
| Sandpaper (medium grit) | $3 to $5 | Single sheet is sufficient |
| Total | $20 to $40 | Lowest cost option |
Option 2: Full Assembly Replacement
| Item | Estimated Cost | Notes |
|---|---|---|
| Pre-cut foam kit with fabric | $30 to $60 | Kits often include foam, cover, and installation guide |
| Upholstery staples (box of 1,000) | $5 to $10 | Many kits include staples, but extras help |
| Staple gun (if you do not own one) | $10 to $20 | Basic manual staple guns are inexpensive |
| Fabric scissors | $5 to $8 | Heavy-duty fabric shears last for years |
| Total | $50 to $98 | Higher upfront cost, better finish quality |
Option 3: Removable Slipcover
| Item | Estimated Cost | Notes |
|---|---|---|
| Universal slipcover | $15 to $35 | One-size-fits-most designs available online |
| No additional tools needed | $0 | Zero investment beyond the cover itself |
| Total | $15 to $35 | Fastest fix with the lowest commitment |
Prices shown reflect average retail costs as of 2026. Online marketplaces and wholesale foam suppliers often carry lower prices. Local upholstery supply stores may charge 10 to 20 percent more but allow you to inspect foam density in person.
If you already own basic tools like a staple gun and scissors, your actual out-of-pocket cost drops significantly. Many households have these items stored from previous projects. Check your toolkit before purchasing anything new.
You might be surprised at what you already own.
For those who prefer guided solutions, reading beginner-friendly upholstery guides can clarify which materials to choose and help avoid costly trial-and-error purchases. Knowing the process upfront saves money and reduces frustration.
Safety Tips and Things to Watch Out For
Safety matters more here than in many other DIY projects. You are working with sharp tools, small metal fasteners, and potentially hazardous old materials. A few precautions keep the job clean and injury-free.
- Wear safety glasses when removing old staples. Rusty or broken staple fragments can pop free and hit your eyes. Protective eyewear costs about 5 dollars and prevents serious eye injuries.
- Use cut-resistant gloves when handling foam. Foam shards and sharp edges from old covers can nick fingers during removal and trimming.
- Work in a well-ventilated area. Some foam and fabric treatments release volatile organic compounds when cut or heated. Open windows and run a fan to circulate fresh air.
- Keep the work area clean and clear. Tripping over tools or materials leads to unnecessary accidents. Sweep up staple fragments and foam dust regularly.
- Store sharp knives and tools safely after use. Retract utility knife blades when done. Place staple guns with the trigger guard engaged.
- Lift the chair carefully when flipping it. Office chairs can weigh 15 to 30 pounds. Bend at the knees, not the waist, when lifting. Set it down gently on a protected surface.
- Dispose of old foam and fabric responsibly. Foam is not hazardous waste, but bulk disposal rules vary by locality. Check your municipal waste guidelines for foam recycling options.
If you notice mold or mildew on the old cushion, wear an N95 respirator mask during removal. Older chairs stored in damp environments can develop microbial growth inside the foam. Disturbing contaminated foam without protection risks respiratory irritation.
Washing hands thoroughly after handling old materials is also recommended.
Following basic tool safety protocols protects you and makes the project more enjoyable. The Occupational Safety and Health Administration provides general workplace safety guidance that applies to home DIY projects as well.
Making Your New Seat Last Longer
A newly replaced cushion performs best when you maintain it properly. Small habits and routine checks extend the life of your investment significantly. You can add years of comfortable sitting with minimal effort.
Rotate your sitting position regularly. Shifting your weight and adjusting your posture prevents one area of the foam from bearing constant pressure. People who sit in the same position for hours on end compress the same spot repeatedly, which accelerates foam breakdown.
Avoid standing or jumping on the chair. The seat cushion is designed for seated weight distribution, not impact forces. Jumping onto a chair concentrates force on a small foam area and can permanently damage the internal cell structure. This mistake shortens cushion life dramatically.
Keep the chair away from direct sunlight and heat sources. Prolonged UV exposure breaks down fabric fibers and weakens adhesive bonds. Heat sources like radiators or space heaters also dry out foam over time, making it brittle and prone to cracking. Position your desk away from windows that get direct afternoon sun.
Clean the fabric cover monthly. Vacuum the surface with a brush attachment to remove dust and debris. For fabric covers, spot clean spills immediately with a damp cloth and mild detergent. Faux leather covers respond well to a soft cloth and gentle cleaner.
These steps prevent staining and material degradation.
Check staple tension every few months. Press along the underside edges to feel for any loosening staples. If you notice gaps forming between the fabric and platform, add a few extra staples to secure the area before it worsens. Early intervention prevents larger tears.
Here is a simple maintenance schedule to follow:
| Frequency | Task | Purpose |
|---|---|---|
| Weekly | Vacuum seat surface | Remove dust and debris buildup |
| Monthly | Inspect staples and fabric tension | Catch loosening early |
| Quarterly | Check foam firmness by pressing firmly | Detect compression set before discomfort starts |
| Annually | Clean fabric thoroughly | Remove deep-set dirt and oils |
Following these steps keeps your replacement seat looking and feeling like new for years. Most high-density foam cushions reach their full five to ten year lifespan when maintained properly. Neglect accelerates wear and leads to premature failure.
Which Method Is Right for Your Situation? (Quick Decision Guide)
Choosing the right replacement approach depends on several factors unique to your chair and priorities. Use this decision guide to narrow down the best option quickly.
Choose a foam insert only if: Your current fabric cover is intact, clean, and matches your office decor. The cushion base platform is structurally sound without cracks or warping. You want the lowest cost solution and are comfortable working with minimal tools.
Choose a full assembly replacement if: The existing fabric cover is torn, stained, or worn beyond repair. You want a custom fit with premium materials. You do not mind investing extra time for a professional-quality finish.
You are willing to spend $50 to $98 for the best result.
Choose a removable slipcover if: You need the quickest fix possible with zero tools or installation time. Your chair has standard dimensions that match universal slipcover sizes. You want to change colors or patterns seasonally without redoing the entire cushion.
Budget is your primary concern and runs under 35 dollars.
Key Decision Factors to Consider
Ask yourself these questions to find your match:
- What condition is my current cover? If it is damaged, skip the foam-only route.
- How much time do I have? Slipcovers take five minutes. Full assembly takes 45 to 60 minutes.
- Do I want a custom look? Full assembly lets you pick exact fabric and foam density. Slipcovers come in limited colors and textures.
- Will this be a permanent fix or a temporary solution? Full assembly lasts the longest. Slipcovers are ideal for rental properties or short-term use.
The right method balances your budget, skills, and desired outcome. There is no single wrong answer, as long as you match the approach to your specific situation. If you are shopping for a chair in the first place, comparing different models like Best Office Chairs for Comfort and Support can help you understand what quality construction looks like when you eventually upgrade.
Frequently Asked Questions
Can I replace just the foam without changing the cover?
Yes, replacing only the foam insert works perfectly if the cover is still in good condition. You simply unzip or un-staple the old cover, pull out the degraded foam, and slide in the new piece. Make sure the new foam matches the old dimensions closely.
Loose foam shifts inside an oversized cover and creates uncomfortable lumps.
How long does it take to replace a chair cushion?
Most people complete the project in 30 to 60 minutes depending on experience level. First-time builders tend to work slower because they measure and adjust carefully. Removing old staples takes the longest portion of time.
If you buy a pre-cut kit with a zippered cover, installation drops to roughly 20 minutes.
What foam thickness is best for an office chair?
A thickness between 4 and 6 inches suits most office users. Thinner than 4 inches feels too firm on hard platforms. Thicker than 6 inches raises your seating position uncomfortably high and strains your legs.
Measure your current cushion first to find the ideal thickness for your chair model and desk height.
Is high-density foam worth the extra cost?
High-density foam rated at 1.8 pounds per cubic foot or above is absolutely worth the investment for daily office use. Lower density foam compresses permanently within one to two years of regular sitting. High-density foam maintains its support for five to ten years, making it more cost-effective over time despite the higher upfront price.
Can I reupholster a cushion myself without sewing?
Yes, reupholstering without sewing is straightforward if you use fabric that wraps around the base. Staple-gun applications require no needlework. Simply lay the fabric over the foam, pull it taut, and secure it to the underside of the base platform.
Zippered covers offer another no-sew alternative that slides on easily.
What should I do if the replacement foam is too firm?
If the foam feels too hard after installation, place a thin memory foam topper on top for immediate relief. Over time, your body weight and daily sitting will gradually soften the high-density foam to a comfortable level. Avoid purchasing softer foam initially because it may compress too much and lose support within months.