Image source: Bing (Web (fair-use with source credit))
Cleaning a chair properly depends on one thing above all else: knowing exactly what you’re working with. That sounds obvious, but most people skip straight to the stain and never stop to ask what material their chair is made from. The result is usually damaged finish, discolored fabric, or cracked leather that costs far more to replace than it ever would have to clean properly.
Your first move should always be inspection, not action. Look for a care tag, check the underside of cushions, and examine the surface texture under good light. Different materials respond to completely different cleaning agents.
What works beautifully on polyester fabric will destroy aniline leather in minutes.
Quick Answer
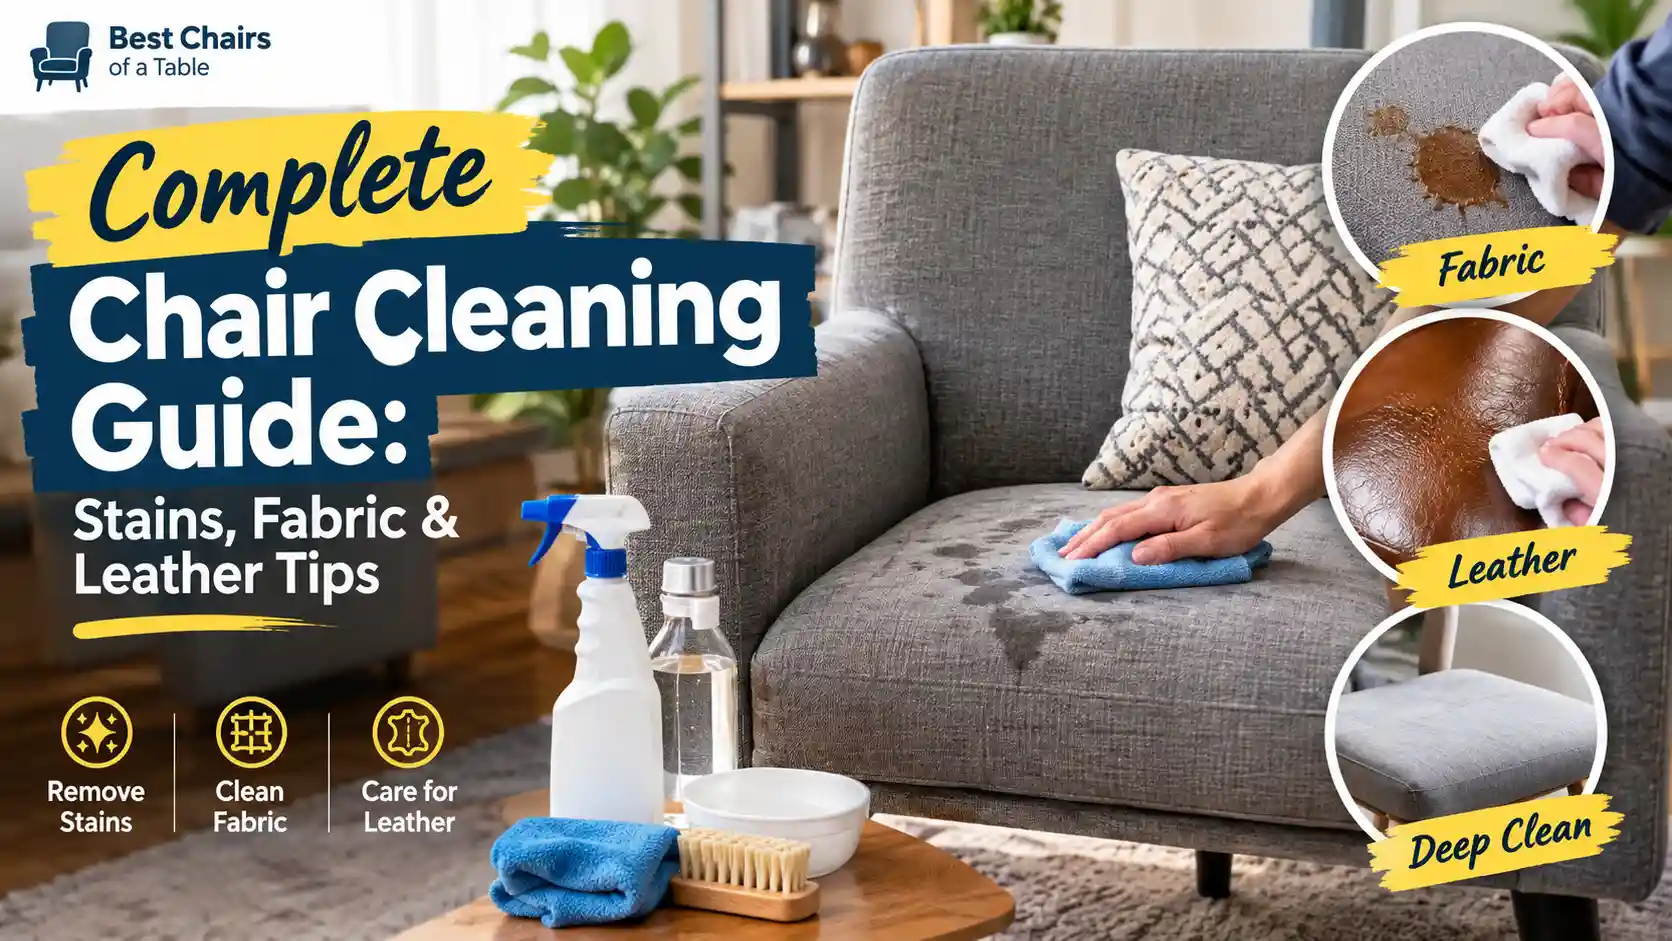
Complete Chair Cleaning Guide walks you through material-specific methods for every common chair type. Identify your chair’s upholstery first, then match your cleaning approach to that material. Use gentle products, always spot-test, and never oversaturate fabric or wood.
Regular maintenance prevents deep stains and extends the life of your seating by years. Professional help makes sense for antiques, heavy stains, or delicate leathers.
What To Know Before You Start Cleaning Any Chair
Cleaning a chair properly depends on one thing above all else: knowing exactly what you’re working with. That sounds obvious, but most people skip straight to the stain and never stop to ask what material their chair is made from. The result is usually damaged finish, discolored fabric, or cracked leather that costs far more to replace than it ever would have to clean properly.
Your first move should always be inspection, not action. Look for a care tag, check the underside of cushions, and examine the surface texture under good light. Different materials respond to completely different cleaning agents.
What works beautifully on polyester fabric will destroy aniline leather in minutes.
Before reaching for any bottle, run through this quick checklist:
- Locate and read the manufacturer’s care label if it exists
- Test your chosen cleaner on a hidden area first
- Make sure you have the right tools ready before applying anything
- Keep all cleaning supplies away from heat sources and open flames
This preparation mindset saves you from the most common regret we see people report. They spray, scrub, and then watch the finish cloud over or the color shift. Prevention through careful identification beats emergency repair every single time.
If you want to learn more about proper chair care routines, understanding how long does an office chair last gives useful context for how regular maintenance compounds over years of use.
How To Identify Your Chair Material in 60 Seconds
Finding out what your chair is made of takes less time than most people spend debating which cleaning product to grab off the shelf. The process follows a simple visual and tactile sequence that anyone can learn. Start with what you can see, move to what you can feel, and confirm with any tags or labels present.
Check the Care Label (W, S, WS, or X)
Many upholstered chairs carry a small fabric tag stitched into a seam or tucked under a cushion. This tag uses standardized symbols created by the International Home Furnishings Center to communicate safe cleaning methods. Reading it correctly prevents costly mistakes before you even begin.
- W means water-based cleaners are safe to use
- S means only solvent-based cleaners should be applied
- WS means either water or solvent-based products work
- X means vacuum only. Do not apply any liquid
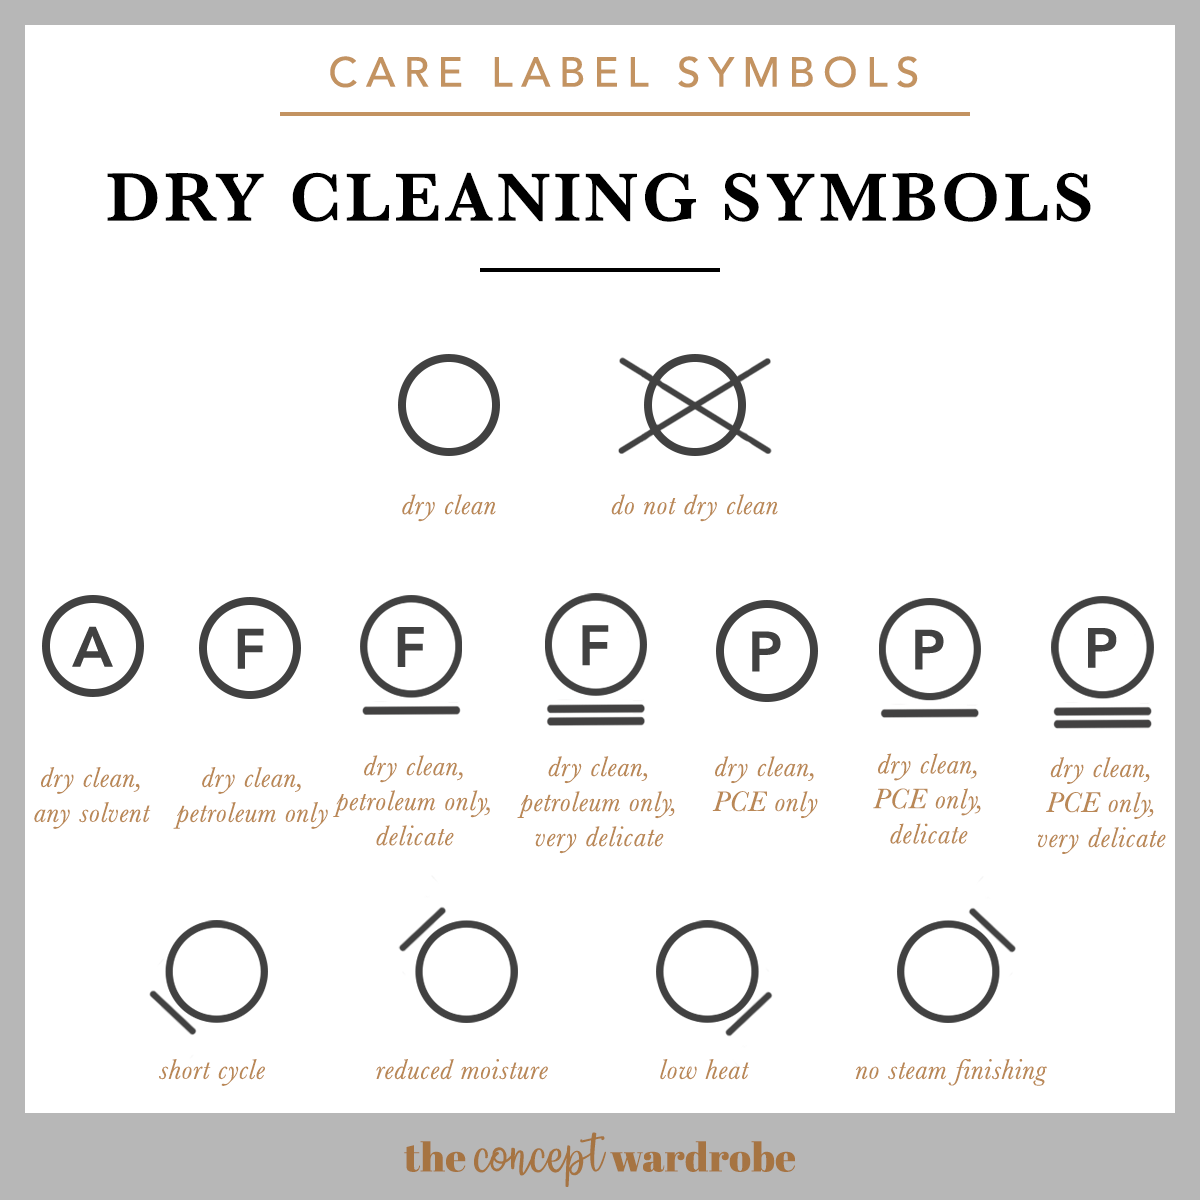
If you find an X-tagged chair, resist the urge to experiment. Solvent-based products can leave permanent rings, and water can cause shrinking or mildew. Stick to thorough vacuuming and professional cleaning for those pieces.
Touch and Look Tests for Leather, Fabric, Wood, and Metal
When no care tag exists, use your senses to determine the material. Leather feels cool and smooth but slightly porous. Real leather shows natural grain variations.
Faux leather feels plasticky and has perfectly uniform patterns. Fabric varies from tightweave synthetic blends to loose natural fibers like linen. Wood reveals grain lines, knots, and a distinct tactile warmth that plastic or metal never mimic.
Run these simple checks:
- Press your fingertip gently into the surface. Leather leaves a temporary indent that slowly fills back. Synthetic covers bounce back instantly.
- Breathe lightly on the surface. Real leather shows a momentary darkening where moisture hits the pores. Sealed surfaces resist this.
- Feel the edge or underside. Wood and metal frames have weight and temperature differences that are hard to fake.
- Look for stitching patterns. Fabric chairs show thread lines. Leather pieces often reveal hand-stitching marks or machine seams with visible tension points.
When to Stop and Call a Professional Instead
Some chairs deserve expert hands from the start. If your piece is an antique valued above a few hundred dollars, a professional conservator knows how to handle finishes that modern products cannot touch. Vintage lacquers, French polished surfaces, and original upholstery fabrics all require specialized knowledge.
Stop and seek professional help when:
- The chair dates before 1950 or has documented provenance
- The finish shows cracking, alligatoring, or cloudiness already
- You cannot confidently identify the material after inspection
- Previous cleaning attempts have already caused visible damage
Professional upholstery cleaning typically runs between $75 and $200 per chair depending on material and condition. That investment protects furniture that would otherwise degrade irreversibly. For context on pricing across chair categories, you might also want to review how much does a chair cost to understand replacement values versus restoration costs.
Leather Chairs: Cleaning, Conditioning, and Protecting
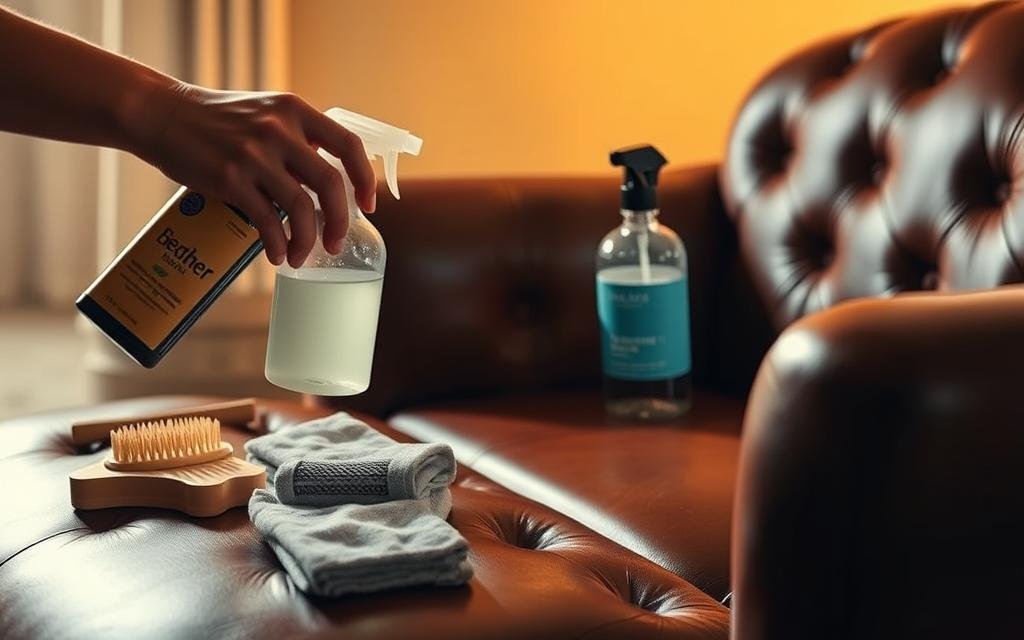
Image source: Bing (Web (fair-use with source credit))
Leather is one of the most rewarding materials to maintain and one of the easiest to ruin. It responds well to consistent care but punishes neglect and wrong products harshly. A well-kept leather chair can look better with age.
A poorly cleaned one can suffer permanent scarring, fading, or cracking within months.
Aniline, Semi-Aniline, Bonded, and Faux Leather Each Need Different Care
Not all leather is created equal, and treating every type the same guarantees problems down the line. Understanding the four main categories helps you choose products that match your chair’s actual construction rather than hoping for the best.
| Leather Type | Porosity | Cleaners to Use | Conditioner Need | Risk Level |
|---|---|---|---|---|
| Aniline | High | pH-neutral leather soap only | Every 6 to 12 months | High |
| Semi-aniline | Medium | Standard leather cleaners acceptable | Every 6 to 12 months | Medium |
| Bonded | Low | Mild soap and water sparingly | Not recommended | High |
| Faux leather | None | Gentle soap solution only | Avoid petroleum conditioners | Medium |
Aniline leather is the most natural and most vulnerable. It absorbs spills quickly and shows every mark. Semi-aniline carries a light protective pigment layer that offers some resistance while preserving the natural look.
Bonded leather uses shredded leather fibers pressed together with adhesives, so it flakes over time rather than develops a nice patina. Faux leather is entirely synthetic and needs only basic cleaning, though alcohol-based products can degrade the coating.
The Right Cleaner and Conditioner for Your Leather Type
Product selection matters enormously here. Most grocery-store furniture polish contains silicones and waxes that build up on leather surfaces. That buildup creates a cloudy film, traps dirt underneath, and eventually causes the finish to peel.
Avoid anything labeled all-purpose furniture spray on genuine leather.
Choose products formulated specifically for leather:
- pH-neutral leather soap for routine cleaning
- Leather conditioner containing lanolin or beeswax for semi-aniline and aniline types
- Leather protectant spray with UV blockers for chairs near windows
- Microfiber cloths for application and buffing
Apply conditioner sparingly and evenly. Too much product saturates the fibers, softens the structure, and attracts dust. A thin layer buffed to a soft sheen delivers protection without residue.
How to Remove Common Leather Stains Without Damaging the Finish
Act fast on spills. Fresh stains wipe away with minimal effort. Dried-in stains require more patience but still come out when treated correctly.
Never use household degreaslers, bleach, ammonia, or vinegar directly on leather surfaces unless the manufacturer explicitly approves them.
Here is how to handle the most frequent offenders:
- Water rings: Dampen a cloth lightly and blot the affected area. Allow to air dry naturally away from heat sources.
- Ink marks: Apply a small amount of isopropyl alcohol on a cotton swab. Dab gently, do not rub. Test on hidden area first.
- Food grease: Sprinkle cornstarch or talcum powder on the spot. Let it sit for several hours to absorb the oil, then brush away.
- Sweat and body oils: Clean the entire seat surface weekly with leather soap. These areas accumulate oils fastest and break down finish quickest.
Conditioning Frequency and What Happens When You Skip It
Leather loses natural oils over time through exposure to sunlight, body heat, and ambient dryness. Skipping conditioning allows those oils to deplete further until the material becomes brittle. Once cracks appear, no conditioner reverses them.
Prevention through regular maintenance is the only real strategy.
Follow this conditioning schedule:
- Light-use chairs in climate-controlled rooms: condition twice yearly
- Frequently used dining chairs: condition every three to four months
- Chairs near direct sunlight or heating vents: condition monthly during peak seasons
- Antique or museum-quality leather: consult a conservator rather than experimenting yourself
Over-conditioning causes its own problems. Excess product clogs leather pores, prevents the material from breathing, and attracts particulate matter that turns into abrasive sludge. Less is consistently better than more.
If you’d like a broader perspective on leather chair options, exploring best massage chairs: top picks for comfort and durability highlights how leather varieties differ across premium seating categories.
Fabric Chairs: Spot Cleaning, Deep Cleaning, and Stain Removal
Fabric chairs dominate home seating because they are comfortable, affordable, and available in virtually every style. That popularity comes with a tradeoff. Fabric absorbs liquids, traps odors, and hides debris deep in its fibers where vacuuming alone cannot reach.
Proper fabric care requires a two-tier approach: daily spot management plus periodic deep cleaning.
Understanding Fabric Weaves and Why Tight vs. Loose Matters
Fabric construction directly affects how stains behave and what cleaning methods work. A tightly woven polyester microfiber behaves completely differently from a loosely woven cotton canvas. Treating both the same produces inconsistent results at best and damage at worst.
| Fabric Characteristic | Tight Weave Examples | Loose Weave Examples |
|---|---|---|
| Stain absorption speed | Slow. Beads sit on surface | Fast. Liquid penetrates immediately |
| Vacuum effectiveness | Surface debris removed easily | Debris trapped deep in gaps |
| Agitation tolerance | Higher. Can handle gentle brushing | Lower. Vigorous scrubbing pulls fibers |
| Best cleaning approach | Foam extraction or light steam | Blotting and low-moisture methods |
Tightly woven synthetics like microfiber respond well to gentle steaming because the dense structure repels moisture long enough for the heat to break down stains. Loosely woven naturals like linen or raw cotton absorb moisture rapidly, making extended wet cleaning risky. Water sitting in loose weaves causes swelling, shrinkage, and mold growth if drying is incomplete.
Vacuuming Techniques That Actually Pull Dirt Out of Deep Fibers
Most people vacuum furniture incorrectly. They glide the nozzle slowly across the surface in straight lines and call it clean. That approach removes surface dust but leaves compaction debris buried in the weave.
Effective fabric vacuuming requires deliberate technique.
Use this method for thorough results:
- Attach the upholstery tool and set suction to medium-high
- Move the nozzle in slow overlapping strokes against the fabric grain
- Pause for one second at each point to let suction pull debris upward
- Pay extra attention to seat edges, creases, and seam intersections
- Vacuum the frame and legs separately with a crevice attachment
Regular vacuuming every one to two weeks prevents the majority of stubborn stains from forming in the first place. Compacted dirt acts like sandpaper under use, grinding fibers apart and dulling color faster than spills ever would.
Safe Spot-Cleaning Methods for Food, Drink, Ink, and Pet Accidents
Spot cleaning works when you match the technique to the stain chemistry. Protein-based stains like dairy and egg require cold water. Tannin-based stains like coffee and wine respond better to slightly warm water.
Oil-based stains need a solvent or surfactant approach rather than plain water.
Generic safe method for most fresh fabric stains:
- Blot immediately with a clean absorbent cloth. Never rub, which pushes stain deeper.
- Apply a small amount of pH-neutral upholstery cleaner diluted per label directions.
- Work from the outside edge of the stain toward the center to prevent spreading.
- Rinse the cleaned area with a damp cloth using plain water to remove residue.
- Blot dry and allow complete air circulation before sitting on the chair.
Pet accidents require enzymatic cleaners specifically designed to break down organic compounds. Standard detergents mask odor temporarily but leave residual proteins that attract pets back to the same spot. This behavior persists until the enzyme treatment fully decomposes the source material.
When Steam Cleaning Works and When It Will Cause More Damage
Steam cleaning sounds appealing because it promises deep sanitization without harsh chemicals. The reality is more nuanced. Steam delivers intense heat and moisture simultaneously, which benefits some fabrics and harms others.
Steam cleaning is appropriate when:
- The fabric care label permits water-based cleaning (W or WS code)
- The chair construction includes removable, washable cushion covers
- The fabric is synthetic or synthetic-blend with high heat tolerance
- Mold or bacterial odor is the primary concern rather than surface staining
Steam cleaning should be avoided when:
- The fabric is natural fiber only, such as pure wool or cotton, which shrinks under heat
- The chair has internal foam that cannot dry thoroughly after steam injection
- The underside or frame contains glued joints sensitive to moisture
- Previous spot treatments have already left visible discoloration
Professional steam extraction machines remove significantly more moisture than consumer rental units. That difference matters enormously for drying time and mold prevention. If your chair lacks adequate airflow during drying, the risk outweighs the benefit.
For readers interested in cushion-level fabric refresh without full reupholstery, understanding how do you reupholster a chair cushion provides practical insight into when DIY approaches make sense versus when professional intervention is worth the cost.
Wood and Varnished Chairs: Preserving Finish While Removing Grime
Wood chairs present a different challenge from upholstered pieces. The priority shifts from stain removal to finish preservation. Harsh chemicals, excessive water, and abrasive tools all threaten the protective coating that keeps wood stable and attractive.
A successful wood chair cleaning routine focuses on gentle lifting of grime while maintaining the integrity of varnish, lacquer, wax, or oil finishes.
Reading the Finish: Lacquer, Polyurethane, Wax, and Oil
Identifying the finish on your wood chair determines which cleaners are safe and which will degrade the surface. Each finish type has distinct properties and failure modes when treated improperly. The visual and tactile clues below help you classify what you are dealing with.
| Finish Type | Appearance | Touch Test | Water Response |
|---|---|---|---|
| Lacquer | Glossy to satin, uniform | Hard and smooth | Beads and sits on surface |
| Polyurethane | Durable sheen, thick buildup | Very hard surface | Minimal absorption |
| Wax | Soft glow, low sheen | Slightly yielding | Absorbs slowly, darkens |
| Oil (tung, linseed) | Natural grain emphasis | Warm, slightly textured | Absorbs quickly |
| Shellac | Amber tone, delicate | Moderate hardness | Dissolves with alcohol |
If water beads immediately and rolls off, your chair likely has a lacquer or polyurethane finish. That is good news, as those finishes resist moisture well. If water darkens the wood where it touches, the surface is either waxed or oiled and needs gentler handling.
Alcohol testing with a cotton swab on a hidden spot reveals shellac, which dissolves under alcohol contact.
Gentle Cleaning Without Stripping Protective Coatings
Wood finishes degrade gradually through repeated exposure to cleaning agents, friction, and environmental humidity. The goal is to remove surface contamination without abrading or dissolving the protective layer itself. This means shorter contact times, softer applicators, and minimal moisture.
Clean wood chairs using this approach:
- Dust regularly with a soft, lint-free cloth or a brush attachment on low suction
- Mix a few drops of mild dish soap into a bowl of lukewarm water
- Dampen a clean cloth in the solution and wring it out thoroughly until barely moist
- Wipe the chair surface following the direction of the wood grain
- Immediately follow with a second cloth dampened with plain water to remove soap residue
- Dry completely with a third clean, dry cloth before returning the chair to use
Never soak wood or leave standing water on any wooden surface. Even finished wood absorbs moisture through microscopic gaps in the coating. Prolonged wetness causes swelling, finish clouding, and eventual warping.
Dealing with Water Rings, Stickiness, and Built-Up Residue
Water rings are the most common wood chair complaint and also one of the most treatable when caught early. Stickiness and residue buildup indicate previous over-application of polish or accumulation of environmental grime from cooking areas and high-touch households.
Address these specific issues as follows:
- Water rings: Place a thin cotton cloth over the ring. Run a warm iron on low setting over the cloth for two or three seconds at a time. Check frequently. The heat draws moisture out of the finish. Repeat until the ring fades.
- Sticky residue: Mix equal parts white vinegar and olive oil. Apply with a soft cloth along the grain. The vinegar cuts buildup while the oil conditions simultaneously. Buff to a clean finish afterward.
- Heavy grime layers: Remove the chair to a well ventilated area. Use a dedicated wood cleaner formulated for finished surfaces. Follow the manufacturer dilution ratio precisely. Work in small sections and wipe clean before the product dries.
Avoid homemade pastes containing baking soda or lemon juice on finished wood. These abrasive and acidic mixtures gradually wear through protective coatings, leaving the bare wood exposed to future damage.
Reconditioning and Touching Up Finished Wood Surfaces
Maintenance reconditioning restores luster and extends the interval between deep cleanings. It also addresses minor surface scratches and worn areas before they develop into larger problems. The frequency depends on usage intensity and environmental conditions.
Reconditioning schedule recommendations:
- Light-use chairs in climate-controlled interiors: every six to twelve months
- Dining chairs used daily for meals: every three to six months
- Chairs exposed to direct sunlight or fluctuating humidity: every one to three months
- High-traffic commercial or hospitality settings: monthly or as needed
Apply wood conditioner or furniture polish according to product instructions. Use a circular motion sparingly, then buff with a clean cloth following the grain. Build thin layers over multiple applications rather than one thick coat that attracts dust and feels tacky.
For homeowners curious about chair value and replacement considerations, reviewing how much does a chair cost by type helps contextualize whether restoration efforts align with the piece’s current worth.
Metal, Rattan, and Outdoor Chair Cleaning
Outdoor and hybrid-material chairs face unique challenges that indoor-only furniture does not encounter. Exposure to sun, rain, humidity, pollen, and temperature swings accelerates wear on metal frames, woven natural fibers, and combined material constructions. Cleaning these chairs requires addressing both cosmetic grime and structural degradation risks.
Preventing and Treating Rust on Metal Frames
Rust begins as a tiny orange or brown discoloration on steel or iron frames. Left unchecked, it spreads beneath paint or powder coating, weakening structural joints and eventually causing failure. Early detection and treatment prevent the problem from escalating.
Identify and treat rust following these steps:
- Inspect all joints, weld points, and undersides quarterly, especially after wet weather
- Light surface rust: remove with fine steel wool or a nylon abrasive pad. Apply rust-inhibiting primer to the exposed area, then touch up with matching paint.
- Moderate rust with flaking: scrape loose material with a putty knife. Sand the area smooth. Prime and repaint following manufacturer cure times before exposing the chair to moisture.
- Severe rust with structural softness: do not attempt repair. Replace the affected component or retire the chair from load-bearing use.
Powder-coated aluminum frames resist rust naturally but can still show surface oxidation or chalky fading from UV exposure. Clean those surfaces with mild soap and water. Apply an automotive-grade wax or metal protectant annually to maintain appearance.
Cleaning Woven Rattan and Wicker Without Unraveling
Natural fiber chairs require gentle handling because moisture weakens the binding fibers and causes unraveling. These materials also absorb stains and odors readily, so preventive care matters more than aggressive remediation.
Clean rattan and wicker using this careful method:
- Dust weekly with a soft brush or vacuum attachment on lowest suction. Work between weave intersections to avoid pulling threads.
- For general cleaning, mix a few drops of mild soap in warm water. Dampen a soft cloth and wipe along the weave direction. Do not submerge or soak the material.
- Remove stubborn spots with a soft toothbrush dipped in the soap solution. Gently scrub the affected weave section, then immediately blot dry with an absorbent cloth.
- Allow the chair to air dry in a shaded, ventilated area before returning it to use. Never place damp wicker in direct sunlight, which causes rapid uneven drying and cracking.
Store outdoor rattan furniture indoors or under protective covering during winter months or extended rain periods. Moisture trapped inside wrapped furniture creates ideal conditions for mold growth within the weave.
Patio Chair Maintenance for Humid and Sun-Exposed Climates
Environmental factors accelerate deterioration on outdoor seating. High humidity promotes mold and mildew on all materials. Intense UV exposure fades colors, dries out leather, and degrades fabric strength.
Salt air near coastal areas corrodes metal components faster than inland environments.
Protect patio chairs through proactive maintenance:
- Apply fabric protectant spray to outdoor cushions before the summer season begins
- Cover chairs with breathable protective covers when not in use for extended periods
- Wipe down metal frames weekly during humid months to remove salt and moisture deposits
- Rotate cushion orientation periodically so sun exposure distributes evenly rather than fading one side
- Inspect screw joints and weld points monthly for loosening or corrosion signs
Seasonal preparation makes a measurable difference in chair longevity. A brief ten-minute maintenance routine performed every few weeks prevents the kind of cumulative damage that requires expensive replacement.
The Universal Step-by-Step Chair Cleaning Process
Regardless of material type, every effective chair cleaning operation follows the same foundational sequence. Adapting each step to your specific material yields consistent, predictable results. Deviating from this order, particularly skipping the preparation and testing phases, introduces unnecessary risk.
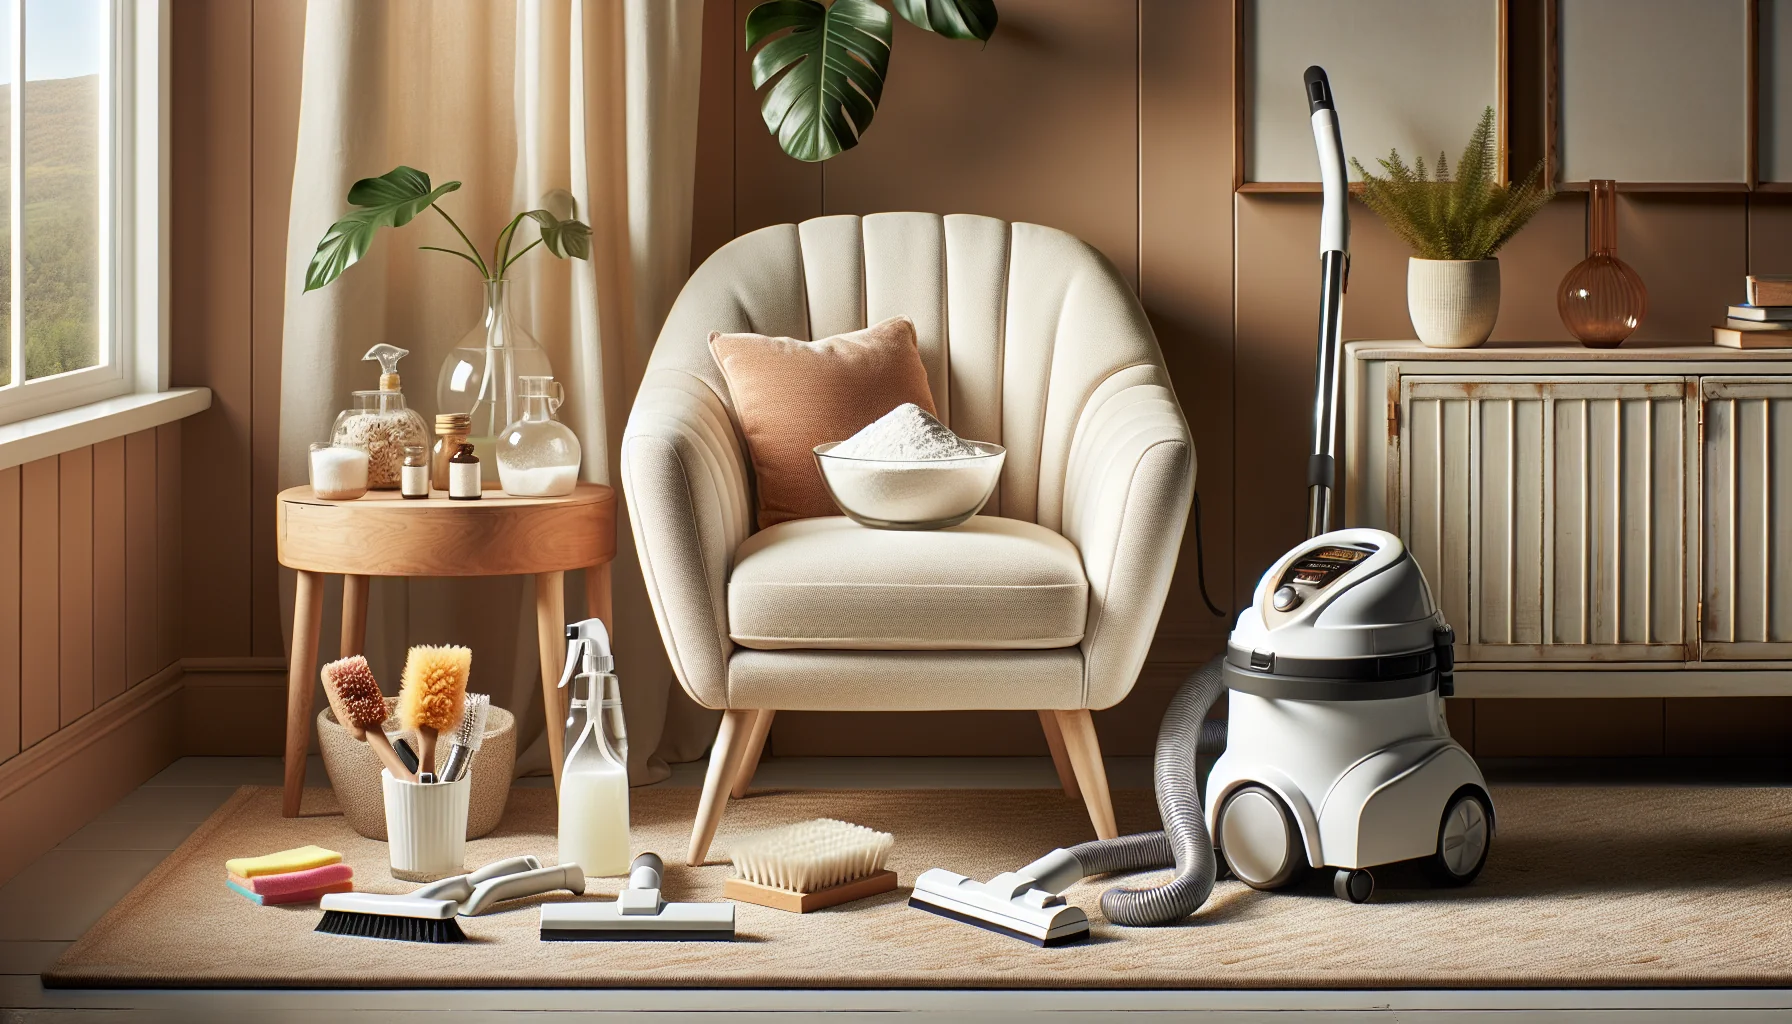
Prep: What to Clear Away Before You Begin
Preparation separates rushed attempts from professional-quality results. A cleared workspace lets you focus entirely on the cleaning task without distractions or cross-contamination between products.
Complete your prep by:
- Removing all detachable cushions, pillows, and throws from the chair
- Relocating the chair to a well-ventilated area if possible
- Laying down a protective drop cloth or old towels beneath the chair
- Gathering all cleaning tools and products within arm’s reach before starting
- Reading product labels carefully for dilution ratios and safety warnings
Organized setup reduces the chance of applying the wrong product or mixing incompatible chemicals accidentally. Both scenarios cause immediate and often irreversible damage.
Test: Performing the Spot Test Correctly
Spot testing validates compatibility between your chosen cleaner and the chair material before you commit to full-surface application. A five-minute test can prevent hours of correction work later.
Execute a proper spot test by:
- Selecting an inconspicuous location such as the underside of a seat cushion or the back of a leg
- Applying a small amount of the cleaning product to a clean white cloth
- Dabbing the test area gently and observing for color transfer, discoloration, or texture change
- Waiting the full recommended dwell time before evaluating results
- Proceeding only if no adverse reaction appears after the waiting period
Always use a white cloth for spot tests. Colored cloths can transfer dye onto the material and create false positives that look like cleaning damage.
Clean: Applying Products Without Over-Wetting
Correct application technique determines whether cleaning improves the chair or introduces new problems. Over-wetting remains the single most common error across all material types.
Apply products using these principles:
- Spray or apply cleaner to the cloth, never directly onto the chair surface
- Work in small manageable sections no larger than eighteen inches square
- Use gentle pressure and follow the natural grain or weave direction
- Keep the material as dry as possible while still achieving cleaning effectiveness
- Move methodically around the entire chair to ensure uniform coverage
Direct application saturates material faster than controlled cloth transfer. That saturation drives moisture into areas that cannot dry efficiently, creating conditions for mold, odor, and structural compromise.
Extract and Dry: Getting Moisture Out Before Mold Sets In
Moisture removal is as important as the cleaning itself. Residual dampness inside fabric, wood, or cushion cores creates a window of vulnerability during which mold spores germinate and bacterial colonies establish.
Maximize drying efficiency by:
- Blotting excess moisture immediately after cleaning with dry absorbent towels
- Positioning the chair in a space with active air circulation from fans or open windows
- Avoiding direct heat sources such as space heaters or hair dryers, which can crack finishes and shrink fibers
- Checking dryness thoroughly before replacing cushions or returning the chair to normal use
- Allowing twenty-four to forty-eight hours for complete drying on heavily cleaned pieces
Incomplete drying produces odors that mimic stubborn stains but originate from microbial growth instead. Addressing the root moisture issue eliminates the smell far more effectively than masking it with fragrance.
Protect: When and How to Apply Fabric Guards or Leather Conditioners
Protection applications extend the time between necessary cleanings and reduce the impact of future spills. These products create barrier layers that resist absorption and simplify routine maintenance.
Apply protectants correctly by:
- Ensuring the chair is completely clean and bone-dry before protection application
- Following the specific product instructions for coverage area and drying time
- Using thin even coats rather than heavy saturated applications
- Allowing adequate curing time before the chair returns to regular use
- Reapplying protection products according to manufacturer-recommended intervals, typically every six to twelve months for fabric guards and quarterly for leather conditioners
Protected surfaces shed liquids longer and accept stain treatment more readily when incidents occur. The upfront effort pays repeated dividends throughout the chair’s usable lifespan.
Stain-Specific Decision Guide: What to Use on What
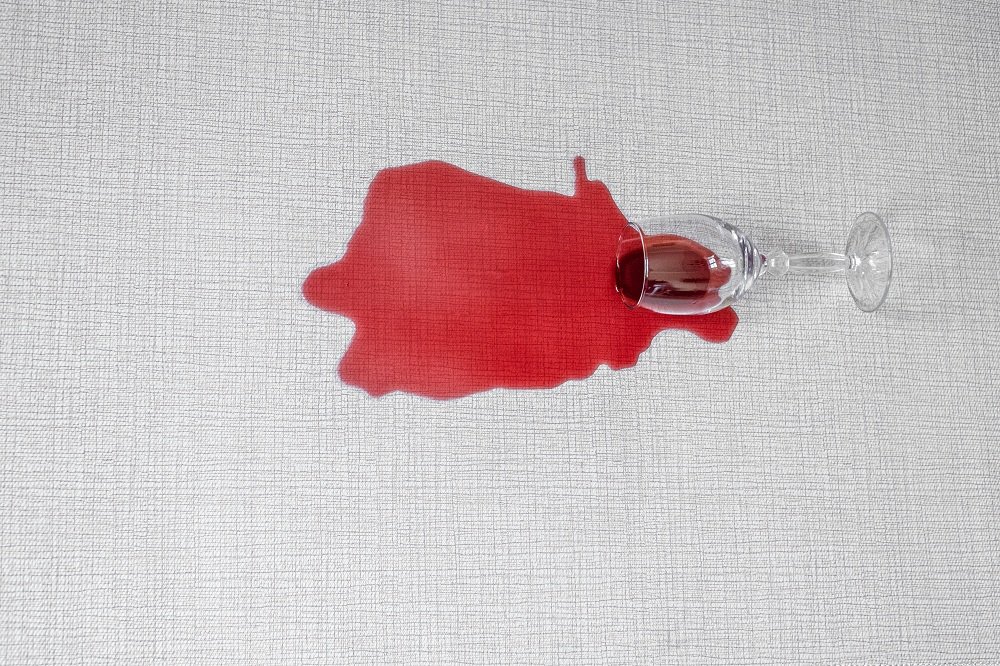
Image source: Bing (Web (fair-use with source credit))
Different stains demand different chemical approaches because each stain type interacts with materials in unique ways. Using the wrong method not only fails to remove the stain but can permanently set it into the fabric, leather, or wood finish. Matching treatment to stain chemistry produces reliable results across the most common household incidents.
Food and Drink Stains
Food and beverage stains cover the widest range of everyday incidents. Understanding the underlying stain chemistry determines whether hot water, cold water, or solvent treatment is appropriate.
| Stain Type | Primary Component | Best Treatment | Temperature Note |
|---|---|---|---|
| Coffee and tea | Tannins | Mild detergent solution, blot repeatedly | Warm water preferred |
| Red wine | Tannins and pigments | Club soda blot, then upholstery cleaner | Cold water initially |
| Chocolate and dairy | Proteins and fats | Cold water rinse, enzymatic cleaner | Cold water essential |
| Grease and oils | Lipids | Cornstarch absorption, then degreasing soap | Temperature flexible |
| Fruit juices | Acids and sugars | Damp cloth blot, neutral pH cleaner | Lukewarm water safe |
Protein-based stains like dairy and egg coagulate under heat, which locks them permanently into fibers. Always treat protein stains with cold water first. Tannin-based stains from coffee, tea, and wine respond well to warm water after initial blotting removes surface pigment.
Ink and Marker
Ink stains represent some of the most challenging household incidents because pen pigments bond chemically with porous materials. Speed of response significantly influences removal success rates.
Treat ink stains by:
- Acting immediately while the ink remains wet and superficial
- Dabbing gently with a cloth dampened with isopropyl alcohol for fabric surfaces
- Testing the alcohol on a hidden area first, as it can remove dye from colored fabrics
- Blotting and repeating until pigment transfers to the cloth, never rubbing aggressively
- Rinsing the treated area with a water-dampened cloth to remove alcohol residue
- Allowing thorough drying before assessing whether complete removal was achieved
Ink on leather requires extra caution. Alcohol can strip protective finish coatings. Apply minimally with a cotton swab and condition the treated area immediately afterward to restore suppleness.
Pet Stains and Odors
Pet accidents introduce organic compounds that standard cleaning products cannot fully address. Enzymatic cleaners contain biological catalysts that break down protein molecules responsible for persistent odors and repeat-soiling behavior.
Address pet stains using this protocol:
- Blot up as much liquid as possible using absorbent paper towels pressed firmly
- Apply an enzymatic pet stain remover according to label directions and contact time requirements
- Allow the treatment to work fully without interference from other cleaning agents
- Rinse lightly with water if the product label recommends it
- Extract remaining moisture thoroughly using clean towels or a wet-dry vacuum
- Ensure complete drying to prevent secondary odor development from microbial activity
Vinegar-water solutions offer a mild alternative for fresh accidents but lack the enzymatic breakdown power needed for older or deeply absorbed incidents.
Oil and Grease
Grease stains resist water-based cleaning because oil and water do not mix. The treatment strategy focuses on absorption first, followed by surfactant or solvent action to remove residual film.
Remove oil stains by:
- Covering the fresh stain immediately with an absorbent material like cornstarch, baking soda, or talcum powder
- Leaving the absorbent in place for several hours or overnight to draw out embedded oil
- Brushing away the saturated powder completely
- Treating any remaining film with a small amount of dish soap diluted in warm water
- Blotting and rinsing thoroughly to prevent soap residue from attracting future dirt
- Air drying completely before returning the chair to use
This multi-step approach works on fabric, leather, and even certain wood finishes when performed carefully with minimal moisture exposure.
Set-In and Old Stains That Won’t Budge
Old stains present the greatest cleaning challenge because pigments and compounds have had time to bond chemically with the material. Success depends on patience, repeated gentle treatment, and realistic expectations about partial improvement versus total elimination.
Approach stubborn stains by:
- Accepting that complete removal may not be achievable on aged or previously treated stains
- Trying targeted treatment with the appropriate cleaner for the suspected stain type
- Applying the cleaner, allowing extended dwell time per product instructions, then blotting
- Repeating the treatment cycle two or three times before evaluating final results
- Considering professional intervention when homemade approaches yield no improvement after multiple attempts
- Exploring color-matched touch-up products for leather or fabric when stain remnants remain visible
Partial improvement through careful repeated treatment often restores acceptable appearance without requiring full reupholstery or refinishing.
Cost Breakdown: DIY Cleaning vs. Professional Chair Cleaning
Understanding the financial dimension of chair cleaning helps you make informed decisions about when to tackle maintenance yourself and when to invest in professional services. Costs vary considerably based on chair size, material complexity, stain severity, and geographic region.
Typical DIY Supply Costs
Basic DIY cleaning requires a modest initial investment that serves multiple cleaning projects across your home. Once purchased, supplies deliver many cleaning cycles at negligible per-use cost.
| Supply Item | Estimated Cost Range | Notes |
|---|---|---|
| Microfiber cloths (pack of 6) | $8 to $15 | Reusable, essential for all materials |
| Soft-bristle upholstery brush | $5 to $12 | Reusable across years of cleaning |
| pH-neutral upholstery cleaner | $10 to $20 per bottle | Yields multiple applications per bottle |
| Leather cleaner and conditioner set | $15 to $30 | Material-specific, lasts many applications |
| Enzymatic pet stain remover | $12 to $25 | Specialty product, minimal quantity needed |
| Steam cleaner rental (daily) | $40 to $80 | One-time use or infrequent occasions |
Annual DIY supply expenditure for a typical household with multiple chairs ranges between $40 and $100 after the initial toolkit purchase. Ongoing costs consist primarily of occasional replenishment of cleaning solutions and replacement consumables like microfiber cloths.
Rental Equipment Costs
Steam cleaners and carpet extractors provide powerful cleaning capability that exceeds typical household tools. Rental access avoids the full purchase price while delivering professional-grade results for occasional deep cleaning projects.
Compare rental economics:
- Daily rental rate for a mid-range steam cleaner: approximately $50
- Deposit requirements typically range from $100 to $200, refunded upon equipment return
- Travel time and logistics add non-financial costs to the rental equation
- Learning curve and improper operation risk may offset quality gains for inexperienced users
Rental equipment makes financial sense when you have multiple large upholstery projects scheduled in a single cleaning season. Single-chair projects rarely justify the rental expense compared to targeted spot treatment or professional service.
Professional Cleaning Pricing by Chair Type
Professional upholstery cleaning carries higher per-chair costs but delivers guaranteed results backed by technician expertise and commercial-grade equipment. Pricing reflects material complexity and stain difficulty rather than simple square footage alone.
| Chair Type | Professional Cleaning Range | Notes |
|---|---|---|
| Standard upholstered dining chair | $75 to $125 | Includes spot treatment and drying |
| Leather accent chair | $100 to $175 | Conditioner application included typically |
| Large recliner or sofa chair | $150 to $250 | More surface area and complexity |
| Antique or heirloom furniture | $200 to $400+ | Specialized handling and conservation methods |
| Outdoor patio chair set | $50 to $100 per chair | Depends on material and condition |
Professional services typically include pre-treatment assessment, stain-specific product selection, controlled cleaning, thorough extraction, and protective finishing when applicable. Results accountability and warranty coverage distinguish paid professional work from DIY attempts.
When Investing in Pro Service Makes Financial Sense
Professional cleaning becomes a sound investment when the chair’s value, condition complexity, or your own capability limits justify the expense. Several scenarios clearly favor professional intervention over home attempts.
Consider professional cleaning when:
- The chair replacement value exceeds the cleaning service cost significantly
- Multiple severe stains have been attempted with DIY methods without improvement
- The material is delicate antique leather, silk upholstery, or historically significant fabric
- You lack appropriate equipment for thorough moisture extraction after deep cleaning
- Time constraints make DIY approaches impractical despite available resources
Purchasing a best wingback chair or similar high-quality piece warrants protecting that investment through professional maintenance schedules rather than risking damage through amateur experimentation.
7 Common Mistakes That Permanently Damage Chairs
Mistakes in chair cleaning follow predictable patterns. The same errors recur across materials because they stem from assumptions, rushed processes, and inadequate preparation rather than malice or negligence. Recognizing these pitfalls prevents them from becoming your own costly lessons.
Using the Wrong Cleaner on the Wrong Material
Applying a general-purpose household cleaner to leather or a solvent-based product to water-sensitive fabric represents the most destructive single mistake homeowners make. Product-label instructions exist for a reason, and ignoring them guarantees adverse outcomes.
Match products to materials deliberately:
- Leather requires pH-balanced leather-specific formulations, not all-purpose sprays
- Fabric accepts water-based or solvent-based cleaners only as indicated by care labels
- Wood finishes resist mild soap solutions but degrade under ammonia, bleach, or abrasive pastes
- Metal frames tolerate mild detergent washes but suffer corrosive damage from acidic cleaners left unrinse
Soaking Fabric or Wood Instead of Light Dampening
Excessive moisture causes damage across every chair material category. Fabric absorbs water into core fibers and cushion padding where drying takes days rather than hours. Wood swells, warps, and develops finish cloudiness when saturated beyond the coating’s moisture barrier capacity.
Maintain controlled moisture levels by:
- Applying cleaners to cloths rather than directly onto chair surfaces
- Wringing cleaning cloths until nearly dry before contact
- Blotting and extracting moisture immediately after each cleaning pass
- Allowing full drying time between multiple wet cleaning sessions on the same piece
Scrubbing Aggressively and Fraying Fibers
Mechanical abrasion from vigorous scrubbing damages surface textures beyond repair. Fabric pills and fuzzes. Leather finish scuffs and thins.
Wood grain raises and fibers stand upright instead of lying flat after drying.
Adopt gentle mechanical action by:
- Using soft-bristle brushes designed for delicate surface cleaning
- Applying light pressure and letting the cleaning product do the chemical work
- Working with the grain or weave direction rather than against it
- Stopping immediately if you notice surface texture changes during agitation
Ignoring Care Labels and Wiping Against Grain
Care labels encode manufacturer-tested cleaning parameters specific to each product. Disregarding them replaces evidence-based guidance with guesswork. Wiping against grain on any material creates visible directional damage that accumulates with each cleaning session.
Respect established care guidelines by:
- Locating and reading care tags before any cleaning begins
- Following W, S, WS, or X designations precisely without deviation
- Wiping wood surfaces along the grain direction consistently
- Moving fabric brush strokes with the weave pattern rather than across it
Mixing Cleaning Products Dangerously
Chemical combinations create hazards ranging from reduced cleaning effectiveness to toxic gas release. Bleach mixed with ammonia produces chloramine gas. Bleach combined with vinegar generates chlorine gas.
Both situations require immediate ventilation and medical attention if exposure occurs.
Practice safe chemical handling by:
- Using one cleaning product at a time with thorough rinsing between products
- Never combining bleach with any other household cleaner
- Reading safety data sheets for products you intend to use together sequentially
- Maintaining adequate ventilation whenever using chemical cleaners indoors
Rushing the Drying Process
Incomplete drying initiates microbial growth, unpleasant odors, and structural degradation long after the visible cleaning appears successful. Rushed drying attempts using heat sources create surface hardness while trapping moisture internally.
Ensure thorough drying by:
- Allowing minimum twenty-four hours for adequately dried upholstered items
- Using fans and dehumidifiers to accelerate airflow without applying direct heat
- Verifying dryness by touching hidden areas that feel cool or damp
- Postponing cushion replacement until the entire chair assembly reaches equilibrium moisture content
Skipping the Spot Test Every Time
Skipping spot tests assumes compatibility without verification. That assumption carries disproportionate risk relative to the two-minute investment required for proper testing. Results from untested product applications lack predictability and control.
Make spot testing a non-negotiable step by:
- Testing every new product on a hidden area before full-surface application
- Recording test results for future reference when revisiting the same chair
- Re-testing products on previously treated areas if formulations change between purchases
- Documenting which products succeeded or failed for each chair in your home inventory
Maintaining Clean Chairs Long-Term
Consistent maintenance prevents the accumulation that transforms minor soiling into major cleaning emergencies. A structured routine costs far less time and money than reactive deep cleaning after months or years of neglected care.
Weekly Quick-Maintenance Routine
Weekly upkeep takes fifteen minutes or less and addresses the accumulation patterns that develop during normal daily use. This routine prevents small issues from becoming entrenched problems requiring intensive intervention.
Perform weekly maintenance by:
- Vacuuming all upholstered surfaces with appropriate attachments
- Dusting wooden and metal frames with a dry or slightly damp cloth
- Fluffing and rotating seat cushions to distribute wear evenly
- Spot-treating any fresh spills immediately before they penetrate deeply
- Checking for loose hardware, worn feet, or emerging structural concerns
Seasonal Deep-Cleaning Schedule
Seasonal transitions provide natural reminders to perform more thorough cleaning beyond weekly maintenance. These deeper sessions address accumulated grime, redistribute protective treatments, and prepare chairs for seasonal usage patterns.
Align seasonal cleaning with calendar transitions:
- Spring: Deep clean indoor chairs before summer entertaining seasons begin
- Summer: Inspect and refresh outdoor furniture after sun and rain exposure
- Fall: Clean and condition leather chairs before heating seasons dry indoor air
- Winter: Perform interior deep cleaning when outdoor furniture enters storage
Protective Sprays and Conditioners That Extend Time Between Cleans
Protection products create invisible barriers that delay stain absorption and simplify subsequent cleaning when spills do occur. Regular reapplication maintains barrier effectiveness as protective layers wear through normal use.
Maintain protection layers effectively by:
- Applying fabric guard sprays to clean dry fabric chairs every six to twelve months
- Conditioning leather chairs quarterly in dry climates or monthly near heat sources
- Reapplying wood polish or conditioner to maintain finish integrity between cleanings
- Rotating protection product brands periodically to prevent formulation-specific residue buildup
Reducing Future Stain Risk Around Eating and Working Areas
Prevention operates at the highest efficiency level because it eliminates stain formation before it occurs. Environmental modifications and usage habit adjustments reduce stain frequency dramatically without additional cleaning labor.
Reduce stain incidence by:
- Using removable, washable seat covers in dining and high-traffic areas
- Establishing no-food policies on certain upholstered chairs
- Keeping cleaning supplies conveniently located near chairs used for meals or crafts
- Implementing a quick-blot protocol so spills receive immediate attention before setting
Consistent maintenance habits compound into noticeably cleaner chairs with less effort over time. The disciplined approach pays repeated dividends throughout the furniture’s functional lifespan.
Chair Cleaning FAQs
Can I Use a Steam Cleaner on All Upholstered Chairs?
No. Steam cleaners work well on synthetic fabrics and sealed leather but damage loose-weave natural fibers, unsealed wood, and antique upholstery. Always verify your care label permits water-based cleaning before attempting steam treatment.
Chairs tagged with an S or X code should never receive steam exposure.
How Do I Know if My Leather Is Real or Faux?
Real leather shows natural grain variations, pores, and temperature responsiveness. Faux leather has uniform patterns, feels plastic-like, and lacks the slight give when pressed. Place ice on the surface briefly.
Real leather melts the ice faster due to its porous structure absorbing moisture.
Is Vinegar Safe for Cleaning All Chair Materials?
Vinegar works safely on many fabric and hard-surface chairs but damages unfinished wood, aniline leather, and delicate natural fibers. The acidity breaks down protective coatings over time. Dilute one part vinegar to three parts water and always spot-test first.
Avoid using vinegar on any surface without prior compatibility verification.
How Often Should I Deep Clean My Chairs?
Most upholstered chairs benefit from professional deep cleaning every twelve to twenty-four months depending on usage intensity. High-traffic dining chairs may need annual service while occasional accent chairs can stretch to biennial intervals. Pet households and homes with young children should lean toward the more frequent end of that range.
What Should I Do If I Spill Something Before I Can Clean It?
Blot immediately with absorbent paper towels or a clean cloth. Never rub, which spreads the spill and pushes it deeper into fibers. Apply the appropriate treatment based on stain chemistry after excess liquid is removed.
Keep a basic stain-response kit near frequently used seating areas for rapid intervention.
Can I Use Bleach or Ammonia on Any Chair Material?
Never use bleach or ammonia on leather, wood finishes, or most upholstered fabrics. These chemicals degrade proteins in leather, dissolve protective coatings on wood, and break down fabric dyes causing irreversible color loss. Both substances also create toxic fumes when mixed with other common cleaners.
Stick to products specifically formulated for each material type.
Quick-Reference Decision Flowchart: Choose Your Path
Choosing the right cleaning approach requires matching three variables: your chair material, the stain type, and the severity level. This flowchart helps you navigate quickly without rereading entire sections.
Material Determines Your Starting Point
Start by confirming whether your chair is leather, fabric, wood, or metal construction. Each material category branches into specific product requirements and technique constraints.
- Leather chairs require pH-neutral cleaners and conditioning treatments
- Fabric chairs need stain-specific approach based on care label codes
- Wood chairs demand minimal moisture and finish-safe products
- Metal and outdoor chairs focus on corrosion prevention and gentle fiber care
If you cannot identify the material after visual and tactile inspection, stop and consult a professional rather than guessing. Wrong assumptions lead to wrong products and avoidable damage.
Stain Type Determines Product Choice
Once material is confirmed, match the stain chemistry to the correct treatment protocol. Different stains require fundamentally different chemical approaches even on the same material.
| Stain Category | Recommended Treatment | Avoid |
|---|---|---|
| Water-based beverages | Damp blotting, mild detergent | Hot water on protein stains |
| Oil and grease | Absorbent powder, degreasing soap | Water-only application |
| Protein-based foods | Cold water rinse, enzymatic cleaner | Heat setting the stain |
| Ink and dye | Isopropyl alcohol dab, blot | Rubbing across grain |
| Pet accidents | Enzymatic cleaner, thorough extraction | Standard detergents alone |
Refer back to the Stain-Specific Decision Guide section for detailed step-by-step procedures matching each category.
Your Situation Determines DIY vs. Professional Help
Not every cleaning situation suits home methods. Several factors push the decision toward professional intervention regardless of material type.
Choose DIY cleaning when:
- The chair is a standard modern piece with identifiable care labels
- Stains are fresh and relatively superficial
- You have appropriate tools and ventilation available
- Budget constraints make professional service impractical
Choose professional cleaning when:
- The chair is antique, valuable, or has documented provenance
- Multiple severe stains resist repeated DIY attempts
- The material is delicate silk, vintage leather, or historically significant fabric
- You lack equipment for thorough moisture extraction
- Time pressure makes DIY approaches unfeasible
Professional services typically cost between seventy-five and four hundred dollars per chair depending on size, material, and condition complexity. Factor in replacement cost comparisons before deciding. A best desk chair or similar investment often justifies professional maintenance to preserve function and appearance.
For additional guidance on chair selection and replacement values, reviewing how much does a wheelchair cost or how much does a lift chair cost provides context on when restoration versus replacement makes financial sense.
Essential Tools and Supplies for Chair Cleaning
Having the right tools makes the difference between a thorough clean and accidental damage. Cheap or incorrect equipment causes more problems than it solves. The wrong brush scratches finishes.
Inadequate cloths smear stains instead of lifting them. Investing in quality tools pays for itself within the first few cleaning sessions.
Core Tool Set for Every Chair Type
Every household should maintain a baseline toolkit that covers all common chair materials. These essentials handle the majority of routine cleaning tasks without requiring special purchases.
| Tool | Purpose | Material Compatibility | Approximate Cost |
|---|---|---|---|
| Microfiber cloths (pack of 12) | Application and buffing | All materials | $8 to $15 |
| Soft-bristle upholstery brush | Agitating fabric without damage | Fabric, leather | $6 to $12 |
| Nylon scrub brush (medium) | Heavy fabric and outdoor chairs | Fabric only | $4 to $8 |
| Crevice tool attachment | Vacuuming seams and joints | All materials | Usually included with vacuum |
| Spray bottle (trigger) | Controlled product application | All materials | $3 to $6 |
| Soft horsehair brush | Dusting wood grain and rattan | Wood, wicker | $5 to $10 |
| Absorbent towels (pack of 6) | Blotting and moisture extraction | All materials | $6 to $12 |
| Cotton swabs | Precision spot treatment | Leather, fabric | $2 to $4 |
Material-Specific Tool Additions
Certain materials benefit from specialized tools that address their unique cleaning requirements. Adding these to your core set expands your capability significantly.
| Material | Recommended Addition | Why It Matters |
|---|---|---|
| Leather | Soft suede eraser | Lifts surface scuffs without liquid chemicals |
| Leather | Conditioner applicator pad | Distributes product evenly without cloth fibers |
| Fabric | Upholstery steam cleaner | Deep sanitation and stain breakdown |
| Fabric | Wet-dry vacuum extractor | Removes excess moisture faster than air drying |
| Wood | Lemon oil polish | Conditions and protects finished surfaces |
| Wood | Wax cloth applicator | Applies paste wax in thin uniform layers |
| Metal | Non-abrasive scouring pads | Removes surface rust without scratching coatings |
| Rattan/Wicker | Soft paintbrush (clean) | Dusts woven intersections without catching fibers |
Storage and Maintenance of Cleaning Tools
Tools degrade quickly when stored improperly. Moisture trapped in cloths breeds bacteria. Brushes left leaning against walls collect dust on bristles.
Proper storage extends tool lifespan and maintains cleaning effectiveness.
Store your toolkit by:
- Keeping microfiber cloths in a sealed container after each use
- Hanging brushes bristle-up on hooks rather than laying them flat
- Rinsing spray bottles with clean water after solvent-based products
- Replacing worn brushes when bristles splay outward beyond normal shape
- Rotating cloths through weekly washing to maintain absorbency and cleanliness
When Store-Bought Products Outperform Homemade Solutions
DIY cleaners work adequately for light maintenance but struggle with stubborn stains and specialized materials. Commercial formulations contain engineered surfactants, pH balancers, and protective additives that household ingredients cannot replicate.
Choose commercial products when:
- Stains have set for more than twenty-four hours
- The chair material requires pH-balanced chemistry (leather, antique wood)
- Enzymatic breakdown is needed for organic stains (pet accidents, food proteins)
- UV protection or fabric guard application is the goal
- Previous homemade attempts produced no improvement
Budget approximately fifteen to thirty dollars annually for quality commercial products used across a typical household. That investment prevents damage from ineffective DIY approaches and extends furniture lifespan measurably.
Seasonal Maintenance Calendar for Different Chair Types
A calendar-driven approach transforms chair maintenance from reactive emergency work into predictable routine care. Different seasons present different challenges, and anticipating them prevents most cleaning disasters before they occur.
Spring Deep-Cleaning Season
Spring delivers the strongest motivation for thorough chair cleaning. Indoor chairs have accumulated six months of dust, body oils, and environmental grime during winter. Outdoor furniture emerges from storage with weather-related residue requiring attention.
Spring maintenance checklist:
- Vacuum all indoor upholstered chairs including under-seat areas
- Clean and condition leather dining and accent chairs before summer entertaining begins
- Inspect outdoor metal frames for winter corrosion and touch up protective coatings
- Wash removable cushion covers according to manufacturer specifications
- Rotate outdoor chair cushions to ensure even sun exposure moving forward
- Check wooden chair joints for loosening caused by winter humidity changes
Summer Protection Phase
Summer heat and sunlight accelerate material degradation. UV radiation fades fabrics and dries leather. High temperatures cause wood finishes to expand and contract, potentially cracking over time.
Summer maintenance priorities:
- Apply UV-protective spray to outdoor leather and fabric chairs monthly
- Move indoor chairs away from direct window exposure during peak afternoon hours
- Clean patio furniture after each major gathering or rain event
- Monitor indoor humidity levels and use dehumidifiers if readings exceed sixty percent
- Spot-clean spills immediately before heat sets them permanently into fibers
Fall Preparation Routine
Fall prepares chairs for increased indoor use and heating season. Furnace circulation dries indoor air, affecting leather and wood alike. Outdoor furniture requires winter preparation before cold weather arrives.
Fall maintenance actions:
- Condition all leather chairs before dry heating seasons begin
- Reapply fabric protectant sprays to high-use dining and living room chairs
- Clean and treat outdoor metal frames to prevent winter rust formation
- Inspect and tighten loose joints on wooden chairs before heavy winter use
- Store seasonal outdoor cushions indoors or in waterproof containers
- Vacuum behind and beneath chairs where dust accumulation accelerates
Winter Conservation Mode
Winter demands minimal intervention focused on preservation rather than deep cleaning. Frozen outdoor furniture should remain covered and undisturbed until spring. Indoor chairs receive lighter but consistent maintenance.
Winter care guidelines:
- Dust and vacuum indoor chairs weekly instead of deep cleaning
- Keep leather chairs humidified if indoor readings drop below thirty percent
- Avoid moving outdoor furniture until temperatures consistently stay above freezing
- Address spills immediately to prevent staining during heavy indoor use periods
- Position chairs away from radiators and heating vents to prevent drying damage
Managing Chair Cleanings in Busy Households
Families with children, pets, and heavy daily use face uniquely demanding chair cleaning challenges. Standard maintenance schedules rarely accommodate the reality of spilled milk, muddy paw prints, and crayon marks appearing multiple times weekly. Efficient management requires systems, not perfection.
The Five-Minute Daily Reset
Busy households cannot afford hour-long cleaning sessions daily. A five-minute reset routine addresses the messes that accumulate during normal use without requiring deep cleaning effort.
Execute a daily reset by:
- Vacuuming seat surfaces and crevices while waiting for coffee to brew
- Wiping down wooden and metal chair arms with a damp microfiber cloth
- Checking for and blotting any fresh spills before they penetrate deeply
- Fluffing cushions and straightening fabric before evening use begins
- Spot-treating one visible stain per session rather than attempting full cleaning
This approach prevents small issues from compounding into emergency situations requiring professional intervention.
Assigning Cleaning Responsibilities by Household Member
Distributing chair maintenance across family members creates accountability and reduces individual burden. Age-appropriate tasks keep everyone involved while maintaining cleaning standards.
| Age Group | Appropriate Tasks | Supervision Level |
|---|---|---|
| Children (6 to 10) | Dusting with microfiber cloth, placing cushions | Minimal after instruction |
| Children (11 to 14) | Vacuuming with attachment, blotting fresh spills | Moderate initially |
| Teens (15+) | Full spot cleaning, applying protectant sprays | Minimal with guidance |
| Adults | Deep cleaning, stain treatment, conditioning | Independent |
Teaching proper technique early prevents damage from well-meaning but uninformed cleaning attempts. Children who learn correct methods become reliable contributors to household maintenance.
Creating a Visual Cleaning Tracker
Visual reminders reduce the cognitive load of remembering when each chair was last cleaned. A simple tracker posted near the dining area or kitchen cabinet keeps maintenance schedules visible and actionable.
Build a tracking system by:
- Listing each chair type and location on a whiteboard or clipboard
- Recording the date of last deep cleaning with initial initials
- Marking upcoming seasonal maintenance tasks with color-coded stickers
- Noting any persistent stains requiring special attention
- Reviewing the tracker during weekly household planning sessions
Visual systems prove especially effective in households with rotating caregivers, cleaners, or family members sharing cleaning duties.
Fast-Response Stain Kits for High-Traffic Areas
Keeping dedicated stain-response kits near frequently used chairs reduces response time from minutes to seconds. Every minute between spill and treatment improves removal outcomes dramatically.
Stock each kit with:
- Three to four clean microfiber cloths in a sealed bag
- Small spray bottle of appropriate cleaner for nearby chair types
- Absorbent paper towels for immediate blotting
- Cotton swabs for precision spot treatment
- Disposable gloves for hygiene during cleanup
Position kits under dining tables, near home office desks, or in any area where spills are most likely to occur. Accessibility determines whether quick response actually happens.
Recognizing When Cleaning Reaches Its Limit
Most chairs can be restored to excellent condition through proper cleaning. Some cannot. Knowing when to stop attempting DIY restoration and invest in professional help or replacement prevents wasted effort and prevents further damage through repeated unsuccessful treatments.
Four Signs That DIY Cleaning Has Failed
Repeated cleaning attempts that produce identical results indicate a fundamental mismatch between approach and problem. These four signals suggest professional intervention is necessary.
| Sign | What It Indicates | Next Action |
|---|---|---|
| Stain darkens after each cleaning attempt | Stain has penetrated beyond surface layer | Professional extraction or replacement |
| Fabric color bleeds during wet cleaning | Dye instability or improper prior treatment | Stop immediately, consult specialist |
| Leather finish peels after cleaning | Coating failure unrelated to cleaning method | Conditioner cannot restore damaged finish |
| Musty odor persists after complete drying | Internal mold growth in padding or frame | Professional remediation required |
Recognizing these signs early prevents compounding damage through continued inappropriate treatment. Each failed attempt typically worsens the underlying problem.
Structural Damage That No Cleaning Method Fixes
Cleaning addresses surface contamination only. Structural deterioration requires repair or replacement regardless of how thoroughly the surface is cleaned.
Structural issues include:
- Squeaking or cracking sounds from weakened wooden joints
- Sagging seat cushions that do not recover after air drying
- Loose or wobbly leg attachments indicating glue failure
- Rusted metal frames showing flaking or structural softness
- Torn fabric exposing foam or batting underneath
Surface cleaning cannot resolve internal structural problems. Attempting to do so wastes time and money better spent on repair or replacement.
Economic Calculus: Clean vs. Replace Decision
Sometimes the rational choice is stopping cleanup efforts entirely and replacing the chair. The decision depends on objective cost comparison rather than emotional attachment.
Calculate replacement economics by comparing:
- Current chair purchase price versus cumulative cleaning costs already incurred
- Estimated professional cleaning cost versus replacement cost for equivalent quality
- Expected remaining lifespan after successful cleaning versus new chair lifespan
- Emotional and time investment in repeated cleaning attempts versus replacement convenience
When annual cleaning costs approach fifty percent of replacement value, replacement typically provides better long-term value despite apparent waste of resources already invested.
For families evaluating budget options alongside maintenance costs, understanding how much does a chair cost across categories helps contextualize whether restoration or replacement aligns with overall seating strategy.
Building a Personalized Chair Care Schedule
Every household contains chairs with different usage patterns, materials, and environmental exposures. A single generic schedule cannot optimize maintenance across diverse furniture collections. Personalized scheduling maximizes cleaning effectiveness while minimizing unnecessary effort.
Audit Your Chair Collection First
Before creating any schedule, document every chair in your home with relevant details. This inventory becomes the foundation for customized maintenance planning.
Record for each chair:
- Material composition (leather type, fabric weave, wood finish, metal coating)
- Care label designation (W, S, WS, or X)
- Primary location and exposure conditions (sunlight, humidity, traffic level)
- Current condition assessment (excellent, good, fair, poor)
- Known stains or damage requiring ongoing monitoring
- Last cleaning date and method applied
This documentation eliminates guesswork during future cleaning decisions and creates a reference database for tracking maintenance history over time.
Create Tiered Maintenance Levels
Not every chair requires equal attention. Tiering your collection by usage intensity and material sensitivity optimizes time allocation and resource distribution.
| Tier | Criteria | Cleaning Frequency | Depth |
|---|---|---|---|
| Tier 1: Daily Essential | Dining chairs, primary workspace chairs | Weekly light maintenance, quarterly deep clean | Full process |
| Tier 2: Regular Use | Living room accent chairs, guest seating | Biweekly light maintenance, semiannual deep clean | Standard process |
| Tier 3: Occasional Use | Decorative chairs, formal dining pieces | Monthly dusting, annual professional inspection | Light maintenance only |
| Tier 4: Specialty Pieces | Antique chairs, delicate vintage upholstery | Quarterly consultation, professional cleaning only | Professional service exclusively |
Tier assignments should reflect actual usage patterns rather than assumptions about importance. A frequently-used kitchen chair deserves more attention than an rarely-entered formal dining room piece regardless of aesthetic value.
Integrate Chair Care Into Existing Routines
Maintenance schedules succeed when they attach to established habits rather than requiring separate time blocks. Linking chair care to regular household activities reduces resistance and improves consistency.
Attach maintenance to existing routines by:
- Vacuuming dining chairs while breakfast dishes clear from the table
- Wiping chair arms during television commercial breaks or meal preparation
- Rotating outdoor cushions during weekend yard work
- Spot-cleaning high chairs while children complete homework at the table
- Checking and tightening chair hardware during monthly bill-paying routines
Integration eliminates the perception that chair maintenance consumes additional time beyond normal household activities.
Track Progress and Adjust Annually
Annual review prevents schedules from becoming stale or misaligned with changing household circumstances. Usage patterns shift with seasons, family composition changes, and lifestyle adjustments.
Conduct annual reviews by:
- Reassessing tier assignments based on current usage data
- Noting which cleaning products performed best for each material type
- Documenting stains that resisted treatment for pattern recognition next year
- Updating supplier and product preferences based on demonstrated effectiveness
- Adjusting seasonal timing based on actual weather and usage observations
Continuous refinement keeps your maintenance system aligned with real-world conditions rather than idealized assumptions made at creation time.
Safety Guidelines for Chair Cleaning Chemicals
Chemical safety during chair cleaning protects both users and the furniture being treated. Many common cleaning products carry hazards that extend beyond skin irritation to respiratory damage and toxic fume generation. Understanding these risks prevents serious incidents during routine maintenance.
Reading Product Labels Before Every Use
Product labels contain legally required safety information that supersedes any cleaning advice found online or in consumer reviews. Label compliance protects users from chemical exposure incidents and ensures products perform as intended.
Label elements to verify:
- Active ingredient list and concentration percentages
- First aid instructions for skin contact, eye exposure, and inhalation
- Required personal protective equipment for application
- Ventilation requirements during and after use
- Storage temperature ranges and shelf life limitations
- Disposal instructions for empty containers and residual product
Never apply a product whose label you have not read completely, regardless of how familiar the product appears from previous use. Formulations change between manufacturing batches, and outdated knowledge creates false confidence.
Personal Protective Equipment Requirements
Proper PPE prevents the most common cleaning injuries: chemical burns, respiratory irritation, and allergic skin reactions. Basic protection requires minimal investment and maximum benefit.
Essential protective equipment includes:
- Nitrile gloves resistant to solvents and alkaline cleaners
- Safety glasses or goggles when working overhead or near eyes
- Respiratory protection when using solvent-based products in enclosed spaces
- Old clothing or an apron protecting skin and personal garments
- Closed-toe shoes when handling heavy chairs or moving furniture
Replace damaged PPE immediately rather than continuing use with compromised protection. Cracked glove surfaces and scratched eyewear create exposure pathways that negate protective intent.
Safe Storage and Disposal Practices
Improper chemical storage creates household hazards ranging from accidental ingestion to explosive reactions. Disposal of cleaning products follows environmental regulations that vary by jurisdiction.
Storage safety rules:
- Keep all cleaning products in original containers with intact labels
- Store away from heat sources, direct sunlight, and children’s access
- Separate solvent-based and water-based products to prevent accidental mixing
- Maintain inventory rotation using first-in-first-out consumption ordering
- Never transfer products to food or beverage containers regardless of clarity
Disposal considerations:
- Follow local hazardous waste disposal guidelines for solvent-based products
- Rinse water-based product containers thoroughly before recycling or trash disposal
- Never pour concentrated cleaning solutions down household drains without dilution
- Contact municipal waste facilities for bulk disposal requirements exceeding household quantities
Emergency Response Procedures
Quick appropriate action during chemical exposure incidents prevents minor incidents from becoming medical emergencies. Preparedness requires knowing response steps before exposure occurs.
| Exposure Type | Immediate Response | Medical Attention |
|---|---|---|
| Skin contact | Remove contaminated clothing, rinse skin with cool water for ten minutes | Call poison control if irritation persists beyond fifteen minutes |
| Eye contact | Flush eyes with running water for fifteen minutes minimum | Emergency medical care required immediately |
| Inhalation | Move to fresh air immediately, loosen restrictive clothing | Seek medical attention if breathing remains difficult after five minutes |
| Ingestion | Do not induce vomiting, rinse mouth with water | Contact poison control center immediately with product label information |
Keep poison control number readily accessible during all cleaning sessions. The United States Poison Control Center operates nationally at one-eight hundred twenty-three-four-five-six-seven-eight. Save this number in your phone before beginning any chemical cleaning project.
For additional guidance on household chemical safety, refer to EPA resources on safe household cleaning product use for updated recommendations on product handling and storage.