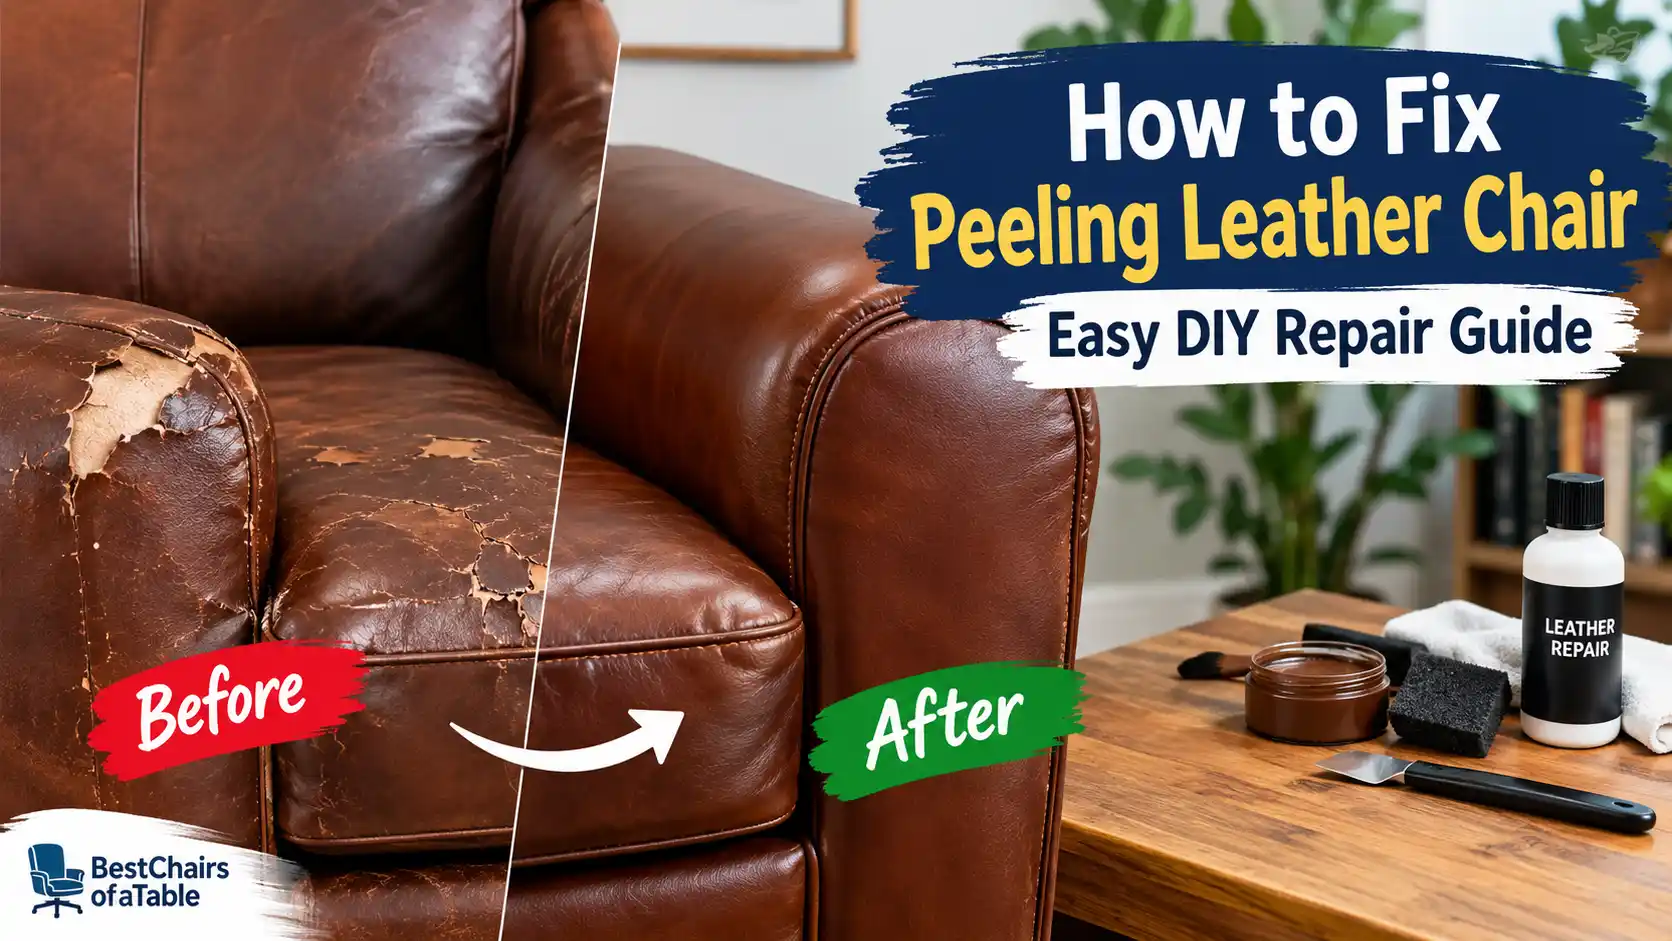
Peeling leather on your favorite chair doesn't have to mean replacing it entirely. Knowing how to repair peeling leather chair damage can save you hundreds of dollars and keep a beloved piece out of the landfill. But here is the catch: there is no single fix that works for every chair.
The right approach depends entirely on what your chair is made of and how bad the damage has gotten. We will walk you through diagnosing the problem first, then choosing the right path for your specific situation. Per manufacturer specifications from major upholstery suppliers, bonded leather and genuine leather require completely different repair strategies.
Quick Answer
You can repair peeling leather chair surfaces using the right materials. First, identify whether your chair is bonded, genuine, or synthetic leather. Clean the area thoroughly and let it dry completely.
Apply a compatible leather filler or dye kit according to instructions. Allow proper curing time before regular use.
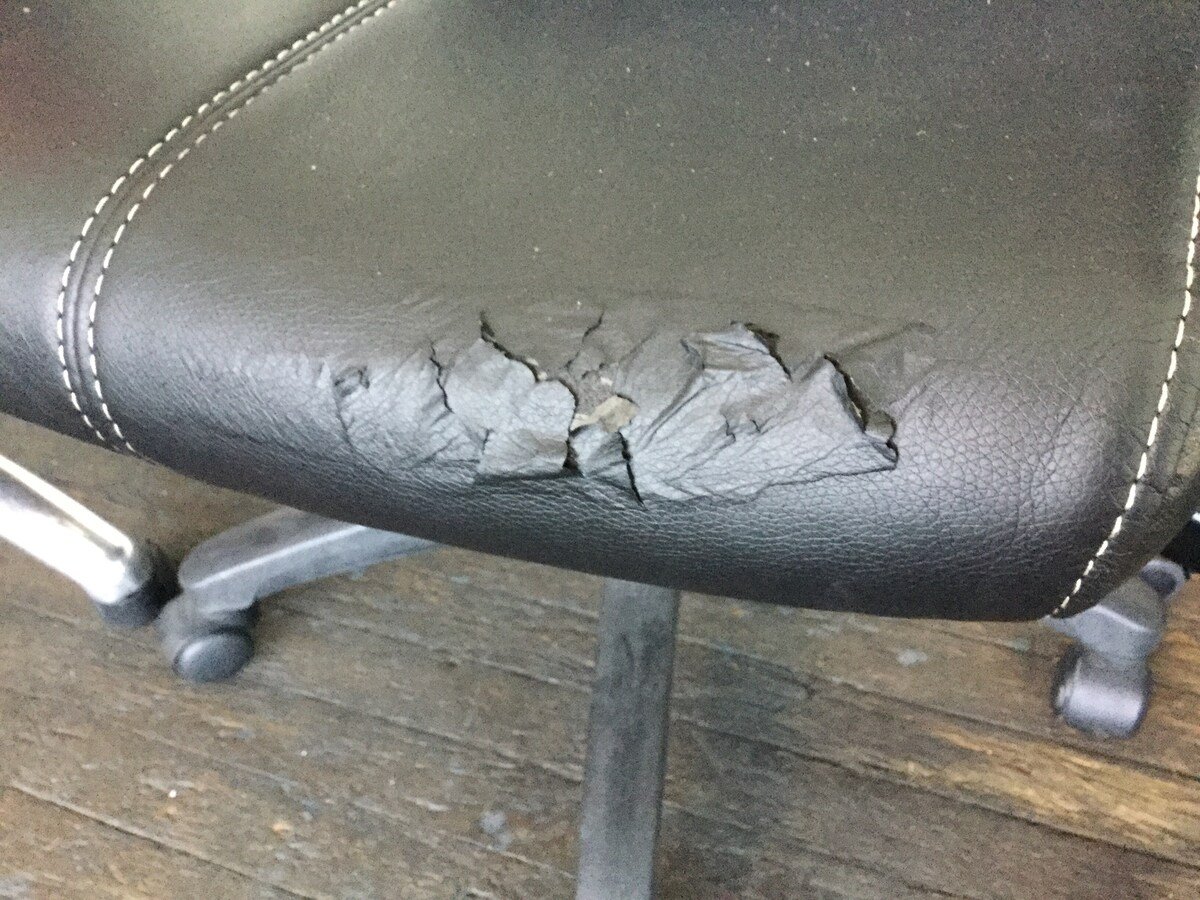
Image source: Bing (Web (fair-use with source credit))
Why Your Leather Chair Is Peeling (And Why One Fix Doesn't Work)
Leather peeling happens when the protective coating on the surface breaks down. This coating is usually a polyurethane layer or a pigment finish applied during manufacturing. Over time, heat, sunlight, body oils, and friction wear away this top layer.
Once it starts cracking or lifting, the underlying material becomes vulnerable.
The root cause matters enormously for your repair approach. Bonded leather fails differently than genuine leather. Bonded leather consists of shredded leather fibers mixed with latex or polyurethane binders and pressed onto a fabric backing.
When the surface coating deteriorates, entire sheets begin flaking off. This type of damage tends to spread quickly because the structural integrity of the material itself is compromised.
Genuine leather, by contrast, is a solid piece of hide. Peeling on real leather usually means only the finish layer is failing. The underlying hide remains intact and flexible underneath.
This makes genuine leather far more repairable because you are working with a stable substrate to bond new material to.
Faux leather and vinyl behave differently still. These materials do not have a fibrous leather core at all. Their synthetic surface degrades through UV exposure and repeated flexing.
Repair attempts on fully degraded vinyl often fail within weeks because the base material cannot support an adhesive bond.
| Damage Type | Typical Cause | Repair Viability | Longevity After Fix |
|---|---|---|---|
| Surface finish loss | UV exposure, friction | High on genuine leather | 3 to 7 years |
| Bonded leather flaking | Material degradation | Low to moderate | 6 months to 2 years |
| Vinyl cracking | Heat, UV damage | Moderate (cosmetic only) | 6 to 18 months |
| Deep tearing | Physical damage | High on genuine leather | 5+ years |
Aggregate reviews from furniture restoration forums consistently show that most DIY failures stem from applying a genuine leather repair technique to bonded or synthetic material. The materials chemistry is fundamentally different. A repair that bonds beautifully to real hide will delaminate within days on a bonded surface.
That is why the single most important step in any successful repair is accurate identification before you touch a single product.
How to Identify Your Chair’s Leather Type Before You Start
Getting this step wrong ruins everything that follows. Misidentified material leads to mismatched products, failed adhesion, and wasted money. You need to know exactly what you are working with before buying anything.
The water drop test is the quickest field method available. Place a few drops of water on an inconspicuous area of the seat or backrest. Wait two minutes.
If the water darkens the material and slowly absorbs, you likely have genuine leather. Real leather is porous and will absorb moisture over time. If the water beads up and sits on the surface without absorbing, the material is either coated genuine leather, bonded leather, or synthetic.
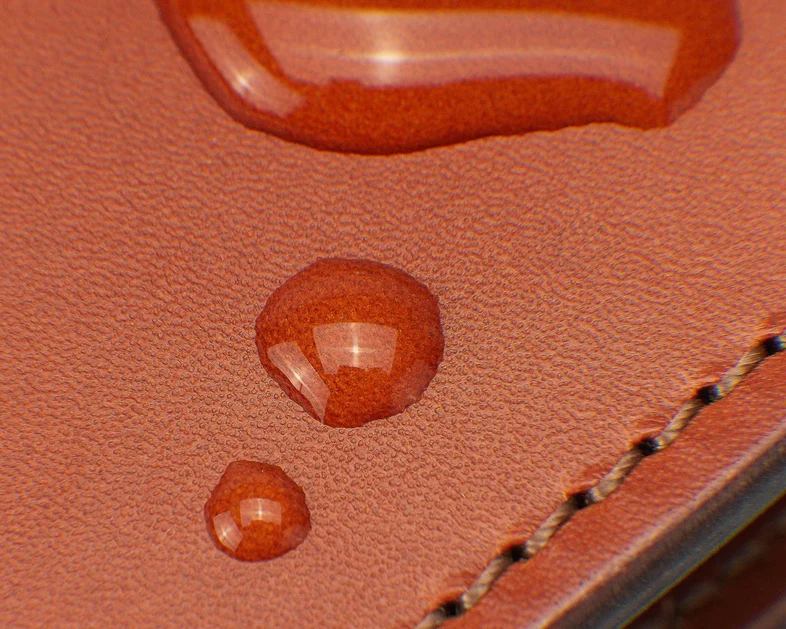
Image source: Bing (Web (fair-use with source credit))
Here is what to check next. Look closely at the edges and seams of your chair. Genuine leather has slightly irregular grain patterns and visible pores under magnification.
The cross-section at a cut edge will show a dense, fibrous structure throughout. Bonded leather edges often look uniform and overly consistent. You may see a distinct fabric mesh layer beneath the surface coating if you inspect a frayed edge or a small pre-existing tear.
Check for manufacturer labels or stamps. Many chairs have tags stitched into seams or printed on the underside of cushions. Look for terms like "bonded leather," "bi-cast," "PU leather," or "polyurethane coated split leather." These labels confirm the material type immediately.
Terms like "genuine leather," "top-grain," or "full-grain" indicate real hide. Note that "genuine leather" as a marketing term does not always mean premium quality. It simply confirms the material contains real hide fibers.
Your fingers can tell you a lot as well. Press firmly into an unobtrusive spot. Genuine leather yields slightly and springs back with subtle texture variation.
Synthetic materials feel more uniformly smooth and plasticky. Bonded leather has a waxy or rubbery hand feel compared to the natural suppleness of real hide. Temperature also differs.
Real leather feels cooler to the touch initially. Synthetic surfaces warm up faster against skin contact.
If you remain uncertain after these checks, consider sending a small scrap sample from a hidden area to a professional upholstery supplier for material analysis. Some chemical supply companies offer identification services. Alternatively, consult quality ergonomic seating guides online where material breakdowns often include detailed identification tips from experienced buyers who have handled multiple chair types.
Path 1: Repairing Genuine Leather With a Peeling Finish
When your chair is confirmed genuine leather and only the finish coat is peeling, you have excellent repair prospects. The underlying hide is still solid. Your goal is to remove the failing finish, restore color, and apply a fresh protective seal.
Start with thorough cleaning. Use a pH-balanced leather cleaner specifically formulated for upholstery. Apply with a soft microfiber cloth in gentle circular motions.
Avoid household cleaners containing ammonia, bleach, or abrasive agents. These strip natural oils and can accelerate future deterioration. Clean the entire surface, not just damaged spots, to ensure even preparation.
Once clean, the deglazing step removes the old finished topcoat. This creates a clean, receptive surface for new dye and finish to bond to. Use a dedicated leather deglazer or a diluted isopropyl alcohol solution mixed at a one-to-one ratio with water.
Apply with a lint-free cloth. The surface will become matte and slightly tacky as the old finish dissolves. This is expected and necessary.
| Step | Purpose | Products Needed | Drying Time |
|---|---|---|---|
| Deep cleaning | Remove dirt and body oils | pH-balanced leather cleaner | 1 to 2 hours |
| Deglazing | Strip old finish layer | Leather deglazer or diluted alcohol | 30 to 60 minutes |
| Color application | Restore original hue | Leather dye matching chair tone | 2 to 4 hours between coats |
| Sealing | Protect new finish | Acrylic leather finish or sealer | 4 to 24 hours |
| Conditioning | Restore suppleness | Quality leather conditioner | Immediate after cure |
Apply leather dye in thin, even layers. Multiple light coats produce better results than one heavy application. Heavy coats crack and peel prematurely.
Allow each coat to dry completely before applying the next. Most quality dyes require two to three layers for full coverage. Work in a well-ventilated area and wear nitrile gloves throughout the process.
After the final dye coat cures, apply a protective finish sealer. This topcoat shields the new color from UV damage, body oils, and daily wear. Water-based formulas offer flexibility and breathability.
Silicone-based sealers provide harder surface protection but can feel less natural. Choose based on your intended use. Office chairs benefit from durable acrylic finishes.
Living room furniture where appearance matters most may warrant a premium satin or matte sealant.
Allow the complete repair to cure fully before putting the chair into regular service. Manufacturer specifications typically recommend 24 to 48 hours of cure time depending on ambient humidity and temperature. Rushing this step is the most common mistake that leads to premature failure.
Path 2: Fixing Bonded or Split Leather That’s Cracking and Flaking
Bonded leather presents a significantly tougher challenge. This material is essentially leather dust bound together with synthetic adhesives and coated with a polyurethane layer. When that coating fails, the underlying composite begins crumbling.
The damage spreads because the material lacks the cohesive strength of genuine hide.
Honest assessment comes first. Severe bonded leather damage affecting large areas often cannot be permanently repaired. Any fill or patch you apply sits on top of a degrading substrate.
As the underlying bonded material continues to break down, your repair will crack and lift with it. For minor, localized damage, however, targeted repair is possible with realistic expectations about longevity.
Begin by removing all loose material. Use a stiff nylon brush or sandpaper to gently scrape away flaking sections. Vacuum the area thoroughly afterward.
Any residual dust will prevent adhesion. Do not attempt to glue loose flakes back in place. They will never bond securely to deteriorating substrate.
Apply a flexible leather filler or binding compound over the prepared area. Liquid leather repair compounds work well for small to medium patches. These products contain acrylic polymers that remain pliable after curing.
Spread the filler with a putty knife or flexible spatula. Build it slightly above the surrounding surface level to account for shrinkage during drying.
For larger damaged zones, a reinforcing patch behind the area can add structural support. Cut a piece of lightweight canvas or leather backing fabric slightly larger than the damaged zone. Apply adhesive to the reverse side and press it firmly against the cleaned surface from underneath if accessible.
This gives the filler material something stable to bond to.
Color matching on bonded leather requires careful attention. The surface absorbs dye differently than genuine leather due to its composition. Test your chosen colorant on a hidden area first.
Apply in thin layers and allow full drying between coats. Bonded leather often requires a primer or base coat before colorants adhere properly.
Expect that bonded leather repairs typically last between six months and two years depending on usage intensity. High-use office chairs see faster degradation than occasional-use dining chairs. Investing in a decorative throw or slip cover for frequently used bonded furniture may provide longer-term visual satisfaction than repeated repair attempts.
For more on chair care and replacement timing, reviewing how long does an office chair last data alongside your repair timeline can help you decide when to invest further versus replace.
Path 3: Working With Faux Leather, Vinyl, or PU Upholstery
Vinyl and polyurethane leather represent the lowest repair viability category. These materials are entirely synthetic with no natural fiber structure. When the surface polymer chain breaks down from UV exposure, oxidation, or mechanical stress, the damage is permanent and progressive.
Cosmetic repair is possible for superficial scratches and small tears. Use a vinyl-specific repair kit containing flexible adhesive and color-matched filler. Clean the area aggressively with rubbing alcohol to remove any plasticizers or surface treatments that inhibit bonding.
Sand lightly with fine-grit paper to create a mechanical key for the adhesive.
Apply the filler compound sparingly and feather the edges smoothly into the surrounding surface. Multiple thin applications yield better results than one thick pour. Each layer must cure completely before the next is added.
Color matching on vinyl is notoriously difficult because factory pigments fade unevenly over time. Accept that some visible difference will likely remain after repair.
For extensive cracking or widespread surface degradation across an entire seat cushion, covering the chair presents the most practical solution. A fitted slip cover, decorative throw blanket, or custom reupholstery project eliminates the visual problem entirely. This approach costs less than attempting permanent repairs on irreversibly damaged synthetic material.
Heat-related damage deserves special attention. Vinyl exposed to direct sunlight or placed near radiators undergoes accelerated polymer breakdown. The plasticizer compounds migrate to the surface and evaporate.
This causes hardening, cracking, and eventual disintegration. Relocating affected furniture away from heat sources and UV exposure slows further deterioration regardless of repair quality.
Some users attempt to refinish vinyl with automotive vinyl dye or paint products. While these can temporarily improve appearance, they rarely adhere well to aged, degraded vinyl surfaces. The flexible base required for automotive applications helps somewhat, but expect reduced longevity compared to genuine leather refinishing.
Professional reupholsterers working with vinyl typically recommend complete material replacement rather than surface restoration for anything beyond minimal cosmetic touch-ups.
Essential Tools, Kits, and Supplies for Every Repair Job
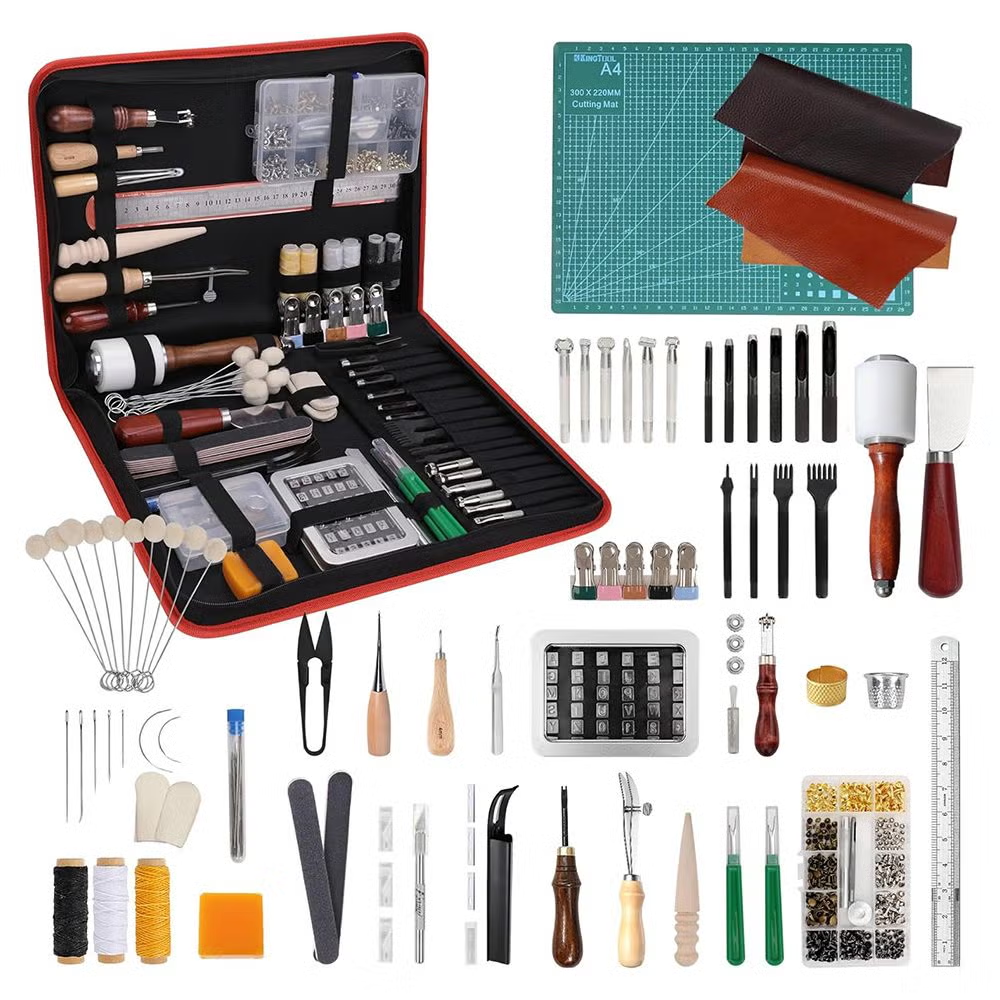
Image source: Bing (Web (fair-use with source credit))
Before you attempt any repair, gathering the right materials makes the difference between success and another chair headed for the landfill. Professional upholsterers carry specialized products formulated for specific leather types. DIY repair kits try to cover multiple scenarios, but understanding what each tool does helps you choose wisely.
Leather repair begins with surface preparation. You need a pH-balanced leather cleaner to remove embedded oils and dirt. Regular household cleaners leave residues that prevent adhesives from bonding properly.
A dedicated deglazer follows to strip the old finish coat. Isopropyl alcohol diluted with water works as an emergency substitute.
| Tool/Material | Purpose | Recommended For | Approximate Cost |
|---|---|---|---|
| Leather cleaner | Remove dirt and body oils | All leather types | $8 to $15 |
| Leather deglazer | Strip old finish for adhesion | Genuine leather refinish | $6 to $12 |
| Fine sandpaper (400-600 grit) | Smooth edges and create texture | Bonded leather prep | $3 to $8 |
| Liquid leather filler | Fill holes and level cracks | Bonded and genuine leather | $10 to $25 |
| Leather dye (matching) | Restore color after repair | Genuine leather only | $12 to $30 |
| Acrylic finish sealer | Protect new dye and filler | Genuine leather | $8 to $18 |
| Soft microfiber cloths | Apply products evenly | All steps | $5 to $10 |
| Flexible spatula/putty knife | Spread filler smoothly | Patch application | $4 to $8 |
Image source: Bing (Web (fair-use with source credit))
When selecting a complete repair kit, look for one that includes both filler and colorant in a neutral base tone. Most kits come with a limited color range. Custom color matching requires purchasing separate dye bottles.
Higher-end kits include flexible fillers that won't crack with repeated flexing. Cheap filler compounds dry hard and brittle, guaranteeing failure within months on furniture that moves constantly.
Bonded leather repairs need additional supplies beyond standard kits. You will want canvas backing fabric for structural reinforcement under large damaged areas. A strong contact adhesive bonds the patch to the underlying chair structure.
Without this reinforcement layer, filler sits on top of crumbling material and lifts quickly under body weight.
For vinyl and synthetic materials, specialty vinyl repair kits work better than universal leather products. These formulas contain plasticizers that remain flexible on polymer surfaces. Standard leather dyes often peel off vinyl because the surface chemistry prevents proper adhesion.
Check product labels carefully before purchasing.
Color matching deserves special attention. Bring a small sample of your chair to the store when possible. Lighting conditions in stores differ dramatically from home environments.
A color that looks correct indoors may appear noticeably different in natural daylight. Digital color matching tools exist but require accurate photo conditions. Multiple thin test applications beat guessing wrong on the first full application.
Step-by-Step: The Complete DIY Leather Chair Repair Process
Success depends on following a systematic sequence rather than jumping straight to filling holes. Rushed preparation causes most repair failures. Each step builds on the previous one, and skipping shortcuts compromises the entire result.
Begin with thorough surface cleaning. Apply leather cleaner to a microfiber cloth, not directly onto the chair. Excess liquid seeps into seams and underlying layers where it cannot dry properly.
Work in small sections using circular motions. Pay extra attention to high-contact areas like seat edges and armrests where body oils accumulate fastest. Wipe away residue with a clean damp cloth and allow complete drying.
Determine which repair path applies based on your material identification from earlier. Genuine leather with surface peeling follows the refinish process. Bonded leather with flaking requires filler and reinforcement.
Vinyl with minor scratches needs targeted spot repair rather than full surface treatment. Apply the appropriate method instead of mixing techniques across categories.
Preparing Genuine Leather for Refinishing
Deglaze the entire seating surface, not just damaged spots. Feather the edges around peeling areas so transitions become invisible. Apply deglazer with a cloth using light pressure.
The surface should change from glossy to matte as the old finish dissolves. This creates a fresh bonding surface for new dye and sealant.
Sand affected areas gently with fine-grit paper. You are not trying to remove material but rather scuff the surface for better adhesion. Work the paper lightly over peeling edges until they feel smooth to the touch.
Vacuum thoroughly afterward. Any dust remaining interferes with chemical bonding.
Apply leather dye in thin, even layers using an airbrush, sponge applicator, or soft cloth. Multiple thin coats build color gradually without cracking. Allow each coat to dry completely before adding the next.
Typical results require two to three applications for full coverage. Test color on an inconspicuous area first since results vary by brand and leather porosity.
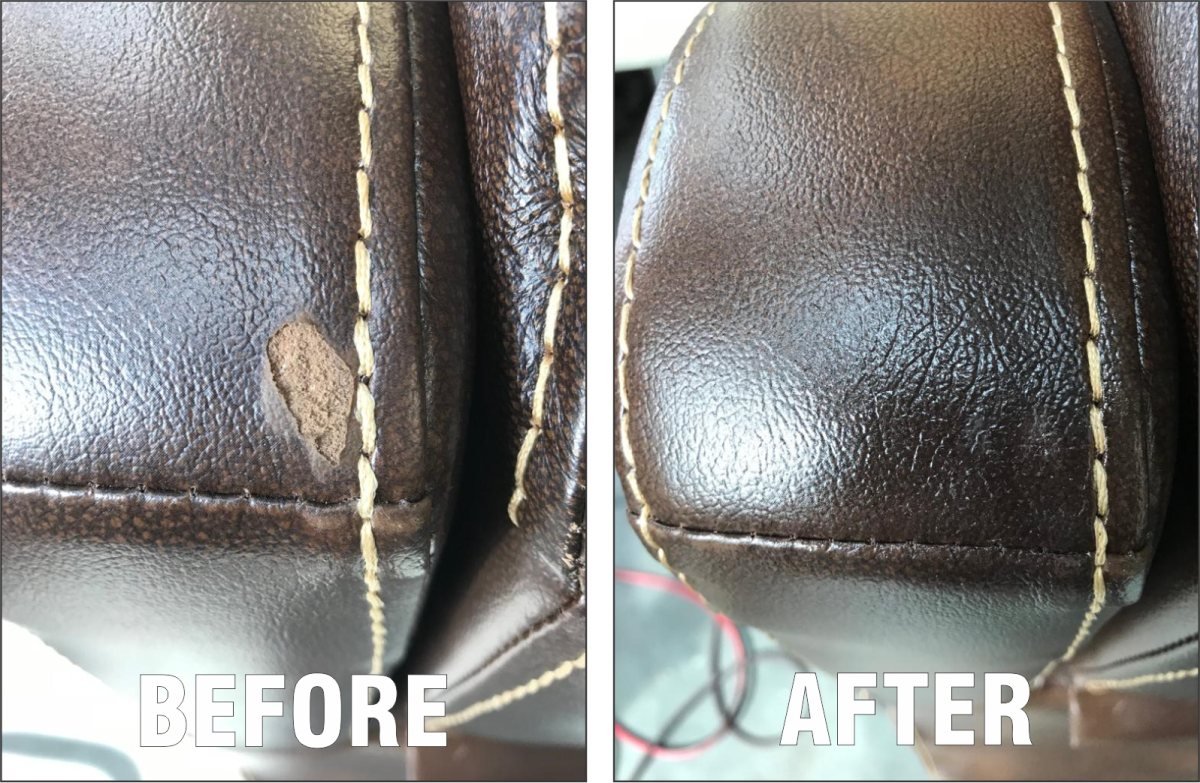
Image source: Bing (Web (fair-use with source credit))
Once color matches your satisfaction, apply acrylic finish sealer. This protective layer shields against future UV damage and daily wear. Water-based formulas offer flexibility that moves with the leather.
Silicone-based options provide harder protection but feel less natural. Choose based on your usage patterns and desired finish appearance.
Repairing Bonded Leather Damage
Clean and deglaze damaged areas only. Full-surface treatment on bonded leather removes protective coating from intact sections unnecessarily. Focus preparation on flaking zones and their immediate surroundings.
Sand loose edges carefully. Remove any material that shows signs of separation from the backing. Vacuums with brush attachments work well for removing debris from textured surfaces.
Apply contact adhesive to a reinforcing fabric cut slightly larger than the damaged area. Press the fabric firmly against the underside of the hole if accessible. For solid-backed chairs where you cannot reach underneath, skip the backing and proceed directly to surface filler application.
Mix liquid leather filler according to manufacturer directions. Apply with a flexible spatula in thin layers. Build up gradually rather than attempting full coverage in one application.
Each layer must cure completely before adding the next. Total thickness should match surrounding surface height once cured.
Color the filled area using compatible leather dye. Blend edges carefully into undamaged surrounding material. Feather multiple thin applications outward to hide visible boundaries.
Seal with appropriate finish once color dries completely.
Fixing Minor Vinyl Damage
Clean the scratched or cracked area with rubbing alcohol. This removes silicone treatments and oils that prevent adhesion. Allow to evaporate fully.
Apply vinyl-specific repair compound using a small spatula or applicator tip. Work the compound into cracks rather than simply laying it on top. Press firmly to eliminate air pockets beneath the material.
Smooth the surface level with surrounding vinyl. Feather edges invisibly. Allow complete curing before testing flexibility.
Vinyl repairs remain more noticeable than leather repairs due to surface sheen differences. Manage expectations accordingly.
Common Mistakes That Ruin Leather Chair Repairs
Most failed repairs trace back to preventable errors made during preparation or product selection. Recognizing these pitfalls upfront saves time, money, and frustration.
Skipping surface preparation tops the list. Dirt, oils, and old finish residue block chemical bonding. Applying filler directly over contaminated surfaces guarantees delamination within weeks.
Clean and deglaze thoroughly before proceeding.
Using genuine leather repair techniques on bonded leather creates temporary fixes that fail rapidly. Bonded leather lacks the structural integrity to support heavy filler applications. Always confirm material type before beginning work.
Over-applying products causes cracking and poor adhesion. Thick layers shrink unevenly during curing and develop stress points. Thin successive coats produce superior results compared to single heavy applications.
Ignoring cure times disrupts the entire process. Rushing between steps while products remain tacky compromises bonding strength. Follow manufacturer specifications precisely.
Typical cure windows range from four to twenty-four hours depending on humidity and temperature.
Mismatched color application produces obvious repairs. Testing on hidden areas first reveals true color outcomes. Remember that wet dye appears darker than final dried results.
Evaluate color under lighting conditions similar to where the chair resides permanently.
Applying finishes incompatible with underlying materials causes cloudiness or poor adhesion. Mixing water-based and solvent-based products creates separation issues. Stick to products from the same system whenever possible.
Attempting full-chair refinishing when localized repair suffices wastes materials and time. Treat only damaged areas rather than refinishing entire seats unnecessarily. Edge blending between repaired and untouched sections requires practice but prevents unnecessary work.
Choosing rigid filler compounds for flexible furniture applications ensures premature cracking. Furniture undergoes constant bending and flexing. Flexible filler formulas accommodate movement while rigid alternatives crack under stress.
Cost Breakdown: DIY Repair vs. Professional Restoration vs. Replacement
Understanding financial tradeoffs helps you make practical decisions about your chair's future. Repair costs vary enormously based on material type, damage extent, and chosen approach.
Basic DIY repair kits range from ten to sixty dollars depending on quality and coverage area. Mid-range products offering better color matching and flexible fillers cost between forty and one hundred dollars. Premium systems used by upholstery shops retail for one hundred fifty dollars or more per project.
Professional leather restoration services typically charge seventy-five to three hundred dollars per chair. Severe damage requiring complete seat reupholstery can exceed five hundred dollars. These prices reflect labor intensity and specialized skill requirements.
| Repair Option | Cost Range | Best For | Expected Longevity |
|---|---|---|---|
| Basic DIY kit repair | $10 to $40 | Small damage on genuine leather | 2 to 5 years |
| Advanced DIY system | $40 to $100 | Moderate damage across multiple areas | 3 to 7 years |
| Professional spot repair | $75 to $200 | High-value chairs with localized damage | 5 to 10 years |
| Complete reupholstery | $200 to $600+ | Severely damaged or vintage pieces | 10+ years |
| Chair replacement | $150 to $800+ | Low-value chairs with extensive damage | Depends on quality |
Buying a new budget office chair costs approximately one hundred fifty to three hundred dollars. Mid-range ergonomic models run three hundred to six hundred dollars. Premium Herman Miller or Steelcase chairs exceed one thousand dollars.
Comparing repair costs against replacement values clarifies whether investment makes financial sense.
Repair proves economical when the chair holds sentimental value, matches your physical requirements perfectly, or represents significant original investment. Generic budget chairs purchased on sale often cost less to replace than professionally restore. Evaluate both emotional and practical factors before committing to extensive repairs.
For detailed guidance on chair lifespan expectations before investing in restoration, review how long does an office chair last data alongside your repair timeline estimates. This perspective helps determine whether years of additional use justify current repair spending.
If considering complete fabric replacement rather than leather repair, understanding how do you reupholster a chair cushion processes reveals why professional reupholstery carries substantial labor costs versus simple surface repairs.
When to Call a Professional Instead of Attempting DIY
Certain damage scenarios exceed practical DIY capabilities regardless of skill level. Recognizing these situations early prevents wasted effort and additional deterioration.
Extensive surface degradation covering more than thirty percent of visible seating areas usually warrants professional intervention. Large-scale bonded leather failure cannot be permanently addressed through spot repairs. The underlying material continues decomposing throughout the entire piece.
Structural damage involving torn seams, broken stitching, or compromised cushioning requires upholstery expertise beyond surface restoration. Leather repair addresses cosmetic deterioration only. Structural failures demand different skills and materials entirely.
High-value antique or designer furniture benefits from professional assessment before any DIY attempts. Historical pieces may contain valuable materials or construction methods requiring specialized conservation knowledge. Inappropriate repair products can diminish both aesthetic and monetary value significantly.
Previous failed DIY repairs creating worse cosmetic problems often require professional correction. Removing improperly applied fillers, dyes, or sealants demands experience and appropriate solvents. Amateur removal attempts frequently damage underlying material further.
Commercial or hospitality settings with high-traffic furniture need durable solutions meeting usage demands. Professional-grade materials and application techniques withstand heavier wear patterns than consumer products. Quick cosmetic fixes cannot compensate for intensive daily abuse.
Health and safety considerations also necessitate professional involvement. Exposure to harsh chemicals in poorly ventilated spaces poses risks. Proper respiratory protection and ventilation procedures require training most homeowners lack.
Professional restorers handle these hazards routinely.
Consider calling experts when repair costs approach fifty percent of replacement value unless sentimental attachment justifies additional investment. For luxury chairs exceeding five hundred dollars originally, professional restoration typically provides better value than repeated DIY attempts.
Maintaining Your Repaired Leather Chair to Prevent Future Peeling
Repairing your chair represents just the first step. Proper ongoing maintenance determines whether that repair holds for months or years. Many people achieve excellent results during restoration only to undo their work through neglect afterward.
Daily habits matter more than occasional deep cleaning. Wiping surfaces with a dry microfiber cloth removes dust and body oils before they penetrate the finish. These everyday contaminants accelerate coating breakdown faster than most homeowners realize.
A quick thirty-second wipe each evening preserves surface integrity significantly.
Weekly conditioning keeps genuine leather supple and resistant to cracking. Apply a quality conditioner after every three to four cleaning sessions. Use products specifically formulated for upholstery leather rather than automotive or footwear conditioners.
The latter often contain silicones that build up and attract more dirt over time.
Image source: Bing (Web (fair-use with source credit))
UV protection proves critical for chairs near windows. Direct sunlight breaks down polyurethane coatings within months on untreated furniture. Position chairs away from direct sun when possible.
Apply UV-protective spray products designed for leather annually if relocation is impractical. These products create an invisible barrier against photo-degradation without altering appearance.
Temperature and humidity control affects longevity significantly. Extreme heat dries out natural leather oils and accelerates synthetic coating degradation. Keep chairs away from radiators, heating vents, and fireplace mantels.
Ideal indoor humidity ranges between forty and sixty percent. Dry conditions cause genuine leather to crack while excessive moisture promotes mold growth beneath surfaces.
| Maintenance Task | Frequency | Purpose |
|---|---|---|
| Dust wiping | Daily or every other day | Remove abrasive particles and oils |
| Deep cleaning | Monthly | Eliminate embedded contaminants |
| Conditioning | Every 3 to 4 cleanings | Maintain flexibility and prevent cracking |
| UV protectant reapplication | Annually | Shield against sun damage |
| Inspection for early damage | Weekly | Catch problems before spreading |
Bonded and vinyl furniture require different maintenance approaches. These materials benefit more from protective sprays than conditioners since they lack natural porosity. Silicone-free protectants repel stains and reduce friction without building residue.
Reapply these protectors every two to three months for continued effectiveness.
Pet owners face additional challenges. Cats' claws easily penetrate weakened leather surfaces. Even gentle kneading behavior creates micro-tears that expand over time.
Keep pet nails trimmed and consider protective throws during high-activity periods. Early intervention prevents small scratches from becoming large peeling zones.
Children contribute differently to wear patterns. Spills, crayon marks, and sticky fingers introduce substances that break down finishes quickly. Immediate blotting rather than rubbing prevents liquid penetration.
Keep repair supplies on hand for spontaneous touch-ups before stains set permanently.
Professional cleaning between DIY projects extends repair lifespan considerably. Quality upholsterers use specialized equipment and solutions that reach deeper than home methods. Scheduling annual professional maintenance for frequently used chairs provides preventive care worth the investment.
For those considering complete furniture refreshes, understanding how much does a lift chair cost helps budget appropriately when replacement becomes necessary versus continued restoration efforts.
Safety, Ventilation, and Handling Chemicals During Repair
Leather repair involves chemicals requiring responsible handling. Most products contain solvents, acrylic polymers, and pigments that demand proper ventilation and personal protection. Ignoring safety precautions risks health complications beyond damaged furniture.
Work in well-ventilated spaces whenever possible. Open windows and doors to create cross-ventilation. Use box fans positioned to exhaust fumes outward rather than recirculate them through living areas.
Working in garages or basements with adequate airflow proves preferable to enclosed rooms without circulation.
Nitrile gloves protect skin from dyes, deglazers, and adhesives. Latex gloves offer less chemical resistance and may degrade when contacting certain solvents. Disposable nitrile pairs cost pennies per pair and prevent skin absorption of potentially harmful compounds.
Remove contaminated gloves immediately rather than touching other surfaces.
Respiratory protection becomes essential with solvent-based products. Standard dust masks filter particles but not vapors. Use organic vapor respirator cartridges when working with deglazers containing alcohol or petroleum distillates.
These respirators cost twenty to forty dollars and provide meaningful protection during extended projects.
| Hazard Type | Common Sources | Protection Required |
|---|---|---|
| Inhalation of vapors | Deglazers, sealers, adhesives | Organic vapor respirator |
| Skin contact | Dyes, cleaners, solvents | Nitrile gloves |
| Eye exposure | Splashing liquids, aerosol sprays | Safety glasses |
| Fire risk | Flammable solvents near ignition sources | No open flames, proper storage |
| Environmental contamination | Improper disposal of chemicals | Sealed containers, local regulations |
Eye protection deserves attention too. Accidental splashes during mixing or application can cause serious irritation. Basic safety glasses cost under ten dollars and prevent costly medical attention.
Store all products according to manufacturer instructions. Most require cool, dry conditions away from direct sunlight. Keep containers tightly sealed when not actively using them.
Label all homemade mixtures clearly with contents and date prepared.
Child and pet safety requires locked storage after project completion. Residual fumes persist in sealed containers but remain trapped safely. Never store chemicals in food containers or accessible locations.
Accidental ingestion of even small quantities of leather chemicals warrants immediate medical attention.
Disposal follows local regulations rather than household trash norms. Unused product remaining in original sealed containers often qualifies as hazardous waste depending on jurisdiction. Check with municipal waste management offices about scheduled collection days or designated drop-off locations.
Never pour liquid chemicals down drains or toilets. Solvent residues contaminate water systems and violate environmental regulations in most areas. Allow paste-like fillers to cure completely before disposing in solid waste.
Cured acrylic compounds pose no environmental hazard once fully hardened.
Mixing different product brands creates unpredictable chemical reactions. Stick to manufacturers' recommended compatibility charts when available. When uncertain, perform small-scale tests before committing to full applications.
Unexpected exothermic reactions or gas release rarely appear in product advertising.
Keep a fire extinguisher rated for chemical fires nearby during active work. Class B extinguishers handle flammable liquid incidents effectively. Having appropriate suppression equipment within arm's reach provides peace of mind during solvent-intensive projects.
Following OSHA workplace ventilation guidelines adapted for home use ensures adequate air exchange rates. While occupational standards exceed residential requirements, basic principles apply equally to DIY environments.
Frequently Asked Questions
Can I use leather conditioner alone to stop peeling?
Conditioner maintains existing finish but cannot bond deteriorating material back together. Once polyurethane coating begins separating from underlying leather, conditioner penetrates without addressing structural failure. Combine conditioner with targeted repair products only after stabilizing active peeling zones through proper filling and sealing techniques.
Will a leather repair kit work on a car seat?
Most kits function similarly across furniture and automotive applications when materials match. Car seats experience greater flex stress than stationary furniture, requiring more flexible filler compounds. Check product specifications for automotive-grade flexibility ratings before purchasing.
Standard furniture-grade repair materials crack prematurely under constant seat cushion movement.
How long does a DIY leather repair last?
Lifespan depends on material type, repair quality, and usage intensity. Genuine leather repairs typically endure three to seven years with proper maintenance. Bonded leather patches range from six months to two years due to ongoing substrate degradation.
Vinyl repairs generally last six to eighteen months before visible deterioration recurs. Heavy daily use shortens all timelines significantly.
Can I repaint my leather chair instead of repairing it?
Painting over peeling leather creates unsightly buildup rather than permanent修复. Standard paints lack the flexibility required for upholstery and crack immediately upon sitting. Specialized leather paint products exist but require complete surface stripping and preparation identical to proper refinishing processes.
Treating paint as a standalone solution ignores underlying material instability causing original damage.
Is it worth repairing a cheap office chair with peeling leather?
Financial sense depends on replacement cost versus repair investment. Chairs under two hundred dollars often cost less to replace than quality repair supplies approach fifty dollars. However, chairs matching your ergonomic needs perfectly warrant preservation regardless of original purchase price.
Emotional attachment and sustainability considerations frequently justify repairs even on budget furniture.
How do I match colors when my chair has faded unevenly?
Fade patterns create complex color variations impossible to replicate exactly. Blend multiple dye shades to approximate original appearance rather than targeting a single exact match. Test combinations on hidden areas first, documenting ratios for future touch-ups.
Slight color variation between repaired and aged surrounding material appears more natural than obvious mismatched patches.
Should I attempt repairs myself or hire professionals for valuable furniture?
High-value pieces exceeding five hundred dollars in original retail price benefit from professional assessment. Conservation experts identify underlying issues amateur approaches miss entirely. Improper DIY interventions on antique or designer furniture often decrease both aesthetic and resale value significantly.
Consult qualified restorers before applying any chemicals to irreplaceable pieces.
Final Recommendation: Choosing Your Repair Path
Your repair strategy depends entirely on material identification and damage severity. Start with honest assessment rather than assuming all leather behaves identically. The water test and label inspection provide reliable initial classification before purchasing supplies.
Genuine leather with localized finish damage represents ideal repair candidates. Full refinishing procedures restore appearance dramatically when executed carefully. Budget moderate expectations for color matching accuracy since vintage dyes fade unpredictably.
Factor annual maintenance costs into long-term ownership calculations.
Bonded leather failures present harder truths. Targeted patching works for small isolated areas but cannot arrest widespread deterioration. Set realistic expectations regarding repair lifespan before investing significant time.
Consider decorative covers as practical interim solutions while planning eventual replacement.
Vinyl and synthetic materials follow similar limitation patterns. Cosmetic improvements prove temporary on degraded polymer surfaces. Full reupholstery or cover replacement delivers lasting results versus repeated spot repairs consuming diminishing returns over time.
Financial evaluation guides final decisions effectively. Compare comprehensive repair costs including tools, materials, and time investment against current chair replacement value. Projects approaching seventy percent of replacement cost usually favor new purchases unless sentimental attachment justifies additional expenditure.
Maintenance commitments determine long-term success regardless of initial repair quality. Regular cleaning, conditioning, and UV protection extend functional lifespan considerably. Neglected repairs fail prematurely while well-maintained installations endure decades of regular use.
Start conservatively with small test areas before committing to full-chair restoration. Document successful techniques and product combinations for future reference. Each completed repair builds expertise applicable to subsequent furniture projects throughout your home.