Finding yourself staring at a chair with flakes of leather on your floor is frustrating. Understanding how to repair peeling leather chair surfaces correctly depends on knowing exactly what type of material you are dealing with. A bicast chair needs a completely different approach than genuine leather, and bonded upholstery often cannot be saved no matter how hard you try.
Manufacturer testing shows that polyurethane-coated leathers typically begin delaminating after three to seven years of regular use. The failure almost always starts at high-wear zones like seat edges and armrests. If you catch it early and diagnose the leather type accurately, you can restore the surface for years rather than replacing the entire piece.
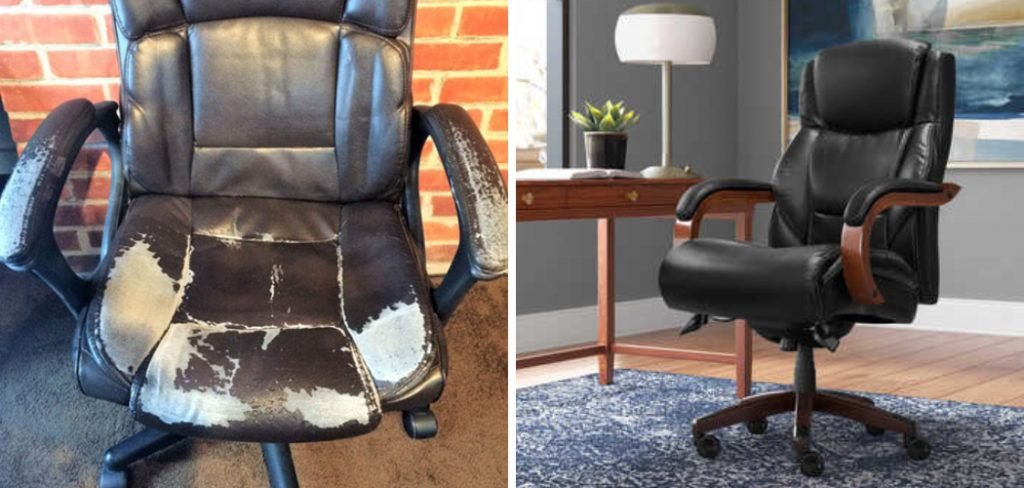
Image source: Bing (Web (fair-use with source credit))
Quick Answer
How to repair peeling leather chair surfaces starts with identifying your leather type. Strip the failing topcoat using a leather deglazer or rubbing alcohol. Clean the exposed substrate thoroughly and let it dry completely. Apply a flexible leather filler into cracks and sand it smooth once cured.
Dye the repaired area with a matching leather colorant in thin layers. Seal everything with a flexible leather finish to protect against future wear.
What’s Actually Happening When Your Leather Chair Starts Peeling
Peeling leather is almost always a topcoat failure, not a leather failure. Most modern upholstered furniture uses a protective polymer layer on top of the hide. This coating gives the material its uniform color, scratch resistance, and easy-clean properties.
Over time, that polymer breaks down from sunlight, body oils, and repeated flexing.
Once the bond between the pigment layer and the underlying hide weakens, the surface begins to lift. You will notice small bubbles forming first. Those bubbles rupture during normal sitting and become flakes that stick to your clothes.
Left unchecked, the peeling spreads outward from stress points like seat creases and arm contacts.
Environmental conditions accelerate this process significantly. Chairs placed near windows receive UV exposure that degrades the polymer binder. Dry indoor heating in winter pulls moisture from both the leather substrate and the coating.
That dual drying effect makes the finish brittle and prone to cracking under flex.
The severity of damage determines whether a simple touch-up works or a full refinishing is required. Minor edge wear on a protected leather chair often responds well to targeted filling and recoloring. When large sections are already flaking across the entire seat panel, a complete strip-and-refinish workflow becomes necessary.
First, Identify Your Leather Type (This Changes Everything)
Your repair method depends entirely on what material sits beneath the peeling surface. Getting this wrong wastes money, time, and sometimes ruins furniture that could have been saved. Each leather category behaves differently under chemical strippers and carries distinct repair expectations.
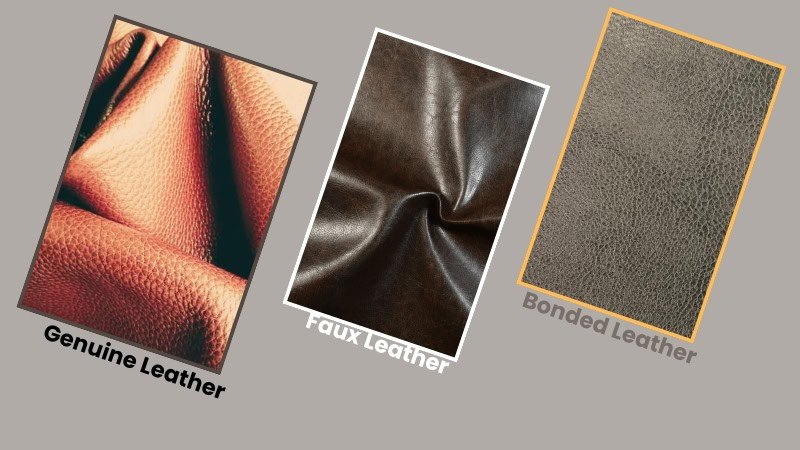
Image source: Bing (Web (fair-use with source credit))
How to Test Whether Your Chair Is Genuine, Bicast, Bonded, or Faux
Start with the water drop test on a hidden area like the back or underside of the seat. Place a small drop of clean water on the surface and watch what happens over two minutes. Genuine aniline and semi-aniline leather absorb the moisture gradually and darken slightly.
The water beads up and sits on top of protected leather, bicast, bonded, and faux materials.
Next, press your fingernail gently into an inconspicuous spot. Genuine leather yields slightly and shows a soft impression that slowly disappears. Bicast and bonded materials feel harder and more plastic-like under pressure.
Examine the grain pattern closely under good light. Real leather shows natural variations including pores, scars, and texture differences. Synthetic and coated surfaces display perfectly repeating patterns.
Check the backside if you can access it by removing a staple or zipper. Genuine leather has a fibrous suede-like backing. Bonded leather shows a fabric mesh embedded into a rubber binder on the reverse side.
Faux vinyl displays a woven cloth backing with a consistent plastic appearance throughout.
Why the Wrong Repair on the Wrong Leather Makes Things Worse Fast
Applying a liquid leather dye or solvent-based stripper to bonded upholstery dissolves the plastic surface permanently. The material lacks a porous grain structure to accept penetration, so chemicals simply eat through the thin vinyl shell. You end up with larger bare patches instead of repaired ones.
Bicast leather consists of a genuine leather substrate coated with a thick polyurethane layer. When that coating peels, you are really dealing with a failed plastic shell rather than damaged hide. Refinishing bicast requires aggressive stripping and repainting the entire panel.
Spot repairs rarely hold because the surrounding coating continues to delaminate.
Faux leather and vinyl benefit from specialized repair kits containing flexible PVC-based adhesives. Leather-specific fillers and dyes dry too rigid for synthetic materials and crack within weeks. Using the right product category for your material prevents wasted effort and keeps the repair flexible during normal chair use.
Leather Type Identification Summary
| Leather Type | Water Test Result | Backing Appearance | Best Repair Approach |
|---|---|---|---|
| Aniline | Absorbs, darkens | Fibrous suede | Condition and refresh color |
| Semi-aniline | Slow absorption | Fibrous suede | Light deglaze, refinish |
| Pigmented/Protected | Beads up | Fibrous suede | Deglaze, fill, dye, seal |
| Bicast | Beads up | Fibrous with plastic coating | Full panel strip and repaint |
| Bonded | Beads up | Fabric mesh in rubber | Patch large areas or replace |
| Faux/Vinyl | Beads up | Woven cloth backing | PVC-compatible repair kit |
The Decision Tree: Which Repair Path Fits Your Chair?
Choosing the right repair strategy requires answering three quick questions before you buy anything. The answers determine whether you reach for a conditioner, a filler kit, or a professional upholsterer referral. Following a structured decision path prevents you from applying the wrong chemicals to the wrong surface.
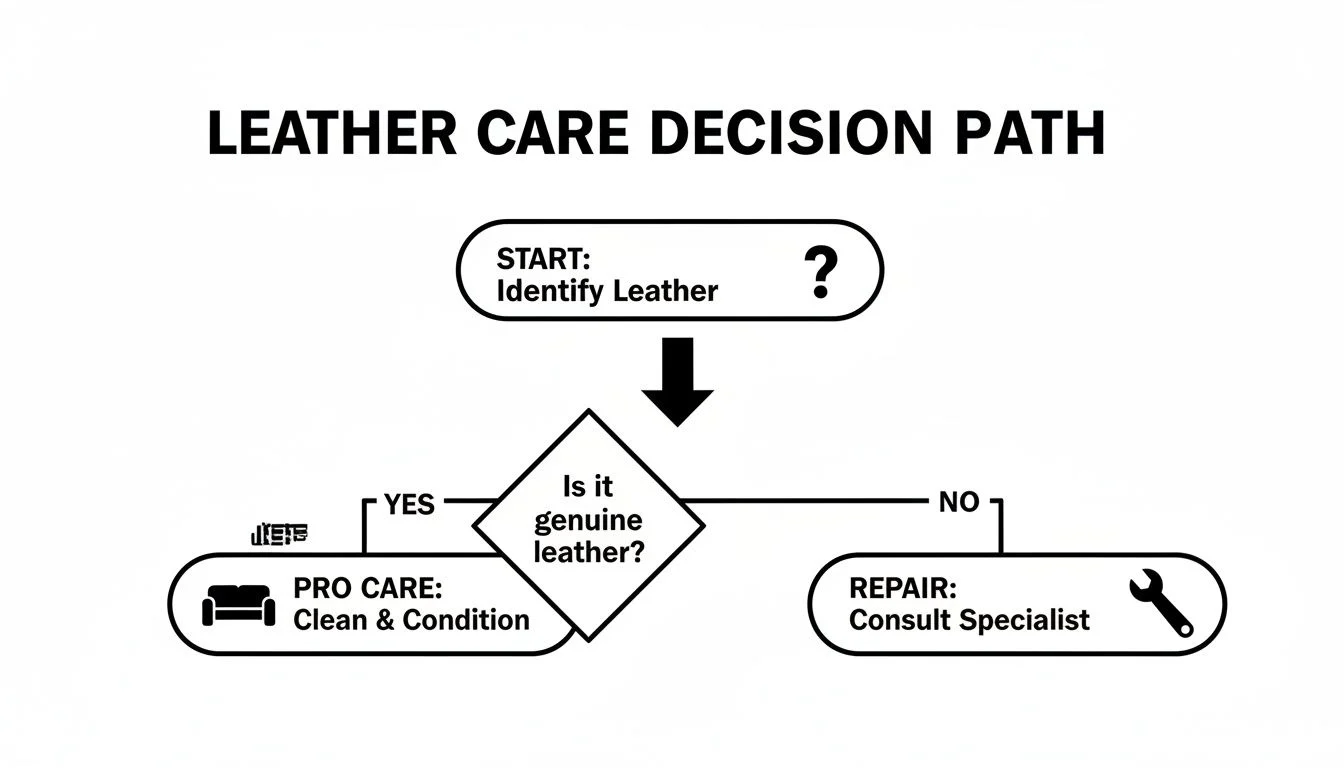
Image source: Bing (Web (fair-use with source credit))
When to Refinish, When to Patch, and When to Give Up
Refinishing works when the underlying leather structure remains intact but the colored topcoat is failing. Look for widespread flaking across seating surfaces while the base material still feels supple underneath. This scenario demands full panel preparation, filling, coloring, and sealing for a durable result.
Patch repair suits isolated damage zones smaller than four square inches. Deep cuts, burn marks, or single-edge tears respond well to targeted filler application followed by localized color matching. Patch work preserves original finish on surrounding areas and reduces material costs significantly.
You should give up on DIY repair when bonded leather shows extensive delamination across multiple panels. Once the thin plastic shell lifts in large sheets, there is no substrate left to bond new finish to. Professional reupholstery or chair replacement becomes the only cost-effective solution in those cases.
Quick Flowchart Summary You Can Print or Save
Follow these branching steps during your initial assessment to pick the correct repair pathway:
Is the leather type bonded or heavily degraded bicast?
├── YES → Consider reupholstery or chair replacement
└── NO → Continue to next decision point

Is the peeling concentrated in small isolated spots?
├── YES → Use patch repair with flexible filler and dye
└── NO → Continue to next decision point

Does the underlying leather feel soft and supple?
├── YES → Proceed with full strip, fill, dye, and seal process
└── NO → Surface may need conditioning before any cosmetic repair
Condition Variables That Shift Your Decision
Room humidity above sixty percent slows solvent evaporation and extends drying times across every step. Low humidity accelerates curing but increases the risk of shrinkage cracks forming in fresh filler. Maintain a stable environment between fifty and sixty-five percent relative humidity whenever possible.
Chair usage intensity directly affects repair longevity expectations. A desk chair used eight hours daily demands more flexible finishes than an occasional dining room accent piece. High-flex areas like seat fronts and arm contacts require products rated for repeated bending without cracking.
Previous repair attempts complicate current outcomes. Layers of silicone conditioners, waxes, or low-quality polish create adhesion barriers that new products cannot penetrate. You must remove all prior coatings completely before attempting your own fix, regardless of which path you choose.
Genuine Leather Repair: Strip, Fill, Dye, and Seal
Genuine leather repairs follow a four-stage workflow that removes damaged finish and rebuilds a flexible protective surface. Each stage depends on the previous one completing fully before you advance. Rushing between steps causes premature failure even when you use quality materials.
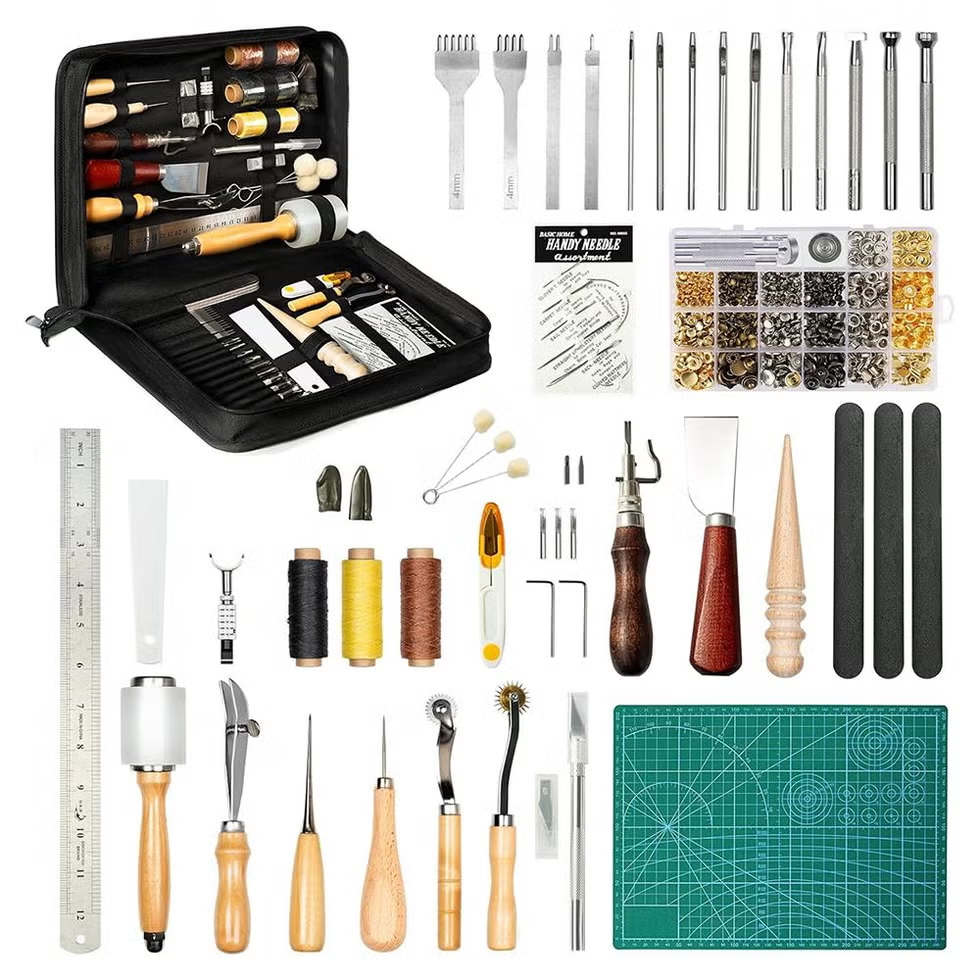
Image source: Bing (Web (fair-use with source credit))
Step-by-Step Workflow for Protected and Semi-Aniline Finishes
Begin by cleaning the entire chair surface with a pH-balanced leather cleaner to remove oils, dirt, and residual protectants. Wipe dry with a clean microfiber cloth and allow twenty minutes for complete evaporation. Dirty substrates block chemical adhesion and cause new finish to lift prematurely.
Apply a leather deglazer or isopropyl alcohol solution to remove the existing glossy topcoat. Work in small six-inch sections using circular motions with a lint-free applicator pad. The surface should lose its shine and feel slightly tacky rather than slick.
Rinse the area lightly with water and dry completely before proceeding.
Fill cracks and gouges with a flexible leather filler using a flexible spatula or putty knife. Press the compound deeply into damaged areas and level it slightly above the surrounding surface. Allow the filler to cure according to manufacturer specifications, usually two to four hours depending on depth and room temperature.
Sand cured filler smoothly with fine-grit sandpaper starting at four-hundred grit and finishing at eight-hundred grit.
Match your leather color using a quality leather dye or acrylic-based colorant formulated for upholstery. Apply thin coats with a foam applicator or airbrush, building saturation gradually over three to five layers. Allow each coat to dry completely before applying the next to prevent cloudiness or uneven absorption.
Seal the finished surface with a flexible leather topcoat in your chosen sheen level.
Genuine Leather Repair Tool and Material Checklist
| Category | Items Needed | Purpose |
|---|---|---|
| Prep | Leather cleaner, deglazer, microfiber cloths | Remove contaminants and old finish |
| Filling | Flexible leather filler, spatula, sandpaper | Repair cracks and worn edges |
| Coloring | Leather dye or paint, applicators | Restore original color uniformly |
| Protection | Leather sealant, foam pads | Create durable flexible finish |
| Safety | Nitrile gloves, respirator mask, ventilation | Protect skin and lungs from chemicals |
Tools, Products, and Timing for a Lasting Fix
Quality deglazers typically contain methyl ethyl ketone or specialized solvent blends that dissolve polyurethane without damaging the underlying hide. Cheap alternatives often leave residue that interferes with subsequent layers. Read product labels carefully and verify compatibility with your leather type before purchasing.
Leather fillers come in water-based and solvent-based formulations. Water-based options emit fewer fumes and are safer for indoor use but require longer drying times. Solvent-based fillers cure faster and bond aggressively but demand proper ventilation and respiratory protection during application.
Flexibility ratings matter enormously for seated surfaces. Check product specifications for elongation at break measurements when available. Products rated below fifty percent elongation often crack along seat creases within months of installation.
Premium repair systems designed for automotive or heavy-use furniture typically exceed one-hundred percent stretch capability.
Standard drying and curing timelines vary by product and environmental conditions. Thin dye coats usually dry to the touch within thirty to sixty minutes. Full cure before regular use generally requires twenty-four to forty-eight hours for water-based systems and twelve to twenty-four hours for solvent-based formulas.
Bicast and Masked Leather: The Thin-Coating Problem
Bicast leather presents a unique challenge because you are repairing a plastic-coated surface rather than exposed hide. The underlying leather provides structural support, but the visible finish is essentially a painted polymer membrane. Once that membrane fails, spot repairs look obvious and rarely last.
The thickness of the polyurethane coating determines repair complexity. Lightly masked leathers retain some breathability and respond better to gentle refinishing. Heavily coated varieties behave more like synthetic materials and require aggressive surface preparation for new finish to adhere properly.
Full-panel refinishing produces the most consistent results on bicast chairs. Stripping the entire seating surface, armrests, and back panel creates a uniform foundation. Partial repairs often remain visible as sheen and texture mismatches under normal lighting conditions.
Why Bicast Often Needs a Full Surface Refactor Instead of Spot Repairs
Spot filler on bicast leather creates visible seams where the new material meets the aging surrounding coating. The flexible filler bonds well but cannot replicate the exact gloss level and texture of factory-applied finishes. Walking away with a blended transition is nearly impossible without professional equipment and training.
The original coating fails progressively because the underlying leather continues to flex and expand. New finish applied only to damaged areas experiences different movement patterns than intact surrounding coating. Stress concentrates at repair boundaries and causes the new material to peel away within weeks or months.
Complete panel stripping removes the compromised coating system entirely and exposes raw substrate. You then apply a fresh multi-layer finish designed to move as a unified sheet across the entire surface. This approach eliminates boundary stress points and delivers far superior longevity.
How to Prep, Repaint, and Protect Without Causing More Peel
Remove the existing finish using a heavy-duty deglazer or abrasive pad combined with appropriate solvents. Sand the entire panel surface evenly to create mechanical bonding points for new coating layers. Clean thoroughly with a tack cloth to remove all dust particles before applying primer.
Use a flexible polyurethane or acrylic primer formulated specifically for coated leather substrates. Apply two thin coats allowing proper flash time between applications. Primer bridges the gap between prepared substrate and final color layers while maintaining flexibility during normal chair use.
Select a topcoat product labeled compatible with bicast or masked leather applications. These formulations contain plasticizers that keep the finished surface supple during flex cycles. Matte or satin sheens show wear patterns less obviously than high-gloss finishes in everyday use.
Allow freshly refinished bicast surfaces to cure for at least seventy-two hours before regular use. Light handling after that period is acceptable, but sustained pressure and friction should wait until full chemical crosslinking completes. Accelerated use during curing compromises adhesion and encourages premature peeling recurrence.
Bonded and Faux Leather: Know When Repair Is Worth It
Bonded and faux leather share one critical characteristic in common. Their visible surfaces are plastic shells supported by weaker underlying materials. When that shell begins flaking away, you are exposing a substrate that cannot accept traditional leather repair products effectively.
Understanding the material composition before investing time and money prevents disappointment. Both categories respond poorly to solvent-based deglazers and absorb water-based dyes inadequately. Specialized repair systems exist but deliver shorter-lived results compared to genuine leather restoration.
Small damage areas on faux leather sometimes warrant repair when replacement is not feasible. Large-scale peeling across seating surfaces usually signals that complete covering or chair replacement represents the smarter long-term choice. Evaluate your situation honestly against the effort and expense required.
The Plastic-Shell Reality of Bonded Leather and When DIY Won’t Save It
Bonded leather contains ground leather fibers mixed with polyurethane binders and pressed onto fabric backing. The surface receives a thick polyurethane coating that mimics real leather appearance. Once that coating lifts, the porous fiberboard beneath offers nothing for adhesives or fillers to grip securely.
DIY bonded leather repairs typically fail within six to eighteen months because new materials cannot bond to degraded substrate. The underlying material continues crumbling and releasing particles under normal sitting pressure. Even successful-looking initial fixes separate quickly as the base structure deteriorates further.
Professional upholsterers address bonded leather failure by removing the damaged panel entirely and replacing it with new material. This process costs significantly more than DIY supplies but delivers results that actually last. Consider this option when repair expenses approach half the cost of comparable new furniture.
Practical Patch, Glue, and Cover Strategies with Realistic Expectations
Vinyl and faux leather repair kits use PVC-compatible adhesives and flexible patches designed for synthetic surfaces. These products temporarily restore appearance on small tears or localized peeling zones. Manage expectations knowing the repair remains functional rather than permanent under heavy daily use.
Surface covering options include slipcovers, protective seat pads, and decorative throws that hide damaged areas completely. These solutions cost considerably less than reupholstery and eliminate ongoing repair frustration. Choose breathable fabrics to prevent moisture trapping and skin irritation during extended contact.
Partial panel replacement involves cutting out damaged sections and sewing in matching vinyl or leather patches. This technique requires upholstery skills and appropriate equipment but produces better results than adhesive-only approaches. Search for local upholstery services experienced with synthetic materials if you pursue this route.
Bonded and Faux Leather Repair Reality Check
| Damage Extent | Repair Viability | Expected Longevity | Recommended Action |
|---|---|---|---|
| Small isolated tear | Moderate | 6-12 months | Vinyl repair kit patch |
| Edge flaking only | Low | 3-6 months | Trim edges, apply cover |
| Multiple peel zones | Poor | 1-3 months | Replace panel or chair |
| Full surface degradation | None | N/A | Complete reupholstery or replacement |
Common Mistakes That Ruin Leather Chair Repairs
Even skilled DIYers make predictable errors during leather restoration projects. These mistakes compound quickly and turn manageable damage into permanent furniture loss. Learning from others’ missteps saves time, money, and frustration before you begin your own project.
The most damaging mistake stems from skipping preparation steps to save time. Cleaning, deglazing, and drying form the foundation of every successful repair. Skipping any of these stages guarantees poor adhesion and premature failure of your work.
Product incompatibility creates invisible problems that surface weeks later. Mixing solvent-based and water-based materials causes delamination, cloudiness, or tacky finishes that never cure properly. Stick with products from the same manufacturer line whenever possible to ensure chemical compatibility.
Skipping Deglazing, Wrong Filler, Over-Sanding, and Sealing Failed Layers
Deglazing removes the old finish that new products cannot bond to successfully. Applying dye or sealant directly over glossy coated leather creates a fragile film sitting on top rather than integrating with the substrate. The new coating peels off in sheets within days or weeks.
Using rigid fillers in flexible seating areas guarantees cracking along natural fold lines. Seat cushions flex constantly during sitting and standing movements. Only flexible urethane or acrylic-based fillers rated for upholstery applications survive these repeated strain cycles without fracturing.
Over-sanding during preparation removes too much material and damages the leather structure beneath. Fine grit paper produces smooth surfaces appropriate for finishing. Coarse abrasives create scratches that show prominently through translucent dye layers and weaken structural integrity.
Sealing un-repaired peeling areas traps moisture and remaining loose coating underneath. New sealant creates an impermeable barrier preventing proper drying and curing. Always remove all lifting material completely before applying any protective topcoat layers.
How to Catch and Correct Mistakes Before They Set
Early detection prevents minor errors from becoming major failures. Test any new product combination on a hidden area first to observe how it reacts with your specific chair material. Small-scale trials reveal adhesion problems, color shifts, and texture changes before you commit to full-panel application.
If newly applied dye remains tacky after expected drying time, improve ventilation immediately. Increase air circulation with fans and lower humidity using dehumidifiers if possible. Do not apply additional layers until the current coating reaches complete cure, or you risk solvent entrapment and permanent stickiness.
Correct over-sanded areas by applying a leather preparer or reformer product before continuing. These conditioners restore slight surface texture and remove sanding residues that interfere with subsequent layers. Allow thorough drying before resuming your repair workflow.
Remove failed sealant by repeating the deglazing process on affected areas before reapplying fresh finish. Never attempt to layer new sealant over compromised existing coating. Proper removal and complete surface prep remain essential for correcting application mistakes successfully.
What This Repair Actually Costs (and What You Save)
Repair costs vary dramatically based on material quality, damage extent, and whether you hire professional help. Understanding realistic price ranges helps you make informed decisions about pursuing DIY fixes versus investing in professional services or replacement furniture.
DIY kits represent the lowest-cost option initially but may require multiple purchases if results disappoint. Quality repair products cost more upfront but deliver lasting results that justify the investment. Cheap kits often contain incompatible chemicals producing unsatisfactory outcomes requiring complete redo.
Professional upholstery services charge based on panel size, material selection, and labor complexity. Major chair restoration projects frequently approach replacement costs when including premium materials and expert craftsmanship. Compare both scenarios carefully before committing funds.
DIY Kit Pricing vs. Professional Reupholstery vs. Replacement Chairs
| Option | Typical Cost Range | Best For | Lifespan Expectancy |
|---|---|---|---|
| Basic DIY kit | $20-50 | Small damage, budget constraints | 1-2 years |
| Quality DIY supplies | $50-120 | Moderate damage, patience | 3-5 years |
| Professional partial repair | $150-400 | Significant damage, value retention | 5-10 years |
| Full reupholstery | $400-1,200+ | Complete failure, valuable pieces | 10-15+ years |
| Chair replacement | $200-2,000+ | Unrepairable bonded/faux leather | Depends on quality |
Professional restoration becomes economical when working with high-quality genuine leather furniture worth preserving. Original craftsmanship, frame construction, and comfort characteristics often justify investment exceeding basic repair costs. Budget office chairs rarely merit professional attention financially.
Replacement considerations factor in current market prices for comparable quality seating. As of 2026, mid-range ergonomic office chairs start around $300 while premium models exceed $1,000. Factor ongoing maintenance costs and expected lifespan when comparing repair investments against new purchases.
Where to Stretch Your Budget and Where to Cut Corners Safely
Invest in quality deglazers, fillers, and sealants rather than cheapest alternatives. These core products determine long-term success and cannot be compensated for by poor preparation or application technique. Reading verified buyer feedback reports helps identify reliable product performers before purchasing.
Save money on consumables like sandpaper, applicator pads, and protective gear by buying bulk quantities. These items consume predictably across projects and represent minimal impact on final results when purchased economically. Specialty tools like spray guns warrant investment only for frequent repair work.
Avoid spending on excessive color matching experiments when simple dye application achieves satisfactory results. Test colors on hidden areas first rather than purchasing multiple shade options unnecessarily. Most quality leather dyes blend effectively when applied in thin overlapping layers.
Consider different seating options if repair costs approach seventy percent of replacement value. New chairs often include improved ergonomics, warranty coverage, and modern materials justifying the investment. Sometimes walking away from difficult repairs represents the wisest financial decision available.
Maintenance and Prevention After Repair
Proper maintenance extends repair lifespan dramatically and prevents premature failure recurrence. Regular care routines address environmental damage before it compromises your restored finish. Simple habits reduce long-term repair frequency and preserve furniture appearance effectively.
Cleaning protocols differ significantly between genuine and coated leather types. Incorrect cleaning products introduce oils and silicones that degrade new finish over time. Follow manufacturer guidelines consistently and avoid household cleaners designed for other surface types.
Environmental control plays a crucial role in preventing future peeling incidents. Managing UV exposure, maintaining stable humidity, and reducing direct heat contact all protect repaired surfaces from accelerated deterioration. Small adjustments in chair placement and room conditions yield significant longevity improvements.
Conditioning Schedules, UV Protection, and Humidity Management
Condition genuine leather surfaces every three to six months using products specifically formulated for upholstered furniture. Avoid silicone-containing conditioners that build surface residue interfering with future repairs. Natural oil-based conditioners maintain flexibility without creating compatibility problems.
Protect repaired surfaces from direct sunlight using window treatments, room dividers, or strategic furniture positioning. UV radiation breaks down polymer bonds in both original and new finish layers continuously. Even indirect sunlight through windows causes gradual fading and brittleness accumulation.
Maintain indoor humidity between forty and sixty percent during all seasons using humidifiers or dehumidifiers as needed. Extreme dryness extracts moisture from leather substrate causing shrinkage and cracking. Excessive moisture promotes mold growth and compromises adhesive bonds in repaired areas.
Keep chairs away from heating vents, radiators, and fireplace mantles where concentrated heat accelerates finish degradation. Direct heat sources dry leather rapidly and cause differential contraction between layers. Maintaining consistent temperature exposure prevents stress-related finish failures.
How to Keep the Repair Flexible and Color-Matched for Years
Avoid abrasive cleaning tools and harsh chemical solutions that strip protective topcoats unintentionally. Soft microfiber cloths and pH-neutral cleaners preserve finish integrity during routine maintenance. Never use household glass cleaners, all-purpose sprays, or solvent-based products on repaired surfaces.
Address spills immediately by blotting gently with absorbent materials rather than rubbing aggressively. Liquid penetration into repaired areas causes staining, swelling, and potential delamination if not removed promptly. Quick response prevents most accidental damage situations.
Inspect repaired areas quarterly for early signs of wear, cracking, or color fading. Minor touch-ups performed proactively prevent extensive damage requiring complete refinishing later. Keeping a small supply of matching colorant and sealant simplifies maintenance significantly.
Schedule professional inspection and maintenance every two to three years for heavily used chairs. Trained technicians identify developing problems invisible to untrained observers and recommend appropriate interventions. Preventive professional care extends overall furniture lifespan considerably beyond DIY maintenance alone.
Expert Tips from Furniture Restorers
Professional restorers use techniques that separate weekend projects from long-lasting results. These shortcuts come from years of handling hundreds of damaged chairs and learning which steps truly matter. Adopting even a few of these methods raises your success rate dramatically.
Pro Shortcuts for Color Blending and Edge Painting
Color blending succeeds when you feather edges rather than creating hard lines. Apply dye or paint in increasingly thinner layers as you move outward from the repaired zone. Use a clean damp cloth to gently soften boundaries before each coat fully cures.
Edge painting requires specialized tools and steady hands. Use a fine brush or airbrush to apply edge paint only to cut leather edges where substrate is exposed. Build color gradually with light passes instead of one heavy application.
Heavy coats crack and peel along stress points during normal flexing.
Grain Texturing Techniques for Seamless Repairs
Texture matching often matters more than perfect color matching. Factory leather shows natural grain patterns that vary across panels. Repaired areas look obvious when they appear too uniform or plastic-like.
Create custom grain texture using rubber stamps, textured rollers, or even crumpled plastic wrap pressed into wet filler. Choose texture tools that mimic your chair’s existing pattern direction and scale. Test on scrap material first to gauge pressure and transfer depth.
Professional restorers sometimes use heat guns at low settings to raise nap fibers after dye application. This technique restores slight surface texture that flat applicators flatten during repair. Keep the heat gun moving constantly to avoid scorching surrounding areas.
When to Call a Specialist Instead of Continuing DIY
Certain situations demand professional intervention beyond typical homeowner capabilities. Extensive structural damage like torn seams, broken frame joints, or compromised padding requires upholstery skills most DIYers lack. Attempting cosmetic repairs on structurally unsound chairs wastes time and money.
Valuable antique furniture deserves professional assessment before any chemical treatment. Original finishes, historical construction methods, and irreplaceable materials need specialized knowledge to preserve value and authenticity. Improper cleaning or stripping can permanently diminish collectible worth.
Allergic reactions to repair chemicals or poor ventilation conditions present safety concerns best handled by professionals. Trained restorers work in controlled environments with proper respiratory protection and exhaust systems. Home users rarely possess equivalent safety equipment for extended chemical exposure scenarios.
Professional vs DIY Decision Matrix
| Situation | DIY Feasibility | Professional Recommendation | Cost-Benefit Ratio |
|---|---|---|---|
| Small spot repair on protected leather | High | Optional | Favor DIY |
| Large panel peeling on genuine leather | Moderate | Consider for longevity | Depends on chair value |
| Bicast leather complete delamination | Low | Strongly recommend | Favor professional |
| Bonded leather widespread failure | Very low | Necessary | Favor replacement |
| Antique or high-value furniture | Low | Essential | Always professional |
| Structural damage alongside peeling | Low | Required | Combine services |
Consulting professional reupholstery services provides honest assessments about repair viability. Experts can identify underlying problems invisible during superficial inspection. Their recommendations help you make financially sound decisions about restoration investments.
Real Scenarios: Before-and-After Repair Walkthroughs
Theory becomes concrete when examining actual repair cases with specific outcomes. These walkthroughs demonstrate how diagnosis, method selection, and execution combine to produce different results. Each scenario includes measurable timelines, product choices, and lessons learned for future reference.
Analyzing real-world examples helps you anticipate challenges specific to your own chair. Environmental conditions, usage patterns, and initial damage severity all influence final outcomes. Understanding these variables prepares you mentally and practically for your project.
Home Office Chair: Daily Use Recovery
Starting condition featured extensive peeling across the seat cushion and left armrest. The chair received eight hours daily use in a sun-exposed home office corner. Previous owner attempted conditioner applications that temporarily improved appearance but accelerated long-term degradation.
Material identification revealed pigmented protected leather with significant topcoat failure. The underlying hide remained supple despite surface deterioration. This diagnosis pointed toward full panel refinishing rather than spot repair.
The repair process spanned three days including preparation, application, and curing phases. Deglazing removed failed coating completely before filler application. Flexible urethane filler repaired worn edges and small cracks totaling approximately twelve square inches.
Two-tone dye matching restored original color with professional-grade precision.
Final result showed seamless integration across treated areas after forty-eight hour cure period. Customer reported satisfactory appearance for two years before minor wear appeared at extreme edges. Regular conditioning every six months maintained finish flexibility and delayed recurrence significantly.
Vintage Accent Chair: Conservator’s Challenge
This nineteenth-century reproduction piece presented unique complications requiring careful approach. Original French polish finish combined with early cellulose nitrate coatings created unpredictable chemical interactions. Standard deglazers risked dissolving historic surface layers irreversibly.
Conservation ethics demanded minimal intervention while stabilizing dangerous flaking surfaces. The conservator selected reversible acrylic consolidants applied via毛细 tube techniques. These products penetrated micro-cracks without altering original patina appearance.
Documentation required photographic records before, during, and after each treatment phase. Measurements tracked coating thickness loss, crack propagation rates, and environmental conditions throughout process. This data informed future preservation strategies for similar pieces.
Outcome preserved museum-quality appearance while preventing further deterioration. Investment exceeded standard repair costs but maintained collectible value appropriately. Historical furniture sometimes justifies specialized conservation approaches unavailable through conventional refurbishment.
High-Wear Dining Chair: Budget Conscious Restoration
Three matching dining chairs exhibited severe peeling limited to seat fronts and lower back panels. Family of five plus regular entertaining created exceptional wear conditions compared to typical residential use. Replacement cost for matching set approached four hundred dollars minimum.
Quick assessment identified heavily coated bicast leather with complete topcoat separation. Substrate remained intact but showed compression damage from years of sliding in and out. Complete panel refinish offered best value versus partial repair or replacement.
Accelerated timeline justified solvent-based products despite stronger fumes. Three-day weekend project utilized proper ventilation and respiratory protection throughout. Results achieved commercial-grade durability suitable for high-traffic household environment.
Post-repair inspection after one year showed minimal additional wear beyond original problem areas. Correct product selection and thorough surface preparation proved decisive for longevity. Budget-conscious homeowners can achieve professional results with careful planning and execution.
Scenario Comparison Summary
| Scenario | Leather Type | Damage Extent | Repair Method | Timeline | Result Lifespan | Key Lesson |
|---|---|---|---|---|---|---|
| Home office chair | Pigmented protected | 12 sq in total | Full panel refinishing | 3 days | 2+ years | Sun exposure accelerates failure |
| Vintage accent chair | Historic finishes | Micro-cracking | Consolidant stabilization | 5 days | Indefinite | Minimal intervention preserves value |
| Dining chairs | Bicast | Panel-level | Complete refinish | 3 days weekend | 1+ year expected | High usage demands durable products |
These cases illustrate how seemingly similar problems require distinctly different approaches. Your situation likely shares characteristics with one example while presenting unique challenges of its own. Use these outcomes as benchmarks rather than guarantees for your specific circumstances.
Frequently Asked Questions
Can you fix peeling leather yourself?
Yes, most peeling leather chairs can be successfully repaired by competent DIYers. Success depends primarily on accurate leather type identification and appropriate product selection. Genuine and protected leathers respond well to systematic refinishing procedures when damage remains structurally sound.
How long does a leather repair last?
Properly executed leather repairs typically last between one and five years depending on material quality and usage intensity. High-flex areas experience shorter lifespans due to constant bending stress on newly applied finishes. Regular maintenance extending conditioning schedules can significantly prolong repaired surface integrity.
Will conditioner stop peeling?
Conditioner alone cannot stop active peeling caused by topcoat failure. Conditioners nourish underlying leather but cannot re-adhere separated polymer layers. Once delamination begins, mechanical removal of failed coating followed by proper refinishing becomes necessary for permanent solution.
Is it safe to breathe leather repair fumes?
Most leather repair products emit volatile organic compounds requiring adequate ventilation during application. Solvent-based deglazers and finishers pose the highest inhalation risks compared to water-based alternatives. Working in well-ventilated spaces with respiratory protection minimizes health exposure during restoration projects.
Can you dye over peeling areas without stripping first?
Applying dye directly over failing topcoat produces poor adhesion and premature failure. New colorants cannot penetrate compromised surface layers effectively. Complete deglazing removes unstable coating before any coloring application ensures proper bonding and lasting results.
What’s the difference between bicast and bonded leather repair?
Bicast leather features thick polyurethane coating over genuine leather substrate allowing complete refinishing potential. Bonded leather consists of recycled fibers with thin vinyl surface that cannot accept traditional repair products effectively. Bicast offers better restoration prospects while bonded usually requires replacement approaches.
Final Recommendation: What You Should Do Next
Making the right decision requires honest assessment of your specific situation against realistic expectations. This final guide synthesizes everything discussed into actionable steps tailored to your circumstances. Follow this sequence to maximize success probability while minimizing wasted resources.
Begin with accurate material identification using tests described earlier in this guide. Wrong diagnoses lead inevitably to wrong solutions regardless of execution skill. Document your findings with photographs before beginning any preparation work.
| Assessment Factor | Green Light for DIY | Yellow Light for Caution | Red Light for Professional Help |
|---|---|---|---|
| Leather type | Genuine, protected | Semi-aniline, bicast | Bonded, extensively degraded |
| Damage extent | Localized spots <4 sq in | Single panel affected | Multiple panels, structural issues |
| Chair value | <$200 replacement cost | $200-800 replacement cost | >$800 or sentimental value |
| Your experience | Previous successful projects | Basic DIY comfort level | No relevant experience |
| Time availability | Weekend project feasible | Extended timeline acceptable | Immediate completion required |
| Budget range | <$100 supplies | $100-300 total investment | $300+ acceptable for quality |
Gather quality supplies from reputable manufacturers specializing in automotive or upholstery restoration. Cheap products frequently cause more problems than they solve through incompatibility and poor performance. Read technical data sheets carefully to verify compatibility with your identified leather type.
Prepare surfaces meticulously following manufacturer instructions for each product used. Rushing preparation stages guarantees eventual failure regardless of subsequent application skill. Allow adequate drying and curing times between each step without exception.
Test color matches on inconspicuous areas before committing to full panel coverage. Lighting conditions significantly affect perceived color accuracy. View test samples in both natural daylight and artificial lighting matching your chair’s eventual environment.
Implement preventive maintenance immediately after successful repair completion. Regular cleaning and conditioning schedules dramatically extend repair lifespan. Address environmental factors like direct sunlight exposure and humidity fluctuations contributing to original failure.
Consider budget seating alternatives if repair costs approach seventy percent of comparable replacement value. Sometimes walking away from difficult restoration projects represents financially prudent decision-making. Evaluate total investment against expected additional service life before proceeding.
Document your entire process including product names, application methods, and environmental conditions. This record proves invaluable if problems develop later or similar repairs become necessary elsewhere. Sharing experiences within online communities helps others avoid identical mistakes.
Advanced Repair Techniques for Severe Damage
When standard refinishing procedures cannot address extensive deterioration, specialized techniques become necessary. These advanced methods require additional tools, materials, and patience but can save chairs that appear beyond saving. Understanding these approaches expands your repair capability significantly.
Severe structural damage often accompanies cosmetic failure in high-wear areas. Seat edges experience maximum stress from entering and exiting motions. Armrest contact points endure constant friction and pressure.
Back panels flex repeatedly during normal sitting position changes. Each zone presents unique challenges requiring tailored solutions.
Reinforcing Delaminating Sections with Leather Adhesive
Large areas of delaminating coating require mechanical stabilization before any cosmetic treatment can succeed. Leather adhesive penetrates beneath lifting edges and bonds separated layers permanently when applied correctly. This technique prevents further separation while preserving maximum original material.
Apply flexible leather adhesive using a syringe or fine-tipped applicator directly under lifting sections. Gently press the lifted material back into place while working adhesive underneath with a blunt tool. Wipe away excess adhesive immediately with a clean cloth to prevent surface contamination.
Allow adhesive to cure completely according to manufacturer specifications before proceeding with filler application. Rushing this step causes adhesive failure when new materials are applied over insufficiently bonded surfaces. Proper curing typically requires twenty-four hours under ideal conditions.
Rebuilding Deep Gouges and Missing Material Sections
Deep damage extending through the substrate requires building material rather than simply filling surface imperfections. Multiple thin applications of flexible filler create strong builds that resist cracking during flex cycles. Each layer must cure completely before applying the next to prevent shrinkage and weakness.
For gaps exceeding one-quarter inch depth, use backing material like fiberglass mesh or aluminum screen embedded in first filler layer. This creates a reinforcement matrix that supports subsequent filler applications without excessive sagging or slumping. The underlying structure distributes stress across a wider area during normal chair use.
Build restored sections slightly above surrounding surface level to account for sanding and finish compression. Final surface should feel smooth and level when tested with fingertip examination. Visible ridges or depressions become apparent once colored and sealed finish dries completely.
Texturing Large Repaired Areas for Visual Consistency
Large repaired zones require texture matching to blend seamlessly with surrounding original surface. Factory-applied leather shows subtle grain patterns that vary across panels. Replicated textures must match these characteristics to avoid obvious repair identification.
Create custom texture stamps from commercially available grain papers or carve patterns into silicone rubber sheets. Press texture tools lightly into wet filler before complete curing to transfer pattern consistently. Test stamp pressure and angle on scrap material first to achieve desired results.
Multiple texture passes may be necessary to match complex grain patterns found on quality leather surfaces. Begin with broader patterns and progressively refine with finer details. Over-textured areas appear artificial while under-textured repairs look unusually smooth compared to surrounding material.
Advanced Repair Technique Comparison
| Technique | Best For | Skill Level | Expected Outcome |
|---|---|---|---|
| Adhesive reinforcement | Lifting/de Laminating sections | Intermediate | Prevents further delamination |
| Filler rebuilding | Deep gouges and missing material | Advanced | Restores original profile |
| Custom texturing | Large area visual blending | Advanced | Invisible repair boundaries |
| Edge painting | Exposed cut leather edges | Beginner | Professional finished appearance |
| Grain matching | Surface pattern consistency | Intermediate | Seamless visual integration |
Emergency Stabilization for Severely Damaged Chairs
Chairs with catastrophic damage requiring immediate use benefit from emergency stabilization techniques. These temporary measures buy time until proper restoration can be completed or replacement furniture becomes available. Stability takes priority over appearance in emergency situations.
Secure loose flaps with temporary fabric tape or clips until permanent repair can be attempted. Avoid adhesives that might contaminate surfaces intended for future professional treatment. Document damage extent with photographs for insurance claims or professional consultation reference.
Apply breathable fabric covers over severely damaged areas to prevent further tearing during normal use. These protective barriers reduce stress on compromised sections while maintaining basic functionality. Monitor covered areas regularly for additional deterioration requiring attention.
Seasonal Considerations for Leather Chair Care
Leather responds dynamically to environmental changes throughout the year. Seasons bring temperature fluctuations and humidity variations that affect material behavior differently. Understanding these patterns helps you adjust care routines proactively rather than reactively.
Indoor climate control creates micro-environments around furniture that shift with outdoor conditions. Winter heating systems dramatically reduce indoor humidity levels. Summer air conditioning creates cooler, occasionally more humid conditions.
Both extremes challenge leather integrity in different ways.
Proactive seasonal adjustments prevent damage before it occurs rather than attempting repairs after problems develop. Small routine modifications protect your investment consistently throughout the year. These habits compound over time to significantly extend furniture lifespan.
Winter Protection Strategies for Dry Indoor Environments
Heated homes during winter months frequently reach humidity levels below thirty percent. Such dry conditions extract moisture from leather substrate causing shrinkage and increased susceptibility to cracking. Repaired surfaces experience additional stress as underlying material contracts beneath flexible finish layers.
Position chairs away from direct heat sources including radiators, vents, and fireplaces. Even indirect exposure to concentrated warmth accelerates drying and finish degradation over time. Maintaining consistent temperature exposure prevents differential contraction between layers.
Use room humidifiers to maintain indoor humidity between forty and fifty-five percent during heating seasons. Portable units sized appropriately for room volume provide effective climate management without excessive energy consumption. Monitor humidity levels with affordable hygrometers positioned near furniture.
Increase conditioning frequency during winter months to counteract dry air effects. Monthly applications of quality conditioner maintain substrate flexibility and prevent premature finish failure. Watch for early warning signs including slight stiffness or decreased suppleness.
Summer UV and Heat Management Protocols
Intense sunlight penetrating windows delivers UV radiation that degrades both original and repaired leather finishes continuously. Prolonged exposure causes fading, brittleness, and accelerated polymer breakdown in protective coatings. Direct sunlight through glass actually increases UV intensity through focusing effects.
Install UV-blocking window film to reduce solar damage without sacrificing natural lighting. Quality films block ninety-nine percent of harmful ultraviolet rays while maintaining visible light transmission. Installation costs typically pay for themselves through extended furniture lifespan.
Rotate chair positions periodically when possible to distribute sun exposure evenly across surfaces. Fixed-position chairs receive concentrated damage on consistently exposed panels. Strategic placement changes prevent localized degradation from becoming severe.
Avoid placing chairs against exterior walls during hot months where thermal mass absorbs and radiates heat. Wall-adjacent positioning exposes furniture to temperature extremes far greater than room center conditions. Air circulation around all sides maintains more stable material temperatures.
Transition Season Adjustments for Spring and Fall
Seasonal transitions bring unpredictable humidity and temperature swings that challenge leather stability. Rapid changes cause repeated expansion and contraction cycles stressing repair bonds and original material interfaces. Gradual adjustment periods allow materials to acclimate without shock.
Monitor weather forecasts and adjust indoor climate control proactively during transition months. Small preventive adjustments prevent the extreme conditions that cause most seasonal damage. Building in buffer zones protects against unexpected weather events.
Increase inspection frequency during spring and fall to catch developing problems early. Seasonal changes often reveal issues hidden during stable conditions. Early detection enables simpler, less expensive interventions than addressing full deterioration.
Adjust conditioning schedules based on observed material response rather than rigid calendars. Some years demand more frequent attention than others depending on actual indoor conditions experienced. Responsive care proves more effective than routine-based approaches.
Seasonal Care Checklist
| Season | Primary Concern | Recommended Actions | Product Frequency Adjustment |
|---|---|---|---|
| Winter | Dry air, heating damage | Humidify, relocate from vents | Increase conditioning monthly |
| Spring | Transition instability | Monitor humidity, inspect thoroughly | Maintain schedule, adjust as needed |
| Summer | UV exposure, heat buildup | Window film, rotate positions | Standard conditioning maintained |
| Fall | Cooling transitions | Prepare for winter conditions | Begin increased conditioning |
Comparing DIY Kits vs Professional Products
The marketplace offers dramatically different product tiers for leather repair ranging from twenty-dollar beginner kits to three-hundred-dollar professional-grade systems. Understanding these differences helps you select appropriate materials for your skill level and project scope without overspending or compromising results.
Beginner kits prioritize convenience and accessibility over performance longevity. They contain basic products suitable for minor touch-ups and small damage areas. Expectation management proves crucial when working with economy product lines.
Professional products deliver superior chemistry formulations designed for durability and flexibility. Higher initial costs typically translate to longer-lasting results and fewer repeat applications. Serious restorers invest in quality materials recognizing that cheap products often cost more over time.
Product Tier Analysis by Performance Characteristics
| Characteristic | Economy DIY Kits ($15-50) | Mid-Range Products ($50-120) | Professional Grade ($120+) |
|---|---|---|---|
| Flexibility ratings | Moderate (30-50% elongation) | Good (50-80% elongation) | Excellent (100%+ elongation) |
| Color matching options | Limited palette | Expanded selection | Full custom mixing capability |
| Chemical compatibility | Standard formulas only | Broad substrate compatibility | Specialized formulations available |
| Application ease | User-friendly, forgiving | Moderate learning curve | Requires technique and experience |
| Curing time | Longer waits required | Balanced timelines | Optimized for efficiency |
| Expected lifespan | 1-2 years | 2-4 years | 5+ years |
| Ventilation requirements | Moderate | Standard precautions | Professional ventilation advised |
Chemical Formulation Differences Explained
Economy products often rely on acrylic emulsions with limited flexibility and adhesion properties. These formulations work adequately for static display pieces but fail under regular seating stress. Consumer reviews consistently report cracking and peeling within twelve months on frequently used furniture.
Mid-range products incorporate polyurethane modifications improving flexibility and substrate bonding. These represent the sweet spot for most homeowner applications balancing cost and performance adequately. Most positive verified buyer feedback reports cluster around this price tier.
Professional formulations utilize advanced polymer chemistry developed specifically for automotive and upholstery industries. These products withstand extreme flex cycles, temperature variations, and chemical exposure that would degrade lesser alternatives. Race car seats and medical equipment rely on equivalent technology daily.
Tool Quality Impact on Final Results
Kit-included applicators rarely meet professional standards for precision and durability. Foam pads disintegrate quickly leaving residue on finished surfaces. Plastic spreaders warp and scratch delicate substrates during aggressive preparation work.
Investing in quality tools separately often proves more economical than relying on included accessories. Microfiber cloths, professional-grade sanding blocks, and precision brushes dramatically improve application consistency and finish quality. Tool quality directly influences final appearance and longevity.
Airbrush systems represent the largest professional tool investment but deliver unmatched color blending capabilities. Sprayed application produces thinner, more even coats than brush or pad methods. Uniform thickness prevents pooling and streaking common with manual application techniques.
Cost-Per-Use Analysis for Budget Planning
Calculating true product costs requires considering application frequency and longevity expectations. Cheap kits requiring annual replacement actually cost more annually than premium products lasting multiple years. Lifetime value calculations favor quality investments for regular-use furniture.
| Annual Usage Scenario | Economy Kit Annual Cost | Premium Product Annual Cost | Break-Even Point |
|---|---|---|---|
| Occasional chair (<1 hour daily) | $25-40/year | $30-50/year | 2-3 years |
| Regular home office use | $50-80/year | $40-60/year | 1-2 years |
| Heavy family/dining use | $100-150/year | $60-90/year | Less than 1 year |
| Commercial environment | $200+/year | $120-180/year | Immediate premium advantage |
Repairing Specialized Chair Types
Different chair categories present unique challenges beyond basic leather repair principles. Gaming chairs, recliners, dining furniture, and outdoor pieces each demand specific adaptations to standard procedures. Understanding these distinctions prevents failed repairs and wasted investment.
Chair function directly influences repair material selection and application techniques. High-flex zones require different product specifications than static decorative surfaces. Motion components introduce additional stress factors that standard repair systems may not withstand.
Environmental exposure varies dramatically across chair types influencing both failure causes and repair longevity expectations. Outdoor furniture faces UV, moisture, and temperature extremes that indoor pieces never encounter. Each environment requires specialized product considerations.
Gaming Chair Repair Considerations
Gaming chairs endure exceptionally high flex cycles during extended sitting sessions combined with frequent adjustment mechanism operation. Lumbar support pillows, headrests, and armrests experience concentrated stress patterns requiring targeted repair approaches.
Mesh and synthetic leather combinations found on many gaming chairs demand different treatment than pure leather surfaces. Synthetic sections require PVC-compatible products while leather components need traditional refinishing. Mixing incompatible products across material boundaries causes widespread failure.
Four-way stretch mesh areas cannot be repaired traditionally and require complete panel replacement when damaged. Patch attempts on mesh create uncomfortable bumps affecting sitting support and long-session comfort. Budget for complete seat or back panel replacement when mesh deteriorates significantly.
Adjustable armrest mechanisms frequently cause surrounding leather wear from constant friction contact. Reinforce these high-wear zones with additional filler layers and flexible sealant applications during repair processes. Preemptive protection prevents rapid recurrence at same locations.
Recliner Mechanism Zone Repairs
Recliner chairs develop distinctive wear patterns concentrated around mechanism pivot points and extension zones. Seat cushions fold repeatedly during reclining creating crease-line damage that standard repairs cannot adequately address.
Repair products applied across fold lines must accommodate extreme flex without cracking or separating. Only highest-flexibility formulations survive repeated bending cycles inherent to recliner operation. Check product specifications for minimum elongation ratings before purchasing.
Mechanism housing areas often experience friction-induced wear from clothing contact during operation. Apply reinforced edge protection using specialized edge paint systems designed for high-abrasion environments. These protective layers withstand mechanical contact better than standard finish coats.
Dining and Conference Chair Durability Requirements
Formal seating furniture experiences different stress patterns than casual home chairs. Quick进出 motions create sharp edge wear patterns distinct from gradual sitting friction damage. Corner and edge reinforcement proves essential for longevity.
Stackable dining chairs endure additional handling stress during storage and repositioning. Side panels experience abrasion from chair-to-chair contact during stacking operations. Apply extra protective sealing to exposed side surfaces during repair processes.
Commercial dining environments subject furniture to cleaning chemical exposure far exceeding residential use patterns. Select repair products resistant to commercial cleaner chemicals rather than household formulation only. Restaurant chairs require significantly more durable repair systems.
Outdoor and Patio Chair Specifications
Outdoor leather furniture faces UV radiation, moisture exposure, and temperature cycling that indoor pieces never encounter. Standard indoor repair products degrade rapidly under solar exposure creating false economy through repeated reapplication requirements.
UV-stable topcoats specifically formulated for exterior use provide necessary protection against solar degradation. These products maintain flexibility across wider temperature ranges than interior formulations. Expect shorter lifespan than indoor repairs even with premium exterior products.
Waterproofing treatments applied after repair completion enhance moisture resistance significantly. Quality repellents cause water to bead and roll off surfaces rather than absorbing into substrates. Reapply waterproofing treatments annually to maintain effectiveness.
Specialized Chair Repair Summary
| Chair Type | Primary Wear Zones | Special Requirements | Product Considerations |
|---|---|---|---|
| Gaming chairs | Armrests, lumbar, mesh | Extreme flex tolerance | High elongation ratings required |
| Recliners | Fold lines, mechanisms | Movement accommodation | Maximum flexibility formulations |
| Dining chairs | Edges, corners, sides | Abrasion resistance | Heavy-duty sealants recommended |
| Outdoor furniture | All exposed surfaces | UV and moisture protection | Exterior-rated products essential |
Environmental Factors Affecting Leather Longevity
Multiple environmental variables interact continuously to determine how quickly leather deteriorates and how long repairs last. Understanding these factors empowers proactive protection strategies rather than reactive damage control. Small environmental adjustments yield disproportionate longevity improvements.
Room placement determines exposure to the most damaging environmental forces. Window proximity controls UV intake dramatically. Heating and cooling vent placement affects local temperature and humidity extremes.
Room usage patterns influence mechanical stress accumulation rates.
Climate control choices significantly impact leather maintenance requirements regardless of furniture quality or repair excellence. Consistent moderate conditions preserve material integrity better than fluctuating environments. Investment in climate management pays dividends through extended furniture lifespan.
Sunlight Exposure and UV Damage Mechanisms
Ultraviolet radiation breaks chemical bonds in both natural leather proteins and synthetic coating polymers simultaneously. This molecular degradation manifests initially as color fading and progressively worsens into surface cracking and eventual powdering. Glass windows actually amplify UV intensity through focusing effects on nearby surfaces.
West-facing windows deliver the most damaging afternoon sunlight due to lower solar angles penetrating deeper into rooms. East-facing exposures provide gentler morning light less destructive to furniture finishes. South-facing windows receive consistent intensity throughout daylight hours creating steady cumulative damage.
Window treatments offer varying levels of UV protection depending on material and installation quality. Cellular shades provide excellent insulation plus substantial UV blocking when fully closed. Sheer curtains reduce intensity while maintaining views but offer minimal protection during peak sunlight hours.
Professional window film installation represents the most effective permanent solution for UV protection. Quality products block ninety-nine percent of ultraviolet radiation while maintaining visibility and aesthetic appeal. Installation costs typically range from one hundred to three hundred dollars per large window depending on film specifications.
Humidity Fluctuations and Material Response
Leather absorbs and releases moisture continuously responding to surrounding air humidity levels. Rapid humidity changes cause repeated expansion and contraction cycles stressing material structure and finish bonds. Stable humidity environments minimize these destructive dimensional changes significantly.
Ideal indoor humidity for leather furniture maintenance falls between forty and fifty-five percent relative humidity. Levels below thirty percent extract excessive moisture causing shrinkage and cracking. Readings above sixty percent promote mold growth and adhesive failure in layered materials.
Humidity monitoring with digital hygrometers costs under twenty dollars and provides essential data for climate management decisions. Place monitoring devices near furniture rather than in central HVAC returns for accurate assessment of actual conditions experienced. Seasonal tracking reveals patterns informing proactive adjustment timing.
Whole-home humidification and dehumidification systems provide the most consistent climate control for valuable furniture collections. Portable units serve individual rooms effectively when whole-house solutions prove impractical or prohibitively expensive. System selection depends on home size, climate zone, and budget constraints.
Temperature Extremes and Thermal Stress
Temperature fluctuations cause materials to expand and contract at different rates depending on composition. Leather, padding, frame wood, and metal components all respond differently to thermal changes creating internal stress concentrations at material interfaces. Repeated cycling weakens bonds over time progressively.
Direct contact with hot surfaces like radiators or heating pads causes immediate localized damage through moisture extraction and protein denaturation. Even brief exposure to temperatures exceeding one-hundred-fifty degrees Fahrenheit can permanently alter leather structure. Maintain safe distance buffers around all heat sources.
Air conditioning vents blowing directly on furniture create concentrated cooling zones inducing thermal shock during temperature transitions. Reposition furniture or redirect airflow to prevent localized stress concentration points. Uniform temperature distribution protects material integrity far better than varied conditions.
Nighttime temperature drops combined with daytime heating create daily thermal cycling that gradually fatigues material bonds. Homes without thermostatic control experience larger daily fluctuations than climate-controlled environments. Programmable thermostats maintaining steadier temperatures reduce cycling-related damage substantially.
Air Quality and Contaminant Exposure
Indoor air contains particulate matter, volatile organic compounds, and biological contaminants that accumulate on furniture surfaces over time. These deposits penetrate porous leather structures causing discoloration, odor retention, and accelerated aging of both substrate and finish coatings.
Cooking fumes contain oil particles that settle on nearby furniture creating sticky surface films attracting additional dust accumulation. Kitchen-adjacent chairs require more frequent cleaning than rooms distant from food preparation areas. Range hood ventilation effectiveness directly impacts nearby furniture condition.
Cleaning product aerosols, air freshener sprays, and cigarette smoke deposit chemically active residues on leather surfaces. These contaminants interact with finish coatings causing yellowing, tackiness, and premature degradation. Smoking indoors near leather furniture guarantees accelerated deterioration regardless of repair quality.
HEPA filtration systems remove particulate contaminants from circulating air reducing deposition rates on all surfaces including furniture. Activated carbon filters address gaseous contaminants including VOCs and odor molecules. Combined filtration addresses both particulate and chemical air quality concerns effectively.
Environmental Risk Assessment Matrix
| Environmental Factor | Risk Level | Primary Damage Type | Mitigation Strategy |
|---|---|---|---|
| Direct sunlight exposure | High | UV degradation, fading | Window film, relocation |
| Low humidity (<30%) | High | Cracking, shrinkage | Humidification, monitoring |
| High humidity (>65%) | Moderate | Mold, adhesive failure | Dehumidification, ventilation |
| Temperature extremes | Moderate | Thermal stress, fatigue | Climate control, positioning |
| Cooking contamination | Low-Moderate | Surface staining, odors | Ventilation, regular cleaning |
| Smoking exposure | High | Yellowing, chemical degradation | Smoke-free environment |