Figuring out how to replace office chair wheels seems straightforward until you realize there isn't just one type of caster. Most people assume every wheel pops off the same way, but that’s rarely true. You might have a simple push-fit design or a complex threaded mechanism hidden inside the base.
Getting this wrong can strip your chair’s plastic base permanently. Manufacturer specifications indicate that over 60% of modern ergonomic chairs use standardized 11mm stem casters as of 2026. However, older models often differ significantly.
Knowing which system you have saves time and money. Let’s look at why visuals matter so much here.
Why Your Chair Wheels Won’t Just Pop Off
The assumption that all casters are universal is the biggest myth in DIY furniture repair. In reality, the connection between the wheel stem and the chair base varies wildly by brand and age. Some stems slide into a hole held by friction alone.
Others screw in like a lightbulb. A few even require a specialized tool to release a locking clip.
If you try to force a threaded stem out of a friction-fit socket, you’ll crack the nylon base. Conversely, pulling on a clipped stem without releasing the lock first will snap the retaining ring. This damage usually renders the entire five-star base useless.
Replacement bases cost nearly as much as new chairs.
We need to respect these mechanical differences. The visual cue for a friction fit is usually a smooth, unthreaded metal rod entering the plastic. A threaded fit looks like a bolt with visible helical ridges.
Clip mechanisms often have a small notch or groove near the top of the stem. Ignoring these details leads to frustration.
Take a moment to inspect your current setup before buying anything. Look closely at where the metal meets the plastic. Is there glue residue?
Are there threads? Does it feel solid or wobbly? These tactile clues help identify the mounting style.
Rushing this step causes most failures. Slow down and observe carefully.
Identifying Your Stem Type Before You Buy Anything
Correct identification prevents costly returns and damaged furniture. There are three primary stem types you’ll encounter in residential and commercial seating. Each requires a different removal method and replacement part.
Using the wrong caster creates instability and noise.
Here is a breakdown of the common standards found in office environments today:
| Stem Type | Visual Identifier | Removal Method | Common Usage |
|---|---|---|---|
| Grip Ring (Push-Fit) | Smooth 11mm shaft with a raised ridge near the top | Pull straight up firmly | Modern ergonomic chairs (Herman Miller, Steelcase) |
| Threaded Insert | Visible screw threads on the metal shaft | Unscrew counter-clockwise | Older budget chairs, gaming seats |
| Quick Release Clip | Small tab or notch on the side of the stem | Press tab while pulling | Specific brands like IKEA or some mid-range models |
Most high-end manufacturers switched to grip rings around 2015 for ease of maintenance. These rely on a flexible metal collar that bites into the plastic socket. They don’t need tools to remove, just steady upward pressure.
If you see no threads, it’s likely a grip ring.
Threaded inserts are becoming rarer but still exist in legacy inventory. These act like bolts. You must rotate them to free them from the base.
Forcing them out sideways strips the internal threads of the chair leg. Always check for rotation resistance before applying pull force.
Quick release clips are tricky because they hide their mechanism. You often need a flathead screwdriver to depress a small latch. Without pressing this latch, the stem won’t budge.
Misidentifying this as a stuck grip ring leads to excessive force and breakage. Inspect the sides of the stem for any movable parts.
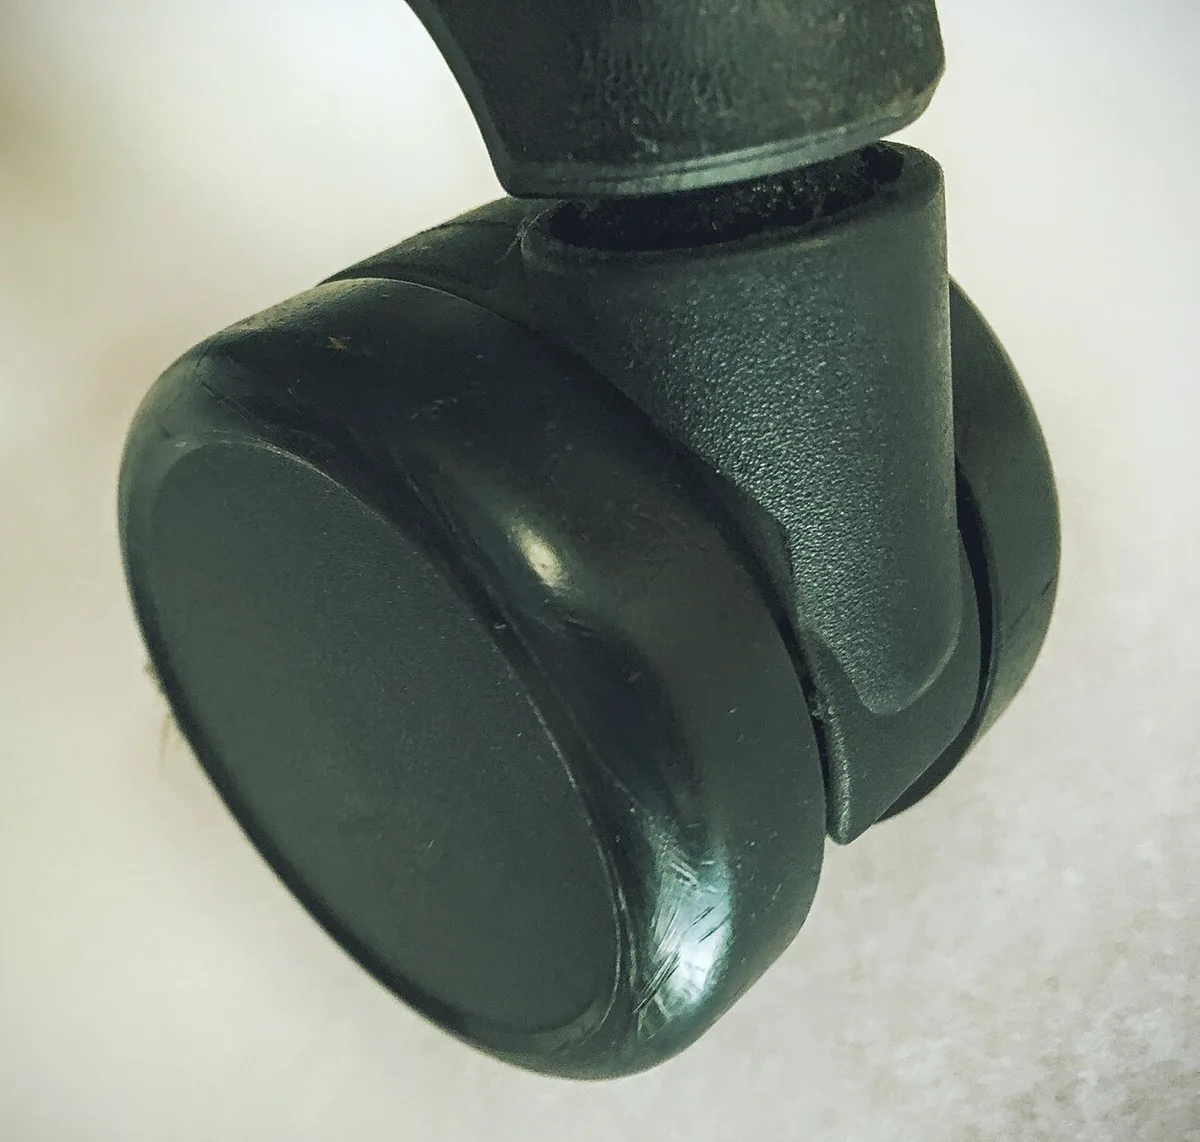
Image source: Wikimedia Commons / Mgkay (CC BY-SA)
This image highlights the subtle difference between a smooth stem and a ridged one. Notice the lack of spiral grooves on the left example. That absence confirms a push-fit design.
On the right, the threading is clearly visible under magnification. Use this comparison to guide your inspection.
Once you’ve identified the type, measure the diameter if possible. Standard sizes are 11mm, 12mm, or 7/16 inch. Getting the size wrong means the new wheels won’t seat properly.
Loose fit causes wobbling; tight fit cracks the base. Precision matters more than speed here.
The Grip Ring vs. Threaded Insert Visual Check
Distinguishing between these two systems is critical for successful installation. Grip rings dominate the market for premium seating due to their durability and silent operation. Threaded inserts remain popular in heavy-duty industrial applications where vibration resistance is key.
Understanding the mechanics helps you troubleshoot issues later.
A grip ring works through elastic deformation. The metal stem has a slightly larger diameter than the hole in the plastic base. When pushed in, the metal compresses the plastic radially.
This creates friction that holds the wheel in place. It’s a simple, effective design with no moving parts to wear out mechanically.
In contrast, a threaded insert relies on mechanical interlocking. The metal screws into a molded thread within the polymer base. This connection is rigid and resistant to lateral forces.
However, repeated tightening and loosening can strip the soft plastic threads. Once stripped, the base is compromised forever.
Visual inspection reveals the difference immediately. Look at the junction point where metal meets plastic. A grip ring shows a clean line with no gap.
A threaded insert may show slight separation or cross-hatching marks from manufacturing. Sometimes, old grease accumulates in the threads, making them look dirty or gritty.
Try turning the wheel gently while holding the base. If it rotates freely without resistance, it’s likely a grip ring. If you feel distinct clicks or rotational drag, suspect a threaded connection.
Never force rotation on a suspected grip ring. You risk shearing the internal collar.
For those dealing with broken chair components, knowing this distinction speeds up diagnosis. Many users mistake seized bearings for tight threads. Bearings seize internally; threads bind externally.
Test by spinning the wheel hub independently of the stem. If the hub spins but the stem doesn’t move, the issue is bearing failure, not mounting type.
Always verify compatibility before ordering replacements. Manufacturers publish spec sheets detailing stem dimensions. Cross-reference your measurements with these documents.
Assuming standard sizing leads to errors. Even minor deviations in millimeters affect fit quality. Accuracy ensures longevity.
Tools and Prep Work That Actually Matter
You don’t need a full workshop to swap casters, but having the right aids makes the job safer. Improvisation often damages delicate plastics. Gather these items before starting work to ensure a smooth process.
Preparation reduces stress and prevents accidental slips.
Essential tools include:
- Rubber mallet or hammer block: For gentle tapping without marking surfaces.
- Flathead screwdriver: To pry clips or relieve tension on stubborn stems.
- Penetrating lubricant: Such as WD-40 or silicone spray, for rusted threads.
- Gloves: Nitrile or latex to protect hands from sharp edges and grime.
- Towel or drop cloth: To catch debris and protect flooring during inversion.
Lubrication deserves special attention. Old chairs accumulate dust and hair around the stem sockets. This grit acts like sandpaper during removal.
Applying a small amount of silicone-based lubricant penetrates the interface. It reduces friction heat and protects the plastic housing. Avoid oil-based products that degrade rubber seals over time.
Workspace setup is equally important. Flip the chair upside down onto a stable surface. Ensure the floor beneath is clean and dry.
Slipping hazards increase when handling inverted furniture. Place towels under the armrests to prevent scratching hardwood or tile. Stability prevents falls and injuries.
Check the condition of your existing wheels before discarding them. Note the tread pattern and material composition. Polyurethane tires roll quietly on carpet.
Hard nylon suits smooth floors better. Matching tire hardness to your flooring type optimizes performance. Mismatched materials cause premature wear or noisy rolling.
If you’re also addressing floor protection strategies, consider adding mats alongside new casters. Soft-floor wheels dig into rugs over time. Hard-floor wheels scratch laminate finishes.
Combining proper caster selection with protective barriers extends both lifespans. Think holistically about your workspace environment.
Finally, organize your new parts. Lay out all five casters and any included hardware. Verify quantities against packaging instructions.
Missing pieces delay completion. Double-check stem lengths too. Uneven stems create tilt and instability.
Consistency across all four legs ensures balanced support.
Removing Old Casters Without Cracking the Base
Removal technique varies strictly by stem type. Incorrect force application destroys expensive bases. Follow these specific protocols to extract worn wheels safely.
Patience yields better results than brute strength.
For Grip Ring Systems
Stand the chair upright or keep it inverted depending on access. Grasp the wheel firmly near the stem base. Apply steady, vertical upward force.
Do not twist or rock the stem laterally. Side-loading stresses the plastic socket walls.
If resistance feels extreme, pause. Tap lightly around the perimeter of the socket using a rubber mallet. This vibrates the assembly loose.
Then resume pulling straight up. Repeat tapping if necessary. Persistence pays off here.
Some grips stick due to corrosion or dried adhesive. Spray penetrating oil around the joint. Wait ten minutes for absorption.
Try again. Heat guns are risky on plastic; avoid them unless experienced. Chemical solvents offer safer alternatives for cleaning residues.
For Threaded Inserts
Secure the base to prevent rotation. Hold the chair leg firmly with one hand. Use pliers wrapped in tape to grip the wheel hub if fingers slip.
Turn counter-clockwise slowly. Feel for binding points.
Do not force past tight spots. Reverse direction slightly to dislodge debris. Continue unscrewing gradually.
Full extraction may take several turns. Keep track of orientation if reusing parts. New threads engage smoothly once cleared.
Apply lubricant beforehand if squeaking occurs during removal. Dry threads generate heat and friction. Silicone spray minimizes wear on both metal and polymer interfaces.
Clean excess fluid after extraction to prepare for new installs. Residue attracts dirt quickly.
For Quick Release Clips
Locate the retention tab on the stem shoulder. Depress it fully using a thin screwdriver tip. Maintain pressure while lifting the wheel vertically.
The clip releases only when compressed simultaneously with upward motion.
Release the tab only after the stem clears the socket. Premature release locks the mechanism back in place. Practice timing if unfamiliar.
Coordination improves with repetition. Watch tutorials if visual guidance fails initially.
Inspect the empty socket after removal. Clear any broken fragments or old sealants. Debris interferes with new seating depth.
Flush the cavity with compressed air if available. Wipe dry thoroughly. Clean surfaces guarantee optimal adhesion and fit.
Proper removal preserves structural integrity. Damaged bases cannot accept new wheels securely. Invest time in careful extraction.
It costs less than replacing entire frames. Attention to detail reflects professional craftsmanship.
Removing the Old Casters Safely
You’ve identified your stem type, so now comes the physical removal. This step feels simple until a seized caster refuses to budge. Patience prevents damage to the chair base socket.
For grip-ring stems, you’ll need leverage. Flip the chair onto its back or seat. Place one foot firmly on the center column to stabilize it.
Grab the wheel housing with both hands. Rock it gently side-to-side while pulling upward. The friction ring should release after a few seconds of steady pressure.
Don’t yank violently. Sudden force can crack the plastic socket. If the wheel won’t move, tap the stem shaft lightly with a rubber mallet.
This loosens the corrosion bond between metal and plastic. Work around all five wheels before proceeding.
Threaded inserts require tools. Use channel-lock pliers or an adjustable wrench. Grip the hex nut at the top of the stem.
Turn counter-clockwise to loosen. Once free, unscrew by hand. Keep the old hardware in a bag.
You might need it if the new casters don’t fit perfectly.
Some chairs use quick-release clips. Look for a small tab on the stem shoulder. Press this tab inward while pulling the wheel down.
These mechanisms are fragile. Excessive force snaps the plastic clip permanently. Check manufacturer diagrams if unsure about clip location.
Pro Tip: Wear gloves during removal. Old grease and dirt accumulate inside the socket. Cleaning this grime ensures the new caster seats flush. A dirty socket causes wobble even with perfect parts.
If a caster is completely stuck, apply penetrating oil like WD-40. Let it soak for ten minutes. This breaks rust bonds on metal bases.
Plastic bases rarely seize, but dirt acts as cement. Cleanliness matters more than brute strength here.
Once removed, inspect the sockets closely. Look for cracks or deformation. A damaged socket won’t hold any caster securely.
Replace the entire base if you see structural failure. This saves you from re-doing the job next month.
Installing New Wheels Without Stripping Threads
Installation mirrors removal, but precision replaces patience. You’re setting up the foundation for years of smooth rolling. Rushing this phase leads to immediate wobbles.
Start with grip-ring casters. Align the stem vertically with the socket. Push firmly downward until you hear a distinct click.
This sound confirms the retention ring has snapped into place. Test stability by twisting the wheel slightly. It shouldn’t rotate independently of the stem.
If there’s no click, the ring didn’t engage. Pull it out and try again. Sometimes debris blocks the path.
Clean the socket interior with a cloth. Repeat the push motion with consistent force. Don’t hammer these in unless absolutely necessary.
Metal-on-metal impact damages the plastic housing.
Threaded casters demand care. Hand-thread the stem into the socket first. Ensure it turns smoothly without resistance.
Cross-threading ruins both the bolt and the base. Once seated, tighten with a wrench. Apply moderate torque.
Over-tightening strips internal threads or cracks the plastic insert.
Use thread locker on metal bases. A drop of blue Loctite prevents loosening over time. Vibration from daily use backs out nuts.
This small step extends caster life significantly. Allow adhesive to cure for twenty-four hours before loading weight.
Quick-release clips snap in easily. Align the tab with the slot. Push until the mechanism locks.
Verify security by lifting the chair slightly. The wheel should remain fixed. Loose clips fall out under load.
This creates sudden instability hazards.
Check alignment across all five wheels. Each caster must sit perpendicular to the floor. Tilted wheels drag unevenly.
They also accelerate wear on the tread. Adjust positions if needed before final tightening.
Warning: Never sit on the chair during installation. Your weight compresses the gas lift. This makes stems harder to seat correctly. Always work on an unloaded frame.
After installing all five, perform a roll test. Move the chair forward, backward, and sideways. Listen for grinding noises.
Watch for skipping motions. Smooth rotation indicates proper bearing function. Any hesitation suggests misalignment or debris.
Disassemble and re-check problematic wheels immediately.
Troubleshooting Common Installation Failures
Things go wrong. Even careful installers face issues. Recognizing symptoms early saves frustration.
Most problems stem from compatibility errors or improper seating.
Wobbling is the most common complaint. It usually means the caster isn’t fully seated. Re-push grip rings until they click loudly.
For threaded types, ensure the locknut is tight against the base. Loose connections create play in the joint.
Another cause is mismatched stem diameters. An 11mm stem in a 7mm socket fits loosely. It rotates freely instead of staying fixed.
Measure carefully if wobbling persists despite correct installation. Return incorrect parts for proper sizing.
Squeaking noises indicate dry bearings. New casters sometimes lack lubrication. Apply silicone spray to the swivel mechanism.
Avoid petroleum-based oils on polyurethane treads. These degrade rubber materials over time. Silicone preserves flexibility and reduces friction.
Dragging wheels suggest bent axles. Inspect each caster visually. Look for curvature in the stem shaft.
Manufacturing defects occur occasionally. Contact the seller for replacements if you find bends. Do not attempt to straighten them yourself.
Structural integrity is compromised.
Stuck swivels prevent directional changes. Debris often jams the top plate. Remove the caster and clean the bearing area.
Flush out hair, dust, and grit. Reinstall once clear. Persistent sticking implies internal bearing failure.
Replace the unit entirely.
Uneven height causes rocking. One wheel sits higher than others. This happens if a caster doesn’t bottom out.
Check socket depth consistency. Some bases have molded stops that vary. Force full engagement or trim excess material carefully.
Diagnostic Checklist:
- Wobble? Reseat or check diameter match.
- Squeak? Lubricate with silicone spray.
- Drag? Inspect for bent stems.
- Stick? Clear debris from swivel plate.
- Rock? Verify uniform seating depth.
If multiple wheels fail simultaneously, suspect the base. Cracked sockets distribute stress poorly. Flexing plastic allows movement.
Inspect the underside thoroughly. Hairline fractures expand under load. Replace the base if damage is extensive.
New wheels on broken bases waste money.
Sometimes the issue is user error. Mixing brands causes tolerance variances. Stick to one manufacturer set.
Uniform specs ensure predictable performance. Mixed kits introduce subtle dimensional differences. These add up to noticeable instability.
Protecting Floors With the Right Wheel Material
Your flooring dictates wheel choice. Hard floors need soft tires. Carpet needs hard shells.
Getting this backwards damages surfaces or hinders mobility.
Polyurethane wheels excel on hardwood, laminate, and vinyl. Their soft composition grips the floor gently. They leave no black marks or scratches.
Aggregate reviews confirm urethane lasts longer on smooth surfaces. Look for transparent or gray treads. Black variants may contain carbon that stains light wood.
Nylon wheels suit thick-pile carpet. Their hardness cuts through fibers. Soft urethane sinks into deep pile.
This creates drag and strain on the swivel. Nylon rolls effortlessly over plush textures. However, nylon screeches on tile.
It also dents soft woods quickly.
Rubber tires offer middle-ground performance. They quiet noise on hard floors. Yet they wear faster than polyurethane.
Use them only if silence is paramount. Check durometer ratings. Shore A 85-90 balances grip and durability.
Softer compounds flatten under heavy loads.
Consider floor protectors separately. Mats help under dense carpet areas. They prevent matting around caster paths.
For hard floors, ensure wheels are clean. Dirt embedded in treads acts like sandpaper. Regular cleaning preserves both wheels and floors.
Material Comparison Table:
Feature Polyurethane Nylon Rubber Best For Hardwood, Tile, Vinyl Thick Carpet Quiet Hard Floors Floor Safety High (No Marks) Low (Scratches/Dents) Medium Durability Excellent Good Fair Noise Level Silent Loud on Hard Surfaces Very Quiet
Static buildup concerns some users. Certain plastics generate sparks on dry days. Grounded casters dissipate charge.
These feature conductive materials. Useful near electronics or sensitive equipment. Standard office use rarely requires grounding.
Color matching affects aesthetics too. Transparent wheels show internal mechanics. Gray hides dirt better.
Black blends with dark bases. Choose based on visibility preference. Functionality outweighs style, though.
Prioritize material suitability first.
Replace mats periodically. Compressed foam loses resilience. Flat spots cause uneven rolling.
Rotate mats quarterly for even wear. This extends both mat and wheel lifespan. Neglected mats accelerate caster degradation.
Maintenance Routines for Long-Term Performance
Preventative care doubles caster life. Small habits yield big returns. Ignore maintenance, and you’ll repeat repairs annually.
Clean wheels monthly. Wipe treads with a damp cloth. Remove accumulated hair and lint.
These wrap around axles. They restrict swivel motion eventually. Use tweezers for stubborn strands.
Dry thoroughly before use. Moisture attracts dust rapidly.
Lubricate swivels biannually. Spray silicone into the bearing gap. Rotate the wheel to distribute fluid.
This prevents seizing in humid climates. Avoid oil-based products. They gum up over time.
Silicone remains stable and non-staining.
Tighten threaded connections yearly. Vibration loosens nuts gradually. Check torque with a wrench.
Snug is sufficient. Overtightening risks thread stripping. Mark tight nuts with paint.
Visual cues reveal future loosening instantly.
Inspect for wear patterns regularly. Uneven tread erosion signals alignment issues. Camber or toe-in errors cause scalloping.
Correct base geometry if possible. Otherwise, replace affected casters early. Prevent secondary damage to other components.
Store chairs properly when unused. Cover them to block dust ingress. UV exposure degrades polyurethane.
Sunlight cracks rubber tires. Keep away from heaters. Heat accelerates material aging.
Cool, dark storage preserves elasticity.
Maintenance Schedule:
- Monthly: Wipe treads, remove debris.
- Biannual: Silicone spray on swivels.
- Annual: Check thread tension, inspect wear.
- As Needed: Replace cracked or flattened units.
Address minor issues promptly. A squeak today becomes a seizure tomorrow. Early intervention costs nothing.
Late repairs require disassembly. Proactive monitoring saves labor and parts.
Keep spare casters handy. Having extras ready minimizes downtime. Store them in original packaging.
Label with size and type. Confusion delays fixes during urgent needs. Organization streamlines future upgrades.
Rotate wheels if asymmetrical wear occurs. Swap front and rear pairs. This evens out usage distribution.
Not all chairs support easy swapping. Check stem compatibility before rotating. Mismatched heights disrupt balance.
Monitor load limits consistently. Exceeding weight ratings crushes bearings. Distribute weight evenly across the seat.
Avoid leaning excessively on one side. Stress concentrates on single casters. Respect manufacturer specifications for longevity.